Difference between revisions of "7 Photosensitive gesture"
| Line 11: | Line 11: | ||
[[File:Micropython2.png|thumb|[[3 Mpfshell details]] ]] | [[File:Micropython2.png|thumb|[[3 Mpfshell details]] ]] | ||
[[File:Micropython2.png|thumb|[[4 Pycharm IDE programming]] ]] | [[File:Micropython2.png|thumb|[[4 Pycharm IDE programming]] ]] | ||
| + | [[File:Micropython2.png|thumb|[[3 Bottom IO port control] ]] | ||
| + | [[File:Micropython2.png|thumb|[[4 Panel key detection]] ]] | ||
[[File:Micropython5.png|thumb|[[1. Panel scrolling text]] ]] | [[File:Micropython5.png|thumb|[[1. Panel scrolling text]] ]] | ||
| − | [[File:Micropython2.png|thumb|[[2. Panel display images]] ]] | + | [[File:Micropython2.png|thumb|[[2. Panel display images]] ]] |
| − | [[File:Micropython2.png|thumb|[[3 Bottom IO port control] ]] | + | [[File:Micropython2.png|thumb|[[3 Bottom IO port control]] ]] |
[[File:Micropython2.png|thumb|[[4 Panel key detection]] ]] | [[File:Micropython2.png|thumb|[[4 Panel key detection]] ]] | ||
[[File:Micropython2.png|thumb|[[5 Gets the board temperature]] ]] | [[File:Micropython2.png|thumb|[[5 Gets the board temperature]] ]] | ||
Revision as of 19:24, 19 February 2019
[[File:Micropython2.png|thumb|[[3 Bottom IO port control] ]] [[File:Micropython2.png|thumb|4 Panel key detection ]]
Photosensitivity and gesture detection
Contents
photosensitive sensor
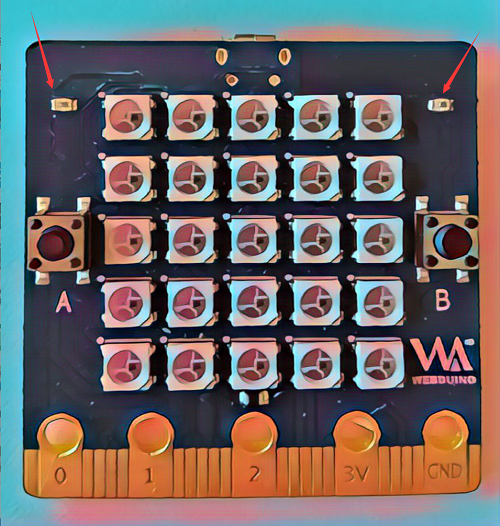
Careful students may have found, in the bpibit board above two such things, yes, these two things are photosensitive sensor. It is a light-sensitive sensor that, through a sampling circuit, converts the intensity of light into the magnitude of the voltage.
Its model is PTSMD021 click to learn more
Get the intensity of the light
There is a light module in the firmware. We can easily get the light intensity by calling the function in this module.
sample code
import light
from time import sleep_ms
R = light.Intensity(39)
L = light.Intensity(36)
while True:
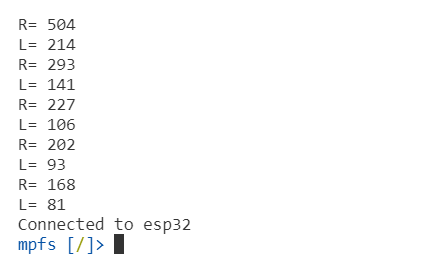
   print('R=',R.read())
   print('L=',L.read())
   sleep_ms(1000)
- To use the module of light, we first need to import this module, which can be imported by import light. Similarly, we need a delay function so we should import the function sleep_ms().
- What do light.Intensity(39) and light.Intensity(36) mean? it actually doing here is initializing the photosensitive sensor
- But why 36 and 39? Well, that's a question that we'll save for the last part of the course for you to fill in, which you probably don't understand right now.
- After the initialization is complete, we can call the read() function to get the light intensity. The read() function returns a value of 0-1000, which indicates the current approximate light intensity
- We can now print out the data serial port
Photosensitive gesture recognition
We already know from above that we have two light sensors on our board, so let's use those two light sensors to do something interesting, like simple gesture recognition
We preset Gesture() in our light module, which allows us to achieve simple Gesture recognition, so let's try it out.
sample code
import light
from display import*
ts = light.Gesture()
display = Display()
t = 0
while True:
   res = ts.get_gesture()
   if res != None:
       t = t+1
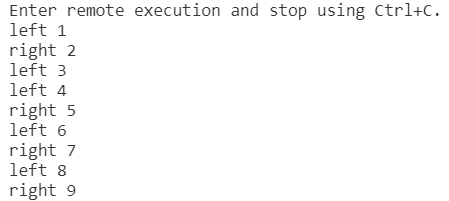
       print(res, t)
       if res == 'right':
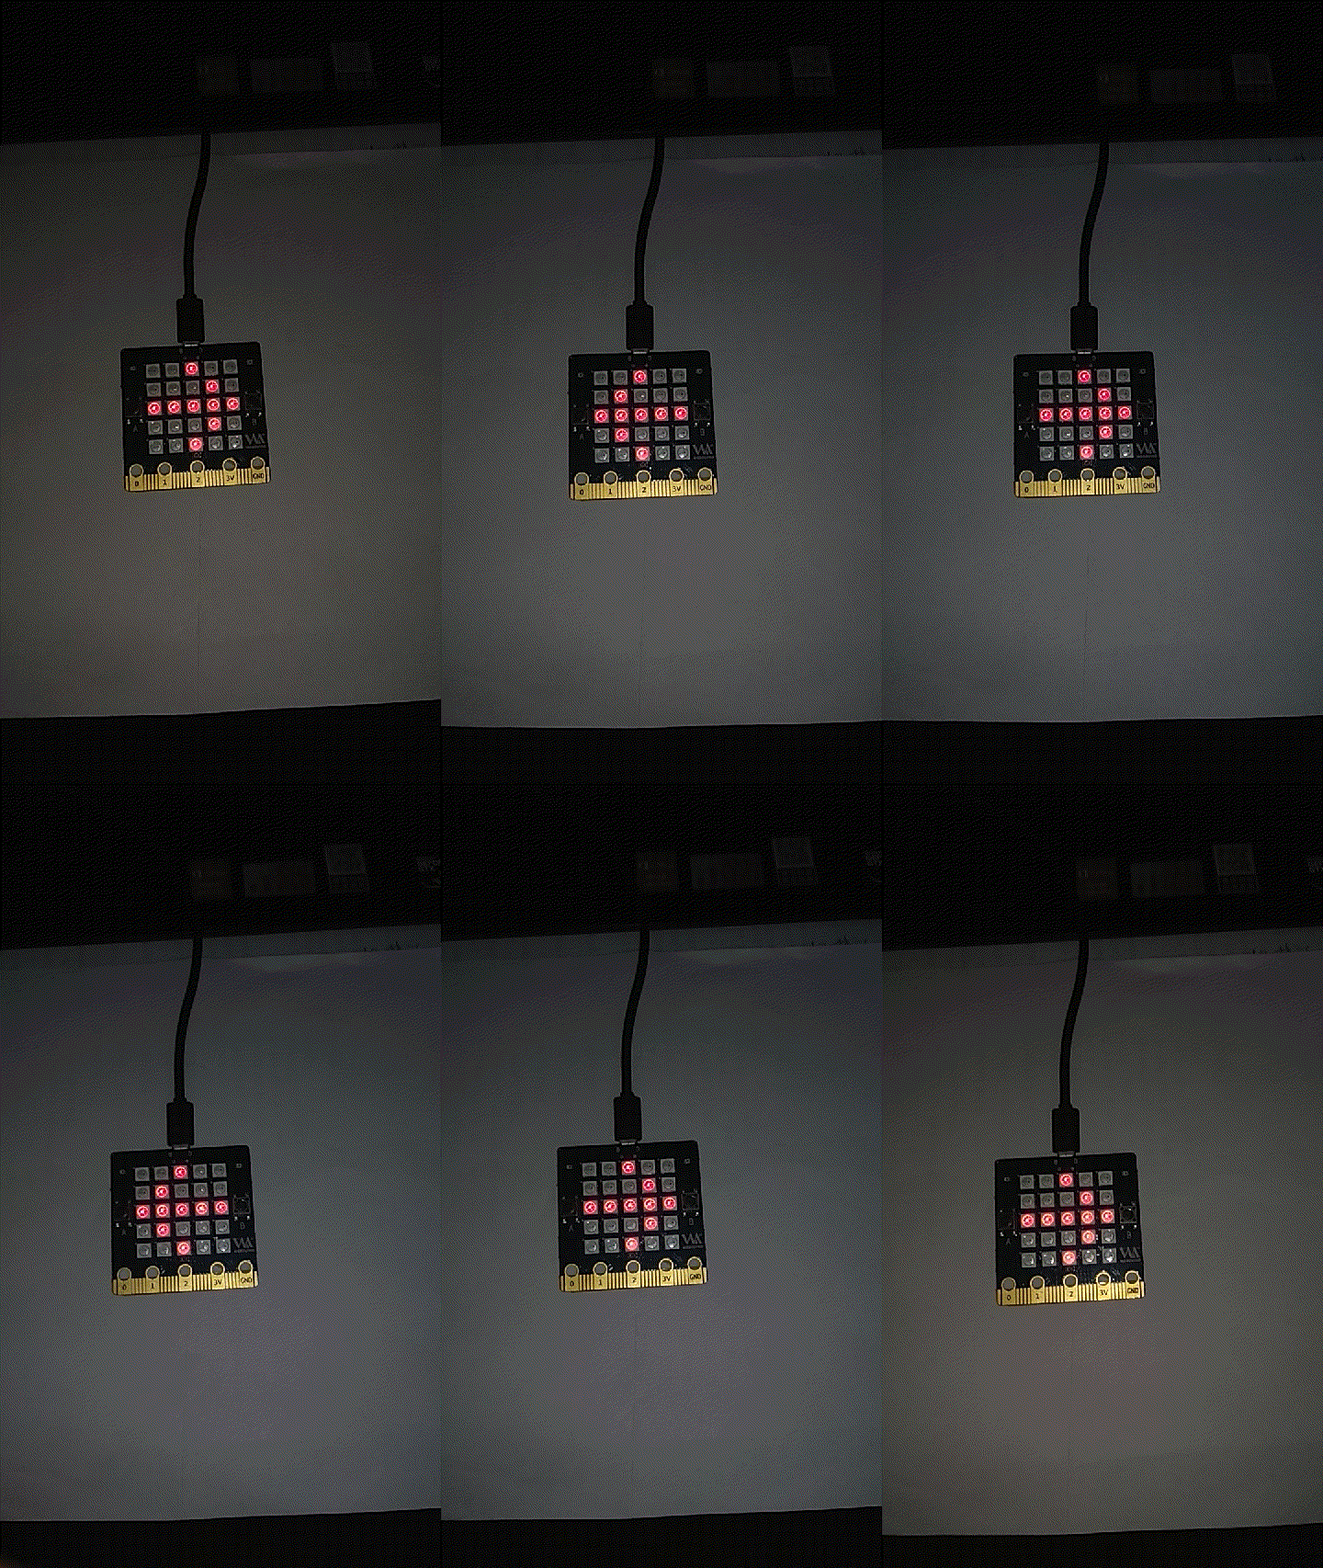
           display.show(Image.ARROW_E)
       else:
           display.show(Image.ARROW_W)
- First, import our light module, and then instantiate the Gesture() class, ts = light.gesture (), through which the Gesture detection is initialized
- Call get_gesture () method to test our action, the detection function needs about 25 ms time, use the while true because here we want it to always detect our gestures, if don't want to run such a long time, we can use a for statement to circle the number of times, for example, we want to make it within 10 s gestures, then through for I in range (10 * 1000/25) let get_gesture () loop 400 times.
- The get_gesture() method returns 'right' if it detects a left gesture, and 'left' if it is a left gesture.
- We scan two photosensors with our hands, and it detects the action and returns the result. The results of our hand sweeping back and forth across the board are shown below


