Difference between revisions of "3 Try burning the board"
(→go wrong?) |
|||
| Line 1: | Line 1: | ||
| + | |||
| + | [[File:Micropython3.png|thumb|[[1 Get the development suite]] ]] | ||
| + | [[File:Micropython2.png|thumb|[[2 Wired connection board]] ]] | ||
| + | [[File:Micropython2.png|thumb|[[3 Try burning the board]] ]] | ||
| + | [[File:Micropython2.png|thumb|[[4 Hello, World!]] ]] | ||
| + | [[File:Micropython2.png|thumb|[[5 Light up all kinds of LED]] ]] | ||
| + | |||
| + | |||
| + | [[File:Micropython4.png|thumb|[[1 Auto series one key burn]] ]] | ||
| + | [[File:Micropython2.png|thumb|[[2 ESPBlocks Beginner's only]] ]] | ||
| + | [[File:Micropython2.png|thumb|[[3 Mpfshell details]] ]] | ||
| + | [[File:Micropython2.png|thumb|[[4 Pycharm IDE programming]] ]] | ||
| + | |||
| + | [[File:Micropython5.png|thumb|[[1. Panel scrolling text]] ]] | ||
| + | [[File:Micropython2.png|thumb|[[2. Panel display images]] ]] | ||
| + | [[File:Micropython2.png|thumb|[[3 Bottom IO port control] ]] | ||
| + | [[File:Micropython2.png|thumb|[[4 Panel key detection]] ]] | ||
| + | [[File:Micropython2.png|thumb|[[5 Gets the board temperature]] ]] | ||
| + | [[File:Micropython2.png|thumb|[[6 Play MIDI music]] ]] | ||
| + | [[File:Micropython2.png|thumb|[[7 Photosensitive gesture]] ]] | ||
| + | [[File:Micropython2.png|thumb|[[8. MPU-9250 9-axis sensor]] ]] | ||
| + | [[File:Micropython2.png|thumb|[[9. Make a compass]] ]] | ||
| + | [[File:Micropython2.png|thumb|[[10 Free to define gestures]] ]] | ||
| + | [[File:Micropython2.png|thumb|[[11 Random number generator]] ]] | ||
| + | [[File:Micropython2.png|thumb|[[12 S2m Scratch2]] ]] | ||
| + | [[File:Micropython2.png|thumb|[[13 Codelab Scratch3]] ]] | ||
| + | |||
'''Try burning the board''' | '''Try burning the board''' | ||
Revision as of 18:07, 19 February 2019
[[File:Micropython2.png|thumb|[[3 Bottom IO port control] ]] [[File:Micropython2.png|thumb|4 Panel key detection ]]
Try burning the board
Contents
Why burn the board?
burn is a term that used to be used to download programs to hardware. Now it's just an idiom.As long as we burn the tools, we can put the program we want to run in the hardware.
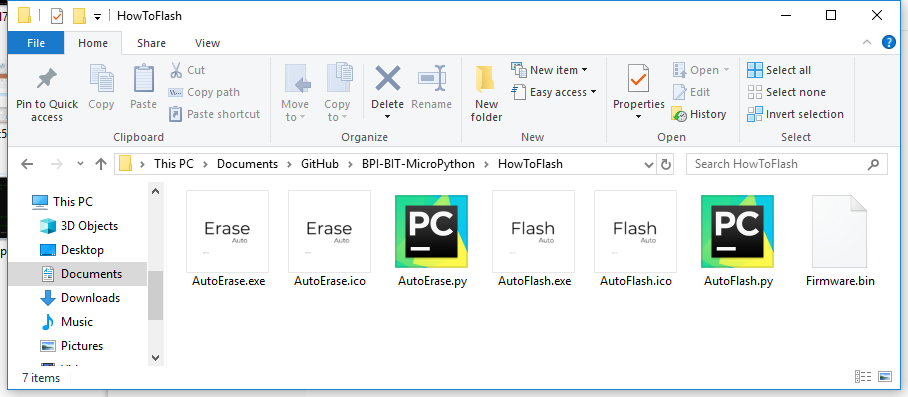
for example with windows 10,you need choose a image verison fromBPI:bitrelease,and download AutoErase.exe、AutoFlash.exe、firmware.bin and put it in the same directory
On other systems, you need to use the py script for the burn, which is autoerers.py and autoflash.py.
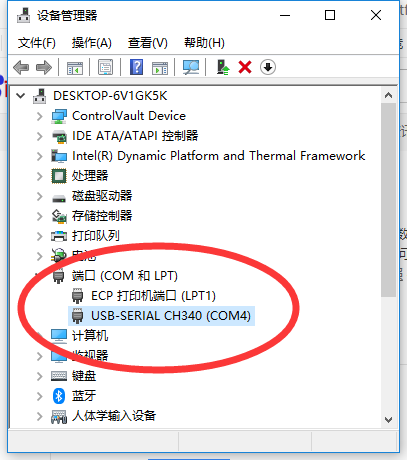
Finally, please ensure that the driver has been successfully installed and the board has been connected to the computer, you can continue to read the following content
One key to write firmware
Erase the board firmware
it is recommended to erase the board once in the following situations.
- first use of the firmware
- other firmware existed before
- the board operation is abnormal
- when at a loss
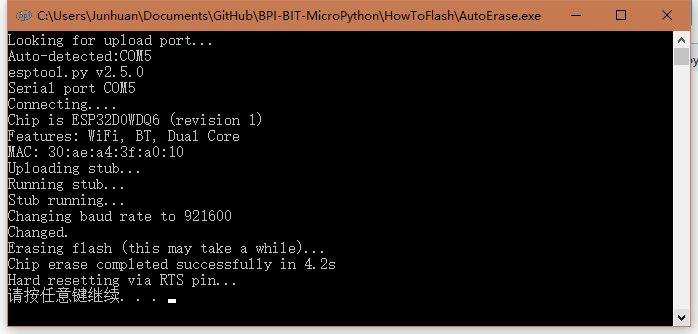
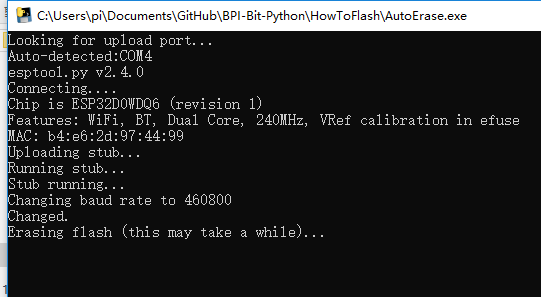
In Windows system, for example, double-click to run autoeraser.Exe , which recognizes the serial port where the computer inserted the latest board and automatically erases the board, so you only need to make sure the board is the latest device to insert.
the above is the successful erasure, if failed, please try again, still failed, please check or the serial port of the device.
2. Update the board firmware
it is recommended to update the board once in the following situations.
- after erasing the board
- firmware needs to be upgraded
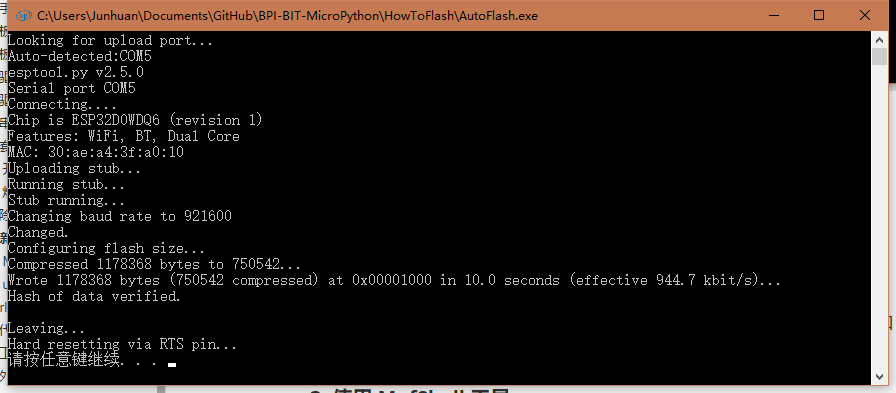
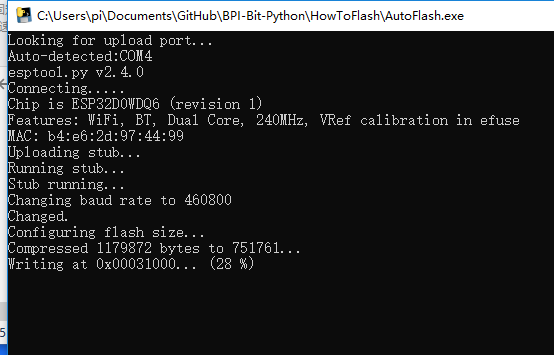
in Windows, for example, double-click to run autoflash.exe . It will recognize the most recently inserted serial port of the board and automatically write all firmware files in the same directory to the board.
The above is a successful burn, if the failure, please try again, still failed, please check or device serial port
Now that the burn is complete, you can move on to the next chapter 3 Hello, World!,If you have any other questions or want to know more, please read on.
Burn tool details
Use windows System
Run ` AutoFlash. Exe ` program will automatically find the latest inserted into the serial port and will be the same directory ` fimware. Bin ` file burn write to the chip of a key.
Using ` AutoErase. Exe ` program firmware can be erased, if there are other firmware, or have a unsolvable problems, are available through the repair (erase) tool to reset the board after burning firmware, note that it will be the board all the file is deleted.
The above procedure through related Python scripts and ` Pyinstller X86 ` module packaging
more than two tools support command line ` AutoErase. Exe - port COM4 - baud 115200 - port ` usage, specific can see below the configuration parameters are introduced.
Use linux system
Shell
sudo esptool.py --chip esp32 --port COM3 --baud 1152000 write_flash -z --flash_mode dio --flash_freq 40m 0x1000 firmware.bin
```
- Before this need users to install python and installing the dependencies esptool, such as ` PIP install esptool `
- esptool.py is ESP chip series of burn script tools
- `--chip esp32` is esp32 chip
- `--port COM3` COM3 is the name of a serial port in Windows and /dev/ttyusb0 in Linux.
- `--baud 921600`,If a burn error occurs, it can be lowered to 460800, which will slow down the burn.
- `firmware.bin`,Refers to the location of a file that is burned. If there is no path, the default is the same directory.
- The others remain unchanged
Performs a burn in the Python interpreter environment
AutoFlash.py Consistent with the Linux Shell, you can see this in the Py code
AutoErase.py To erase the firmware of the current hardware. When you encounter a problem that cannot be solved, you can try to erase it.
After burning?
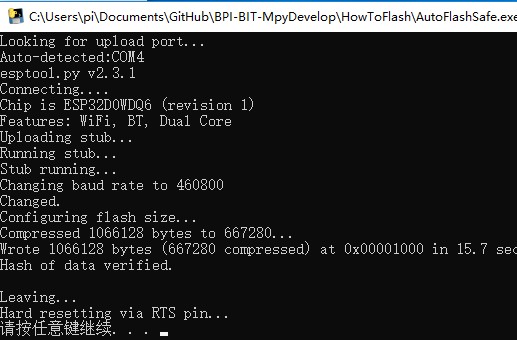
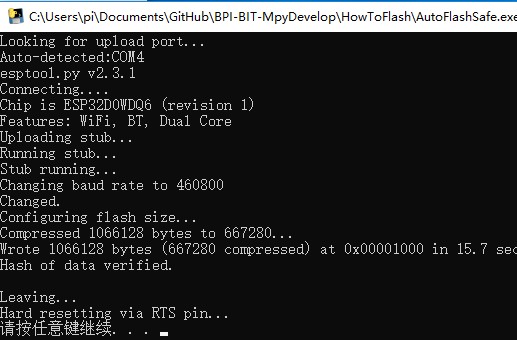
After the burn, if the burn is successful will be as shown below, otherwise it will flash back or appear red warning content, and other information report.
go wrong?
- if you do not know how to solve the problem, please directly submit the problem to us for solving.
- if no one offers a solution, you can use the fix (erase) tool and re-burn the firmware yourself.
- the result of successful execution of the repair (erasure) tool is shown below.
trouble shooting
Write firmware failed, write program flash back, or the result appears red warning
Most reason is that there was a problem with the serial port driver you can try again after the solution to this problem, if the burn write error, it is possible that your computer is using multiple serial ports, the issues that led to the identification error please ensure that the board is the latest inserted, otherwise cannot be automatically identify and burning, if sure have this problem have appeared in the burning failure situation, please change to other burning cables, at this time still burning fails, please send us the board, we will repair or replacement for you.
Burned successfully? But not work?
Make sure wire, if the panel light is not bright, there are two possible, one is the problem of connection wire (line is poorer, insufficient power supply), replace the better line is ok, the other is a previous firmware problem, partition data is damaged, need to erase a can, generally occurred in previous burned other firmware, if ruled out in both cases, only is a computer problem, can first check whether the driver is normal, not an exclamation point, or change the computer to try again.
