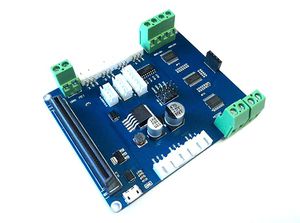
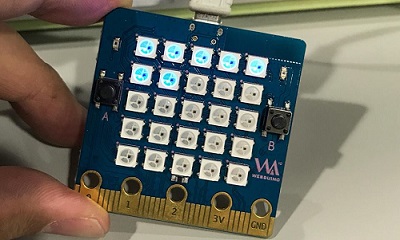
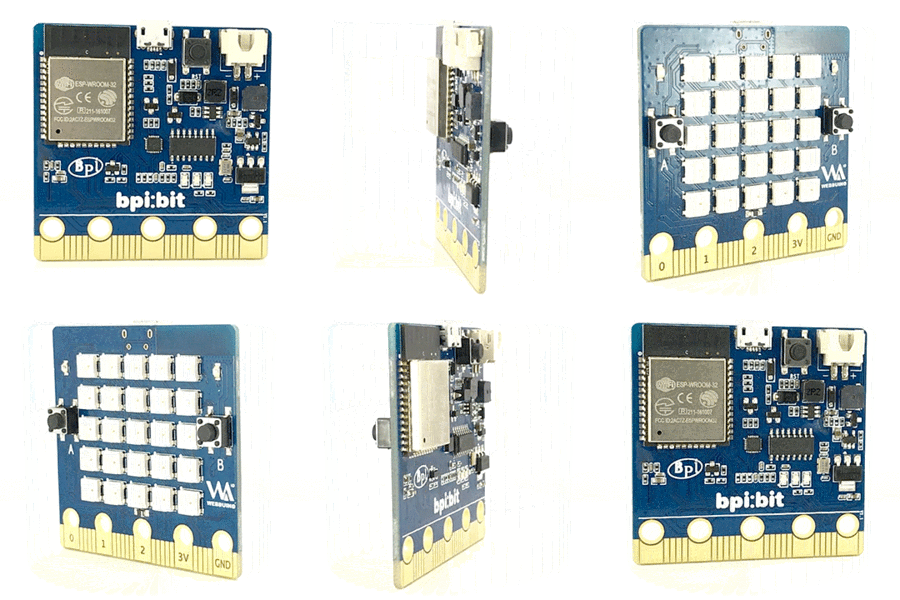
Difference between revisions of "BPI:bit for Webduino"
(→About webduino) |
(→software download) |
||
| (27 intermediate revisions by the same user not shown) | |||
| Line 1: | Line 1: | ||
| − | [[File:Webduino. | + | [[File:Webduino_gif.gif|thumb|Overview: [[BPI-Bit]]]] |
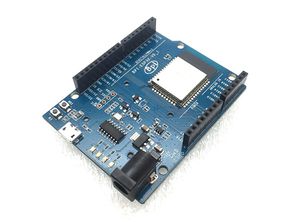
| + | [[File:ESP32_6.JPG|thumb|[[BPI-UNO32]] with ESP32 design]] | ||
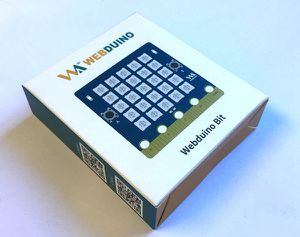
| + | [[File:BPi_bit_webduino_3.jpg|thumb|Overview: BPI:bit for Webduino]] | ||
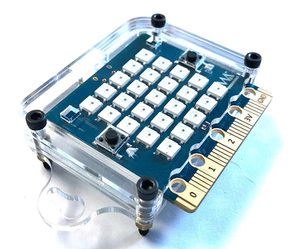
| + | [[File:BPI_bit_acrylic_shell_1_.JPG|thumb|[[BPI-bit acrylic shell compatible LEGO bricks]]]] | ||
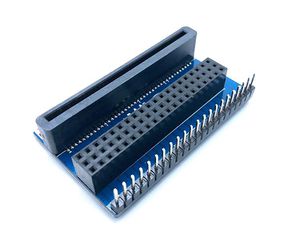
| + | [[File:Bpi_bit_gpio_expansion_board_2.JPG|thumb|[[BPI:bit gpio expansion board]]]] | ||
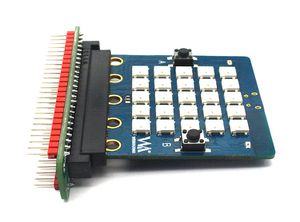
| + | [[File:BPIbit_breadboard_GPIO_expansion_board_3.jpg|thumb|[[BPI:bit gpio expansion board]]]] | ||
| + | [[File:BPI-bit_robort_board_3.JPG|thumb|[[BPI:bit robot expansion board]]]] | ||
=About webduino= | =About webduino= | ||
[http://www.webduino.com.cn/site/en/index.html Webduino ]= [http://webcomponents.org WebComponents] + [http://arduino.cc Arduino] | [http://www.webduino.com.cn/site/en/index.html Webduino ]= [http://webcomponents.org WebComponents] + [http://arduino.cc Arduino] | ||
| + | |||
| + | [[File:Webduino.png]] | ||
*[https://drive.google.com/file/d/1V3k5p9DCj_jcsmSk4ffbPlO3MNpBGvnB/view?usp=sharing Webduino introduce (Public)-en.pdf] | *[https://drive.google.com/file/d/1V3k5p9DCj_jcsmSk4ffbPlO3MNpBGvnB/view?usp=sharing Webduino introduce (Public)-en.pdf] | ||
| Line 15: | Line 23: | ||
[[File:Webduino_1.png]] | [[File:Webduino_1.png]] | ||
| + | |||
| + | ==Webduino project VS Arduino and micro:bit project== | ||
| + | |||
| + | {| class="wikitable" | ||
| + | |- | ||
| + | | style="background: PaleTurquoise; color: black" colspan="4"| '''Webduino project VS Arduino and micro:bit project''' | ||
| + | |- | ||
| + | |item compared || Webduino ||Arduino || Micro:bit | ||
| + | |- | ||
| + | |development language || HTML/JavaScript || C/C++|| Python/JavaScript | ||
| + | |- | ||
| + | |development environment || WEB browser || Arduino IDE|| JavaScript Blocks | ||
| + | |- | ||
| + | |Simulator ||Webduino Simulator || Third-party support||Microsoft MakeCode | ||
| + | |- | ||
| + | |graphical programming|| Wbduino blockly||Third-party Scratch || Blockly | ||
| + | |- | ||
| + | |Cloud Server|| webduino cloud||N/A||N/A | ||
| + | |- | ||
| + | |attended mode || WiFi ||USB || USB | ||
| + | |- | ||
| + | |Update the program || web online update || USB burn || USB disk | ||
| + | |- | ||
| + | |} | ||
=Webduino source code on github= | =Webduino source code on github= | ||
| Line 22: | Line 54: | ||
'''https://github.com/webduinoio''' | '''https://github.com/webduinoio''' | ||
| − | = | + | =How to power the Bit:bit board= |
| − | How to :[[ | + | Board a total of three power supply, you can choose one |
| + | |||
| + | *1,USB cable power supply, bit board design has a Micro USB interface, in daily life wire is relatively common, it is quite convenient to use. | ||
| + | ::[[File:Bit_power_1.jpg]] | ||
| + | *2,Power is supplied through 2Pin battery socket, which can supply power to the board through lithium battery, battery pack, etc. The interface has anti-stay design, and there is no need to worry about the problem of inverting the power supply | ||
| + | ::[[File:Bit_power_2.jpg]] | ||
| + | *3,Through the goldfinger power supply, the lower end of the board goldfinger contains a power interface, while both input and output functions, compatibility is very high. | ||
| + | ::[[File:Bit_power_3.jpg]] | ||
| + | |||
| + | = Webduino firmware programming = | ||
| + | |||
| + | ==How to burn webduino firmware == | ||
| + | |||
| + | bpi:bit has been programmed Webduino firmware by default. Only when you reprogram the flash with other firmware, will you need to program Webduino firmware again. | ||
| + | |||
| + | How to : [[Webduino firmware programming]] | ||
| + | |||
| + | ==Webduino OTA Cloud upgrade== | ||
| + | |||
| + | BPI:bit for webduino support OTA cloud upgrade , it is easy to use this function to update newest version. | ||
| + | |||
| + | power on bit ,Press the A button when flash white light, unpress A booton when when the green light is on, so start to update. | ||
| + | |||
| + | [[File:Webduino_ota.jpg]] | ||
| + | |||
| + | =Initialization of Webduino Bit= | ||
| + | |||
| + | Initialization of Webduino Bit:https://www.webduino.com.cn/site/en/docs/setting.html | ||
| + | |||
| + | if you can connect BPI:Bit to internet ,so you can use webduino blockly to use webduino all functions. | ||
| + | |||
| + | =Web:bit offline education version= | ||
| + | ==software download== | ||
| + | |||
| + | download link : https://github.com/BPI-STEAM/BPI-BIT-Webduino/releases please download the newest version., and one key to install | ||
| + | |||
| + | web:bit offline education version support auto upgrade.When you start it, it updates automatically | ||
| + | |||
| + | [[File:111.png]] | ||
| + | |||
| + | ==online documents== | ||
| + | |||
| + | online doucments: https://doc.bpi-steam.com/en/latest/bpi-web/tutorials/index.html, we will keep update. | ||
| + | |||
| + | = Webduino online Blockly and simulator = | ||
| + | *Webduino Blockly and simulator | ||
| + | [[File:Blockly_en_wiki_.png]] | ||
| + | |||
| + | Webduino online Blockly (english): https://bit.webduino.com.cn/blockly/?lang=en | ||
| + | |||
| + | Webduino online Blockly (chinese) https://bit.webduino.io/blockly/?lang=zh-hant | ||
| + | |||
| + | Quick start BPI:bit with Webduino Blockly and simulator | ||
| + | :: http://www.webduino.com.cn/site/en/tutorials.html | ||
| + | |||
| + | ==Get to know Webduino Blockly Bit== | ||
| + | |||
| + | Get to know Webduino Blockly Bit :https://www.webduino.com.cn/site/en/docs/blockly.html | ||
| + | |||
| + | =Webduino Cloud = | ||
| + | |||
| + | Webduino cloud platform provides your complete Internet of things services. You can update and operate various iot devices through platform management. | ||
| + | |||
| + | https://cloud.webduino.io | ||
===webduino refer to the tutorial=== | ===webduino refer to the tutorial=== | ||
| Line 35: | Line 130: | ||
::code link: https://bit.ly/2MAhHTF | ::code link: https://bit.ly/2MAhHTF | ||
::demo : https://www.facebook.com/oxxo.studio/videos/10216709482752735/?t=20 | ::demo : https://www.facebook.com/oxxo.studio/videos/10216709482752735/?t=20 | ||
| + | |||
| + | =Online tutorials= | ||
| + | *Webduino Bit Detail:https://www.webduino.com.cn/site/en/docs/detail.html | ||
| + | *Initialization of Webduino Bit:https://www.webduino.com.cn/site/en/docs/setting.html | ||
| + | *Get to know Webduino Blockly Bit :https://www.webduino.com.cn/site/en/docs/blockly.html | ||
| + | *5x5 RGB LED matrix:https://www.webduino.com.cn/site/en/docs/rgbmatrix.html | ||
| + | *Buttons : https://www.webduino.com.cn/site/en/docs/button.html | ||
| + | *Light Detection :https://www.webduino.com.cn/site/en/docs/photocell.html | ||
| + | *Buzzer :https://www.webduino.com.cn/site/en/docs/buzzer.html | ||
Latest revision as of 19:41, 16 July 2019
Contents
About webduino
Webduino = WebComponents + Arduino
Webduino working model
- 1 use WebComponents integration Breakout.
- 2 use WebSocket(Firmata) to interacting with the server.
- 3 Server use TCP/IP(Firmata) to control webduino terminal.
Webduino project VS Arduino and micro:bit project
| Webduino project VS Arduino and micro:bit project | |||
| item compared | Webduino | Arduino | Micro:bit |
| development language | HTML/JavaScript | C/C++ | Python/JavaScript |
| development environment | WEB browser | Arduino IDE | JavaScript Blocks |
| Simulator | Webduino Simulator | Third-party support | Microsoft MakeCode |
| graphical programming | Wbduino blockly | Third-party Scratch | Blockly |
| Cloud Server | webduino cloud | N/A | N/A |
| attended mode | WiFi | USB | USB |
| Update the program | web online update | USB burn | USB disk |
Webduino source code on github
More webduino function now is open source , and code update to github.
How to power the Bit:bit board
Board a total of three power supply, you can choose one
- 1,USB cable power supply, bit board design has a Micro USB interface, in daily life wire is relatively common, it is quite convenient to use.
- 2,Power is supplied through 2Pin battery socket, which can supply power to the board through lithium battery, battery pack, etc. The interface has anti-stay design, and there is no need to worry about the problem of inverting the power supply
- 3,Through the goldfinger power supply, the lower end of the board goldfinger contains a power interface, while both input and output functions, compatibility is very high.
Webduino firmware programming
How to burn webduino firmware
bpi:bit has been programmed Webduino firmware by default. Only when you reprogram the flash with other firmware, will you need to program Webduino firmware again.
How to : Webduino firmware programming
Webduino OTA Cloud upgrade
BPI:bit for webduino support OTA cloud upgrade , it is easy to use this function to update newest version.
power on bit ,Press the A button when flash white light, unpress A booton when when the green light is on, so start to update.
Initialization of Webduino Bit
Initialization of Webduino Bit:https://www.webduino.com.cn/site/en/docs/setting.html
if you can connect BPI:Bit to internet ,so you can use webduino blockly to use webduino all functions.
Web:bit offline education version
software download
download link : https://github.com/BPI-STEAM/BPI-BIT-Webduino/releases please download the newest version., and one key to install
web:bit offline education version support auto upgrade.When you start it, it updates automatically
online documents
online doucments: https://doc.bpi-steam.com/en/latest/bpi-web/tutorials/index.html, we will keep update.
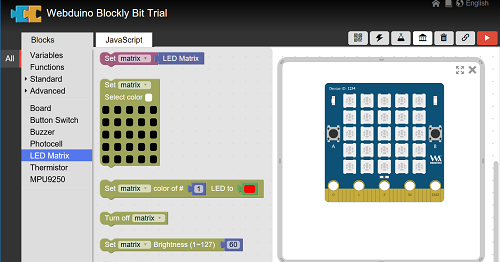
Webduino online Blockly and simulator
- Webduino Blockly and simulator
Webduino online Blockly (english): https://bit.webduino.com.cn/blockly/?lang=en
Webduino online Blockly (chinese) https://bit.webduino.io/blockly/?lang=zh-hant
Quick start BPI:bit with Webduino Blockly and simulator
Get to know Webduino Blockly Bit
Get to know Webduino Blockly Bit :https://www.webduino.com.cn/site/en/docs/blockly.html
Webduino Cloud
Webduino cloud platform provides your complete Internet of things services. You can update and operate various iot devices through platform management.
webduino refer to the tutorial
- BPI:bit Through the photosensitive resistors built into Webduino Bit on the left and right sides, it is easy to determine which side the gesture comes from
- Using Webduino Bit nine shaft sensor "attitude Angle" + full color dot matrix, simple implementation ~ ^_^ interesting effects
Online tutorials
- Webduino Bit Detail:https://www.webduino.com.cn/site/en/docs/detail.html
- Initialization of Webduino Bit:https://www.webduino.com.cn/site/en/docs/setting.html
- Get to know Webduino Blockly Bit :https://www.webduino.com.cn/site/en/docs/blockly.html
- 5x5 RGB LED matrix:https://www.webduino.com.cn/site/en/docs/rgbmatrix.html
- Buttons : https://www.webduino.com.cn/site/en/docs/button.html
- Light Detection :https://www.webduino.com.cn/site/en/docs/photocell.html
- Buzzer :https://www.webduino.com.cn/site/en/docs/buzzer.html
