Difference between revisions of "Getting Started with R2PRO"
(→Windows) |
(→Windows) |
||
| Line 20: | Line 20: | ||
===Windows=== | ===Windows=== | ||
| − | :Download and install [https://download.banana-pi.dev/d/ca025d76afd448aabc63/files/?p=%2FTools%2Fimage_download_tools%2FRKUsbDriverAssitant_v5.1.1.zip Rockchip USB driver] for windows | + | :1. Download and install [https://download.banana-pi.dev/d/ca025d76afd448aabc63/files/?p=%2FTools%2Fimage_download_tools%2FRKUsbDriverAssitant_v5.1.1.zip Rockchip USB driver] for windows |
| + | :[[File:driver_install.PNG]] | ||
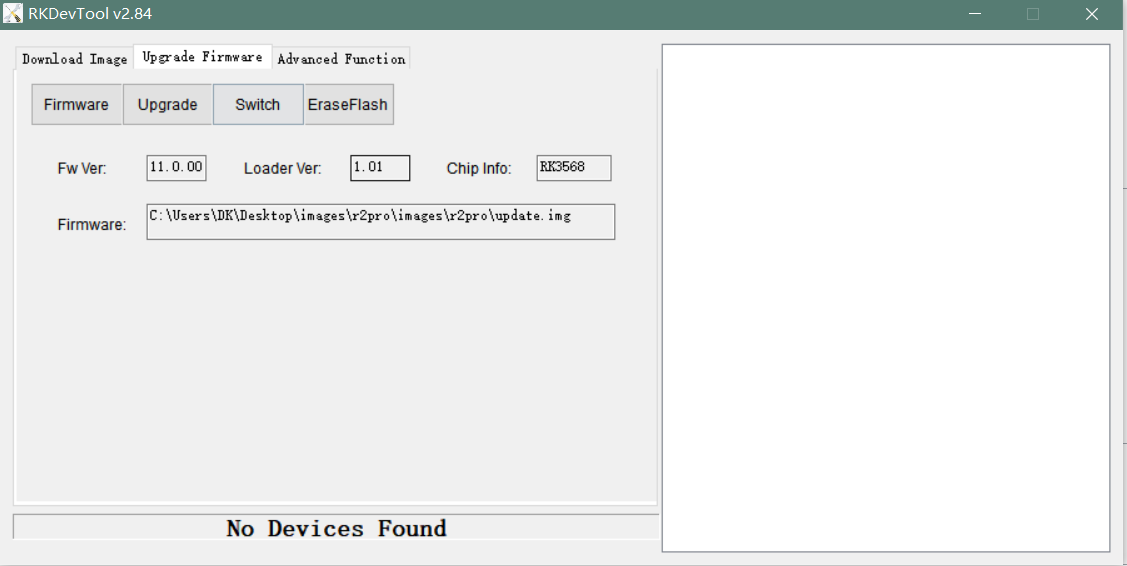
| − | :Download | + | :2. Download [https://download.banana-pi.dev/d/ca025d76afd448aabc63/files/?p=%2FTools%2Fimage_download_tools%2FRKDevTool_Release_v2.84.zip Rockchip USB Download Tool] for windows |
| + | :This tool defaults language is Chinese. you can change it to English after extract the package. Open RKDevTool_Release_v2.84/config.ini with an text editor (like notepad). The starting lines are: | ||
| + | |||
| + | #Language Selection: Selected=1(Chinese); Selected=2(English) | ||
| + | [Language] | ||
| + | Kinds=2 | ||
| + | Selected=1 | ||
| + | LangPath=Language\ | ||
| + | :[[File:download_tool.PNG]] | ||
| + | |||
| + | :3. Disconnect power adapter, connect dual male usb cable from the top usb host port to PC. | ||
| + | |||
| + | :4. There have two usb download mode for image upgrade. | ||
| + | |||
| + | :*Uboot Usb Download Mode, it's supposed to use this way if board already flashed a bootable uboot before. | ||
| + | ::Press the Recovery button beside 3pin uart header and hold, connect the power adapter or press the RST button if power adapter already connected, about two seconds later, release the Recovery button. | ||
| + | |||
| + | :*Maskrom Usb Download Mode | ||
| + | ::Press the Maskrom button beside 3pin uart header and hold, connect the power adapter or press the RST button if power adapter already connected, about one seconds later, release the Maskrom button. | ||
===Linux=== | ===Linux=== | ||
Revision as of 03:16, 29 March 2022
Contents
Introduction
specifications
Prepare
Android
Prepare
- 1. Double male USB data cable.
- 2. MicroUSB cable or usb to ttl cable if you need debug.
- 3. Windows or Linux PC.
- 4. Download the latest android image, and confirm that the md5 checksum is correct.
MaskRom Mode
Upgrade Mode
Install Image with Usb Download Tool
Windows
- 1. Download and install Rockchip USB driver for windows
- File:Driver install.PNG
- 2. Download Rockchip USB Download Tool for windows
- This tool defaults language is Chinese. you can change it to English after extract the package. Open RKDevTool_Release_v2.84/config.ini with an text editor (like notepad). The starting lines are:
 #Language Selection: Selected=1(Chinese); Selected=2(English)
 [Language]
 Kinds=2
 Selected=1
 LangPath=Language\
- 3. Disconnect power adapter, connect dual male usb cable from the top usb host port to PC.
- 4. There have two usb download mode for image upgrade.
- Uboot Usb Download Mode, it's supposed to use this way if board already flashed a bootable uboot before.
- Press the Recovery button beside 3pin uart header and hold, connect the power adapter or press the RST button if power adapter already connected, about two seconds later, release the Recovery button.
- Maskrom Usb Download Mode
- Press the Maskrom button beside 3pin uart header and hold, connect the power adapter or press the RST button if power adapter already connected, about one seconds later, release the Maskrom button.
Linux
USB OTG Mode Switch
- The top usb port is a usb 3.0 otg port, but without hw id pin, it only can be used as host or peripheral.The release image set host mode default, you can change it in Settings->Connected devices->USB Connect to PC, switch on is peripheral mode and switch off is host mode.
