Difference between revisions of "Webduino firmware programming"
(→ESP FLASH DOWNLOAD TOOL) |
(→ESP FLASH DOWNLOAD TOOL) |
||
| Line 38: | Line 38: | ||
Select ESP32 DownloadTool: | Select ESP32 DownloadTool: | ||
| + | |||
| + | *Check the four-line selection box, fill in the following four addresses 0x1000, 0x8000, 0xe000, 0x10000 in the box next to the column, and then select the corresponding file according to the following corresponding relations: | ||
[[File:Webduino_burn_2.jpg]] | [[File:Webduino_burn_2.jpg]] | ||
Revision as of 22:54, 23 February 2019
Contents
firmware Bin file
| File and burn position corresponding | |||
| FileName | Function | ||
| bit_default.bin | BPI-BIT Webduino standard firmware | ||
| bit_stable.bin | BPI-BIT stable version Webduino firmware | ||
| boot_app0.bin | Espressif-WROOM-32 master core program | ||
| partitions.bin | BPI-BIT Webduino firmware partition table file | ||
| bootloader_dio_40m.bin | Espressif-WROOM-32 bootloader(It is applicable to the DIO burning mode with a speed of 40MHz) | ||
Burning BPI:bit webduino firmware in Windows system
A special Webduino version have been developed for bpi:bit. Of course, before using it, we need to program bpi:bit flash with the Webduino firmware.
Note: bpi:bit has been programmed Webduino firmware by default. Only when you reprogram the flash with other firmware, will you need to program Webduino firmware again.
Firmware download address:Webduino for bpi:bit Firmware
ESP FLASH DOWNLOAD TOOL
Tool download address:ESP Flash Download Tool
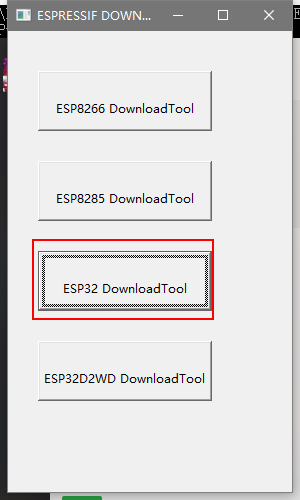
After downloading, unzip the archive and you will see an ESPFlashDownloadTool_v3.6.4.exe inside the folder. Open this shortcut and open an interface selection mode.
- Double-click to open espflashdownloadtool_v3.6.4.exe and select ESP32 DownloadTool to start
Select ESP32 DownloadTool:
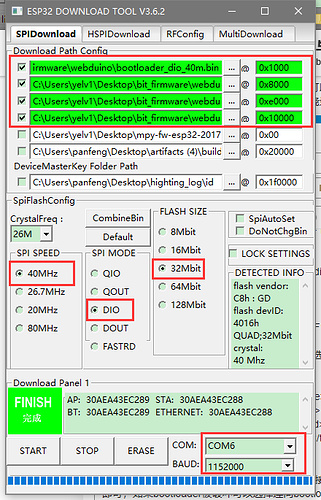
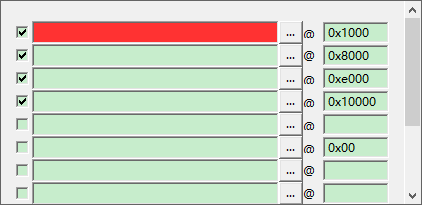
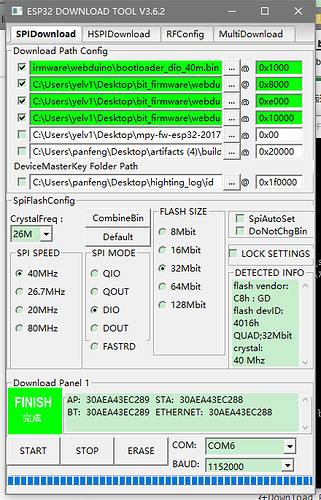
- Check the four-line selection box, fill in the following four addresses 0x1000, 0x8000, 0xe000, 0x10000 in the box next to the column, and then select the corresponding file according to the following corresponding relations:
Under `Download Path Config`, we need to select the four bin files that need to be burned and fill in the corresponding burn locations.
- File and burn position corresponding to:
| File and burn position corresponding | |||
| set | file name | Position | |
| 1 | bootloader_dio_40m.bin | 0x1000 | |
| 2 | partitions.bin | 0x8000 | |
| 3 | boot_app0.bin | 0xe000 | |
| 4 | bit_default.bin | 0x10000 | |
- SpiFlashConfig:
| SpiFlashConfig | |||
| 1 | CrystalFreq | 40M | |
| 2 | SPI SPEED | 40MHz | |
| 3 | SPI MODE | DIO | |
| 4 | FLASH SIZE | 32Mbit | |
| 5 | COM | COMx(Fill in the port number assigned by the computer) | |
| 6 | BAUD | 1152000 | |
Normally, you do not need to burn two boot boot files. You can directly burn the firmware (bit_default.bin) and partitions (partitions.bin). If the bootloader is damaged, you can choose to burn along with bootloader_dio_40m.bin and boot_app0.bin. But be sure to pay attention to the settings below
`SpiFlashConfig` Please configure according to the software screenshot, and then select the port in the COM. Porter 115200 does not need to be changed. Select “START” to start recording.
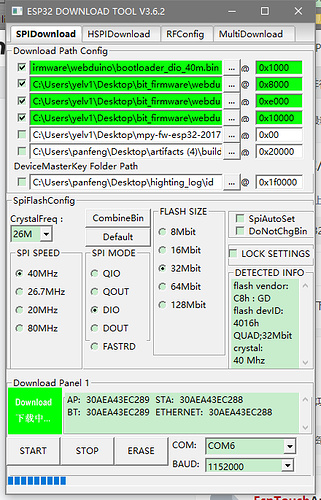
During the burning process:
Finished:
After the burn is completed, you must reset or re-energize, and then you find the LED red light flashing, indicating that the burn is successful.
Burn time is about 20s
then you can use webduino all function on BPI:bit. Please see the webduino teaching documents
Auto Flash工具
Second: PlatformIO comes with a script
This method needs to install PlatformIO in advance. Of course, if you are not using PlatformIO for development, you are advised to use the first method. This method is to disassemble the PlatformIO burning procedure.
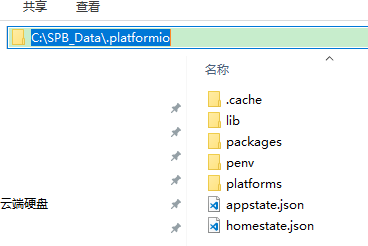
First of all, you need to find the installation location of PlatformIO on your computer. For example, my installation location is as follows
Of course, your installation location is not necessarily the same as mine, you need to find it yourself.
Then, we can find a script file .platformio\packages\tool-esptoolpy\esptool.py according to the following path. This file is the script we need to burn. Then, we open the terminal of PlatformIO, or open the computer. Command line tool, enter the following code
Python ~\.platformio\packages\tool-esptoolpy\esptool.py --port COM19 --baud 115200 write_flash -fm dio -fs 4MB 0x010000 ~\BIT\bit_default.bin
The ~ in the above code needs to be replaced with your actual path, and then fill in the corresponding burning position in order, select the corresponding file path, and then execute this code. This method may be very specific for certain situations. Help, usually used at the time, it is recommended to use the first method of burning.
Normally, you do not need to burn two boot boot files. You can directly burn the firmware (bit_default.bin) and partitions (partitions.bin). If the bootloader is damaged, you can choose to burn along with bootloader_dio_40m.bin and boot_app0.bin. But be sure to pay attention to the settings below
