Getting Started with W2
Introduction


Read more: Banana Pi BPI-W2
Development
Let's get start to develop on BPI-W2, see amazing things happen.
Old page:Getting Started with BPI-W2
Basic Development
Prepare to develop
- Prepare 8G/above TF card, USB-Serial interface, PC with Ubuntu System
- Using your USB-Serial Connect debug console on W2


Load your first image on W2
 1.You could download latest image from our forum

 2.Install bpi-tools on your system
 * apt-get install pv
 * curl -sL https://github.com/BPI-SINOVOIP/bpi-tools/raw/master/bpi-tools | sudo -E bash

 3.After you download the image, insert your TF card into your Ubuntu
 * Execute "bpi-copy xxx.img /dev/sdx" to install image on your TF card.

 4.After step 3, then you can insert your TF card into W2, and press power button setup W2.
Advanced Development
GPIO
GPIO Control
PWM Control
SATA
1. Mount dev on W2
- After insert sata interface, execute "fdisk -l"
- Then "mount /dev/sdx /mnt/xxx"
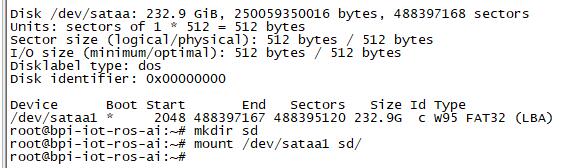

2. If you meet some errors when you mount SATA, try these following commands:
- "fdisk /dev/sdx" to create new partition , set your partition numbers and size, after created partitions, input "wq" to save and quit.
- "mkfs.ext2 /dev/sdx" to format the SATA
- "mount /dev/sdx /mnt/xxx"
SSD
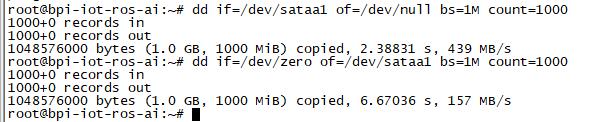
1. After you success to insert SATA, we could input following commands to test SATA interface:
- "time dd if=/dev/xxx of=/dev/null bs=1M count=1000" to test read speed
- "time dd if=/dev/zero of=/dev/sdx bs=1M count=1000" to test write speed

HDD
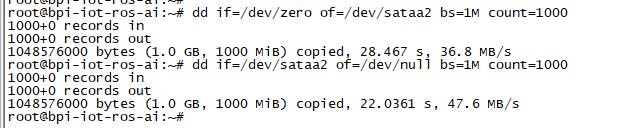
1. After you success to insert SATA, we could input following commands to test SATA interface:
- "time dd if=/dev/xxx of=/dev/null bs=1M count=1000" to test read speed
- "time dd if=/dev/zero of=/dev/sdx bs=1M count=1000" to test write speed

NetWork
GMAC
- iperf3 -c [server]

- iperf3 -u -c [server]

- iperf3 -s

WiFi & BT
1.If you want to use WiFi or BT, you could use RTL8822BE module.

STA
1. Use commands to setup WiFi client
- ip link set wlan0 up
- iw dev wlan0 scan | grep SSID
- vim /etc/wpa_supplicant/wpa_supplicant.conf
network={
ssid="ssid"
psk="password"
priority=1
}
- wpa_supplicant -iwlan0 -c /etc/wpa_supplicant/wpa_supplicant.conf
- dhclient wlan0
2. Use UI interface to setup WiFi Client

AP

Develop 4G module with W2
GPU
- Execute "glmark2-es" to start OpenGL test
- glmark2 Score: 258
