Getting Started with BPI-Wifi6 Router
Prepare
Ethernet cable, BPI-WiFi6, 12V power supply
Web page upgrade
1. First, download the image you want to upgrade.
2. Power on the BPI-WiFi 6 and connect it to the computer using a network cable.
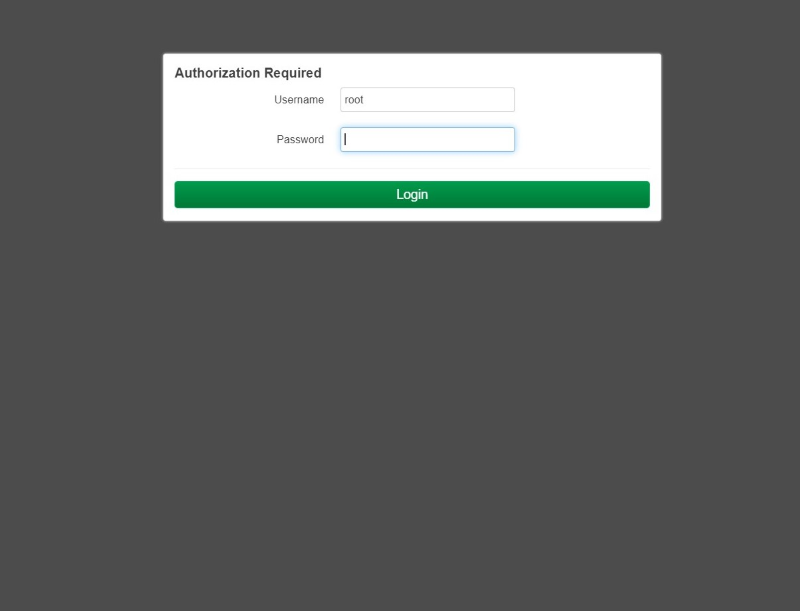
3. Enter the webpage (default IP is 192.168.1.1,the user is root and does not have a password.)
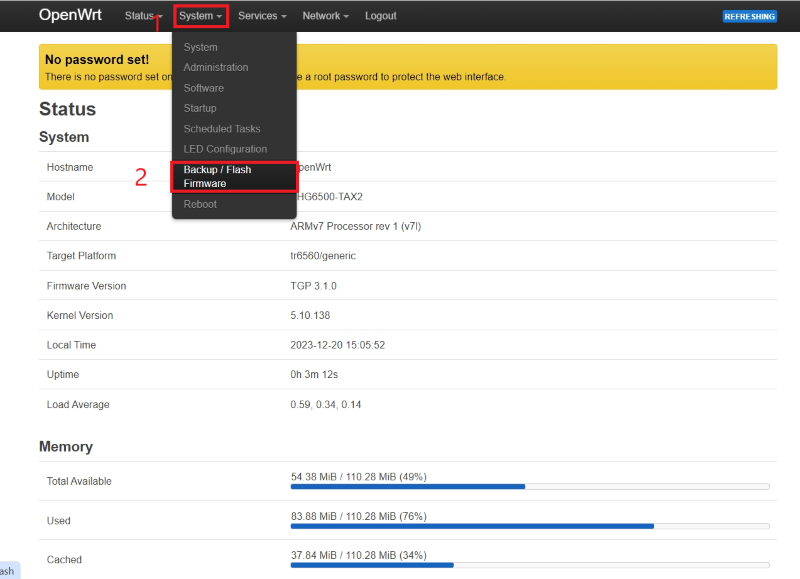
4. Select “System", then select "Backup/Flash Firmware".
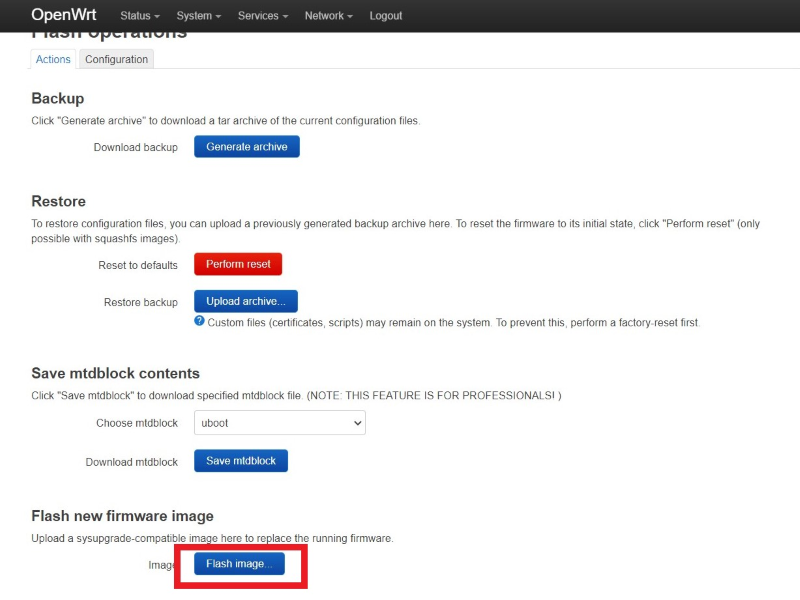
5. Select "Flash image…".
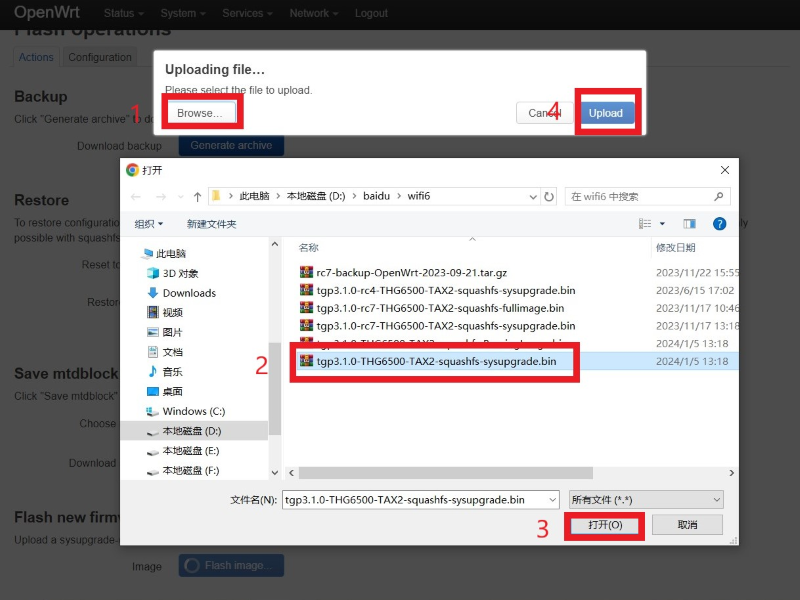
6. Select the image you want to upgrade, and then click "Upload".
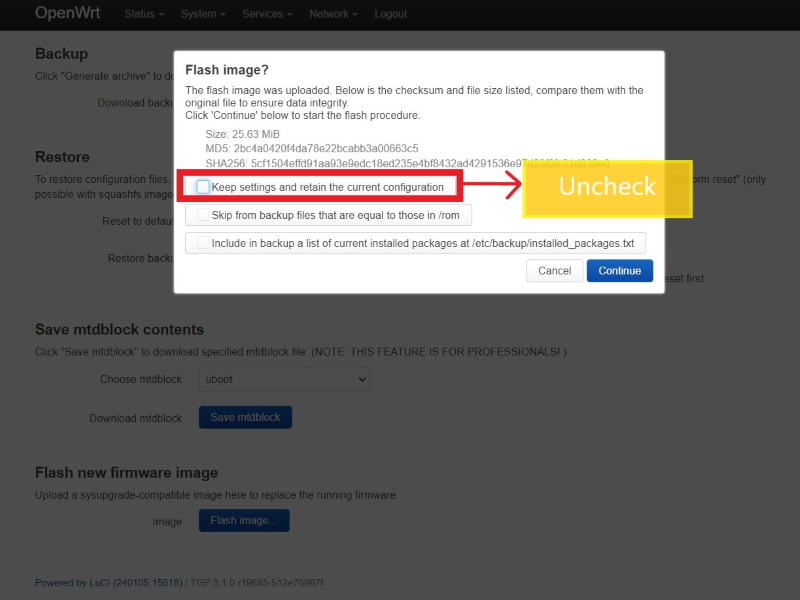
7. Uncheck "Keep settings and retain the current configuration".Select "Continue".
8. Wait a few minutes, after the upgrade is completed, it will automatically restart and the web page will automatically refresh.
