2 Wired connection board
Wired connection board
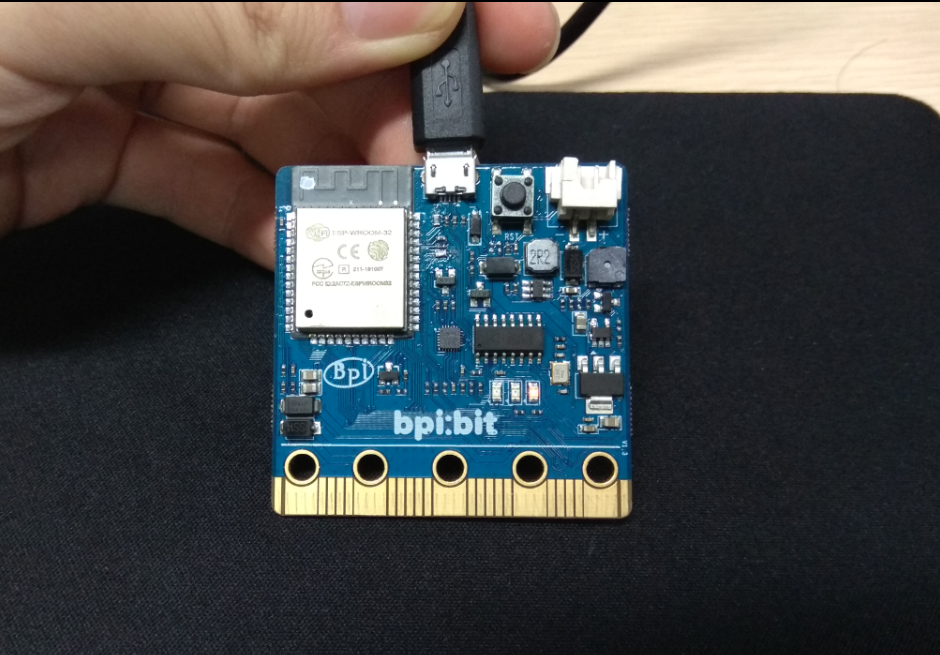
1. connect BPI;bit
Connect a board to your computer via a MicroUSB wire, with Windows10 system
2. Check the drive
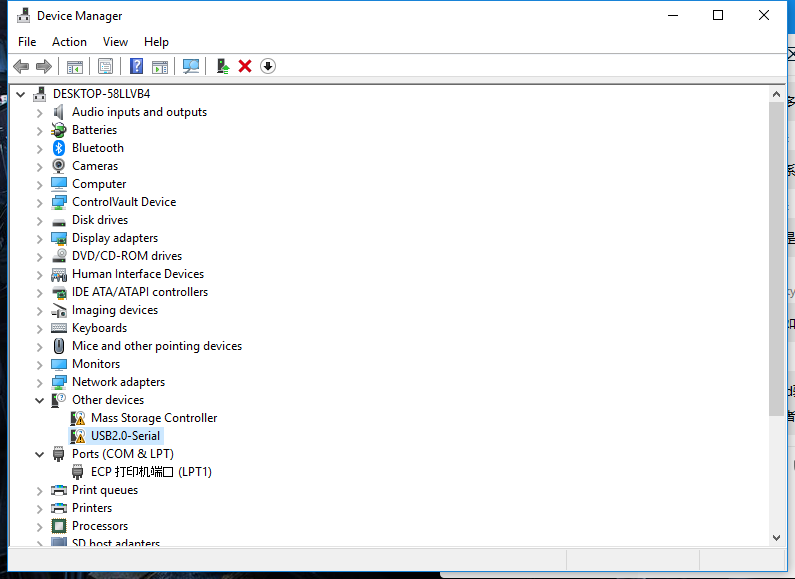
Enter <device manager> to confirm whether Serial is installed, enter as follows.
- (right key)This computer -> attribute -> device manager
- Start menu -> (input) device manager
- Control panel -> (search) device manager
you can see the device display ** usb2.0-serial **, indicating that ** has not been installed driver **, if the driver has been installed before, you can skip to step 5.
3. install the driver
- check here Serial CH341 driver,And follow the instructions below to install the driver
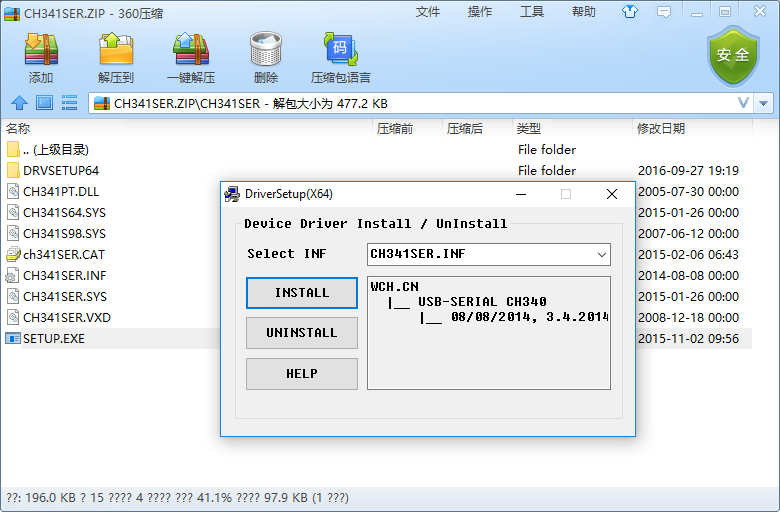
- Open the downloaded CH341SER.ZIP ZIP package, enter the CH341SER folder, open setup. EXE, you can see the following figure.
- check INSTALL to install driver,Wait a moment to complete the installation。
4. Confirm the serial port
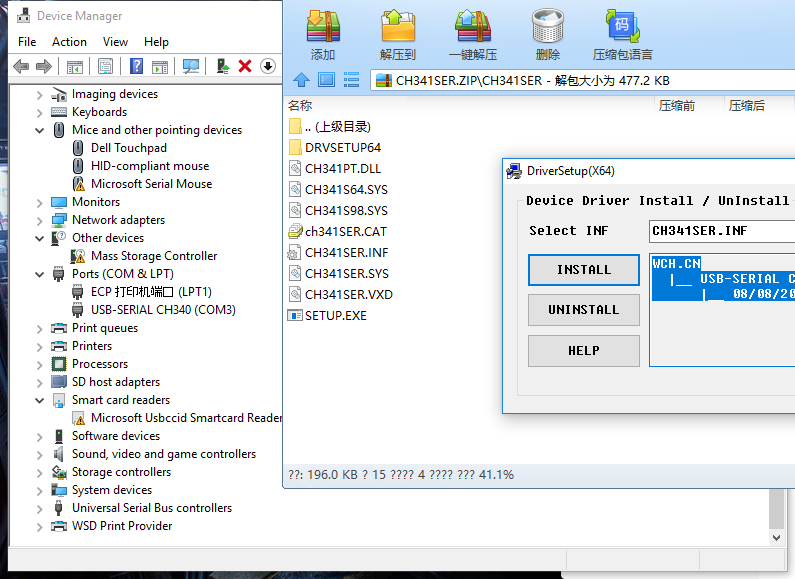
- Check that the board is connected successfully
You can see that the original ** usb2.0-serial ** has disappeared and is replaced by ** usb-serial CH340(COM3)**, which means that you have successfully installed the driver and got the name of the board Serial port (**COM3**). You can view the information coming out of the board of Serial port name (COM3) through various Serial port tools
- 5. 其他系统
- 至此板子连接成功,可以进入下一章节[尝试烧写板子](https://github.com/BPI-STEAM/BPI-BIT-MicroPython/wiki/how_to_flash)了,如果是 Linux 或 Mac 系统就需要你自行搜索问题解决了,但大体都差不多的。


