Difference between revisions of "Getting Started with M4"
JackZengWiki (talk | contribs) (→WiFi on M4) |
JackZengWiki (talk | contribs) (→WiFi Client) |
||
| Line 66: | Line 66: | ||
2. Use UI interface to setup WiFi Client | 2. Use UI interface to setup WiFi Client | ||
| − | [[Image:M4_WiFi_iperf3.jpg] | + | |
| + | [[Image:M4_WiFi_iperf3.jpg]] | ||
Revision as of 02:48, 19 April 2019
Contents
[hide]Introduction
BPI-M4
File:M4 respbian.png
Overview: BPI-M4 respbian linux
Banana Pi BPI-M4 use Realtek RTD1395 chp design ,it is a 64-bit quad-core A53 mini single board computer. It features 1 GB of RAM and 8 GB eMMC. It also has onboard WiFi for b/g/n/ac and BT 4.2. On the ports side, the BPI-M4 has 4 USB 2.0 ports, 1 USB TYPE C port, 1 HDMI port, 1 audio jack. support M.2 Key E PCIE 2.0 interface.
- Read more about : Banana Pi BPI-M4
Key Features
- Realtek RTD1395 ARM Cortex-A53 Quad-Core 64 Bit
- Mali 470 MP4 GPU OpenGL ES 1.1/2.0 H.264 H.265,2K4K
- Onboard1 GB DDR4 (option 2 GB)
- 8G eMMC flash (max 64 GB)
- 10/100 Mbit/s Ethernet and RTL8821 module support Wi-Fi 802.11 b/g/n/AC + Bluetooth 4.2
- USB 2.0 TYPE C
- M.2 Key E slot PCIE 2.0 and USB 2.0
- PoE function support
Development For Linux
Basic Development
Advanced Development
Installed Docker
To have a test, if docker has installed in your image.
- sudo docker run --rm hello-world
EMAC
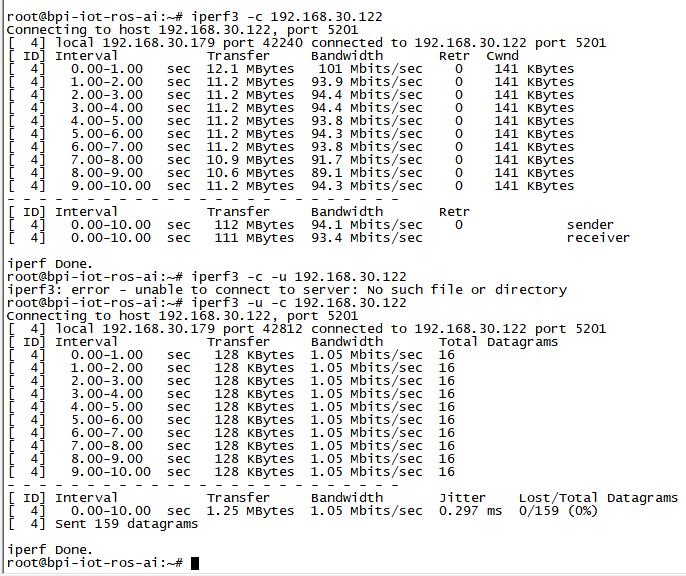
Use iperf3 to test gmac
1. On PC Terminal:
- Execute "iperf3 -s"
2. On M3 console:
- TCP test: "iperf3 -c serverIP"
- UDP test: "iperf3 -u -c serverIP"
Bluetooth
You have two ways to setup BT
1. Use commands to setup BT
- Use bluetoothctl tool to operate BT
- Execute "bluetoothctl"
- If you don't know how to use bluetoothctl, type "help", you will see more commands
- Execute these commands:
2. Use UI interface to setup BT
WiFi on M4
WiFi Client
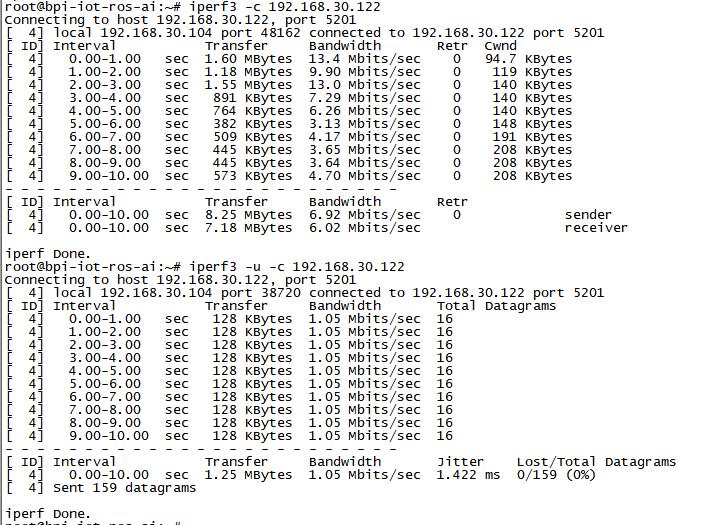
You have two ways to setup WiFi Client
1. Use commands to setup WiFi client
- ip link set wlan0 up
- iw dev wlan0 scan | grep SSID
- vim /etc/wpa_supplicant/wpa_supplicant.conf
 network={
 ssid="ssid"
 psk="password"
 priority=1
 }
- wpa_supplicant -iwlan0 -c /etc/wpa_supplicant/wpa_supplicant.conf
- dhclient wlan0
2. Use UI interface to setup WiFi Client

