Getting Started with M2M: Difference between revisions
Jump to navigation
Jump to search
JackZengWiki (talk | contribs) m JackZengWiki moved page Getting Start with M2M to Getting Started with M2M |
JackZengWiki (talk | contribs) |
||
| Line 11: | Line 11: | ||
* 512MB DDR3 SDRAM | * 512MB DDR3 SDRAM | ||
* WiFi (AP6212) & Bluetooth onboard | * WiFi (AP6212) & Bluetooth onboard | ||
=Development= | |||
==Basic Development== | |||
===Prepare to develop=== | |||
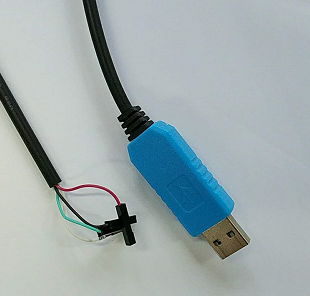
* Prepare 8G/above TF card, USB-Serial interface, PC with Ubuntu System | |||
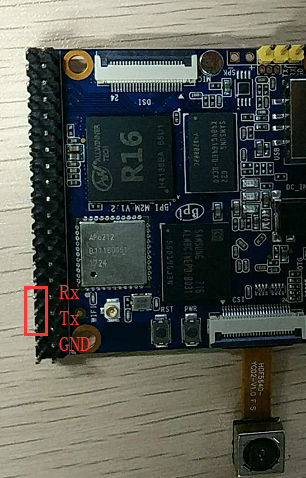
* Using your USB-Serial Connect debug console on M2 Zero | |||
[[Image:Debug_console_wire.png]] | |||
[[Image:M2M__debug_console.png]] | |||
Revision as of 10:58, 30 May 2018
Introduction
BPI-M2M
Banana Pi M2M is another ARM SoC powered development board that offers great computing performance in an ultra portable form factor. It is a 51mm square with Allwinner A33 Quad-core A7 SoC and 512MB DDR3 RAM.
- Read more about : Banana Pi BPI-M2M
Key Features
- Quad Core ARM Cortex A7 CPU. R16
- 512MB DDR3 SDRAM
- WiFi (AP6212) & Bluetooth onboard
Development
Basic Development
Prepare to develop
 * Prepare 8G/above TF card, USB-Serial interface, PC with Ubuntu System
 * Using your USB-Serial Connect debug console on M2 Zero