Difference between revisions of "Getting Started with BPI-M6"
(→specifications) |
(→Linux) |
||
| Line 55: | Line 55: | ||
==Linux== | ==Linux== | ||
| + | |||
| + | :Install Image with Balena Etcher. | ||
| + | :[https://balena.io/etcher Balena Etcher] is an opensource GUI flash tool by Balena, Flash OS images to SDcard or USB drive. | ||
| + | |||
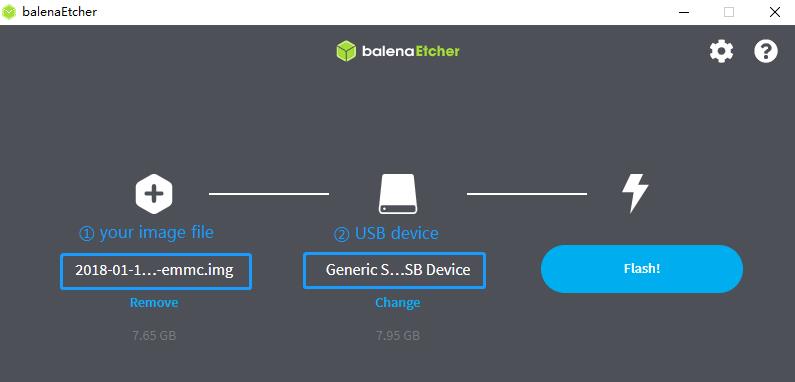
| + | :1.Click on "Flash from file" to select image. Click on "Select target" to select USB device. Click on "Flash!" Start burning. | ||
| + | |||
| + | :[[File:Etcher.jpg]] | ||
| + | |||
| + | :2.After the image is burned, insert the SD card into the BPI-M6. Press and hold the SPI key while inserting the power supply. | ||
Revision as of 00:29, 3 November 2023
Contents
Introduction
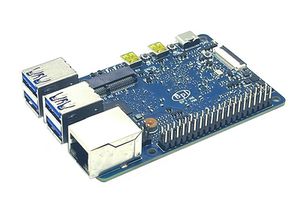
Banana Pi BPI-M6 with Synaptics VS680
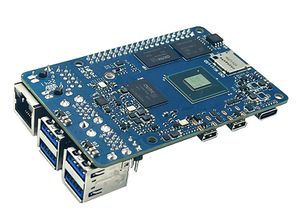
Banana Pi BPI-M6 with Synaptics VS680
Banana Pi BPI-M6 is a new generation single board computer design , use Synaptics VS680 quad-core Cortex-A73 (2.1GHz) and One Cortex-M3 processor,Imagination GE9920 GPU.and NPU Up to 6 .75Tops. Onboard 4GB LPDDR4 memory and 16GB EMMC storage, and supports 4 USB 3.0 interface, a gigabit network port.onboard 1 HDMI-rx port and 1 Hdmi-tx port.
specifications
- Synaptics VideoSmart VS680 quad-core Cortex-A73 (2.1GHz) and One Cortex-M3 processor
- Imagination GE9920 GPU
- NPU for AI up to 6 .75Tops
- System Memory – 4GB LPDDR4
- Storage – 16GB eMMC flash
- Video Output – 1 HDMIin and 1 HDMIout
- Connectivity – Gigabit Ethernet
- USB – 4x USB 3.0 ports via VL817 hub controller, 1x USB-C port (for power only?)
- Expansion – 40-pin
- Debugging – 3-pin debug header
- Misc – Reset, Power, and U-boot button; power and activity LED’s;
- Power Supply – 5V @3A via USB Type-C port
- M.2 Key E(PCIe + MIPI CSI)
development
Prepare
- 1. Prepare a usb-serial cable, a 5V/3A adaptor type-c power supply. The serial cable is used for console debug and type-c cable is used for android image download.
- 2. Prepare a SDcard at least 8GB for linux development, android only support emmc boot.
Android
Prepare
- 1. Download and install the SenarySocSystemTool for android image download via USB type-c on M6, only support windows.
- 2. Download the latest android image, and confirm that the md5 checksum is correct.
Install Image with Usb Burning Tool
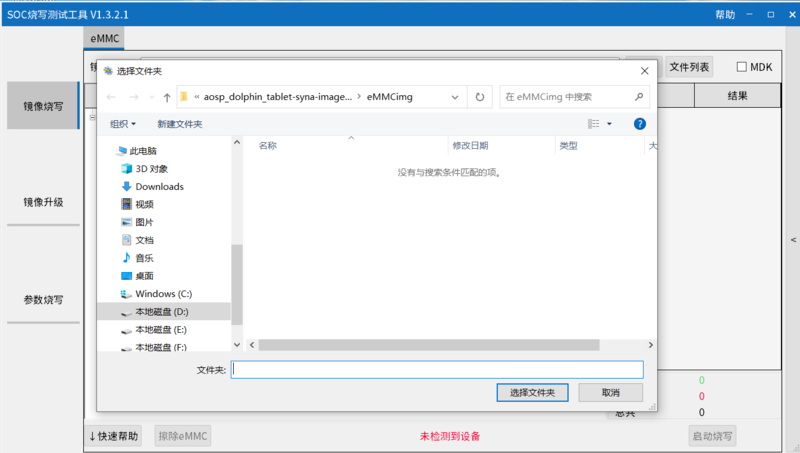
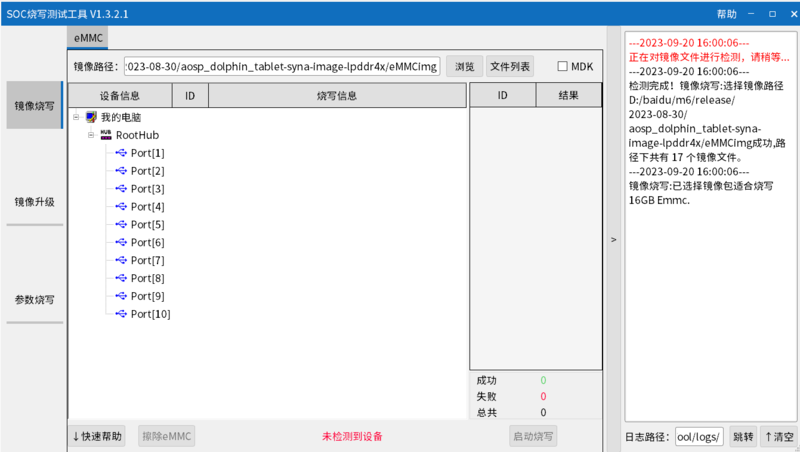
- 1. Open SenarySocSystemTool.exe, click Browse, and select the eMMCimg folder where the image is located.
- 2. Press the USB button next to type-c and connect to the computer using the type-c cable.
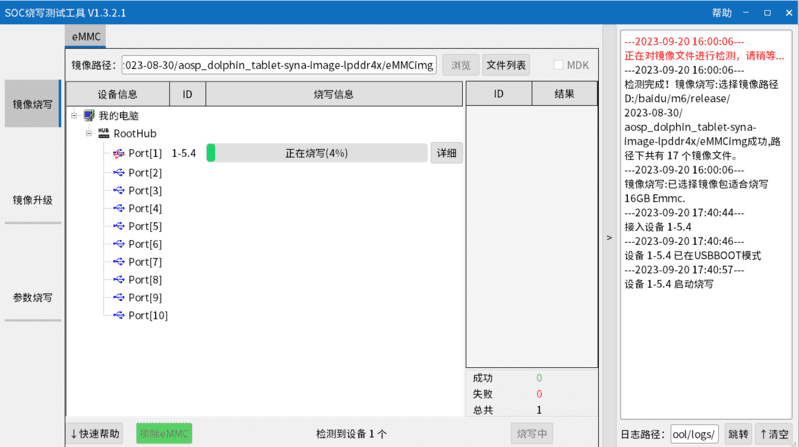
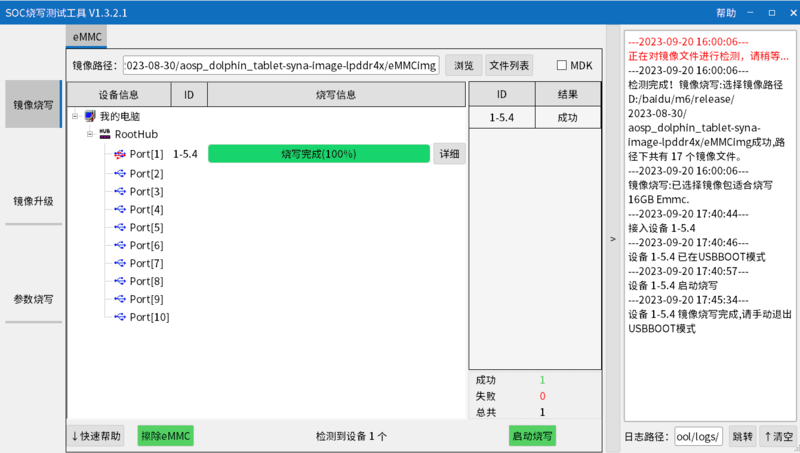
- 3. Click to start burning, and then wait for the burning to complete.
- 4. After Burning successfull, press the RST key, Unplug the usb and connect to power supply adaptor to startup.
- 5. If you want to erase eMMC, you can repeat the above steps, but you need to click on Erase eMMC instead of starting the burn.
Linux
- Install Image with Balena Etcher.
- Balena Etcher is an opensource GUI flash tool by Balena, Flash OS images to SDcard or USB drive.
- 1.Click on "Flash from file" to select image. Click on "Select target" to select USB device. Click on "Flash!" Start burning.
- 2.After the image is burned, insert the SD card into the BPI-M6. Press and hold the SPI key while inserting the power supply.
