Getting Started with BPI-R4: Difference between revisions
Jump to navigation
Jump to search
| Line 39: | Line 39: | ||
Note: | Note: | ||
'''''The temperature of this module is very high when used for a long time, and can reach 90°C. Be careful to prevent burns. | |||
''''' | |||
Do not pull out '''this module''' once it is inserted, otherwise it will cause BPI-R4 to reboot.This phenomenon does not exist with other modules. | Do not pull out '''this module''' once it is inserted, otherwise it will cause BPI-R4 to reboot.This phenomenon does not exist with other modules. | ||
Revision as of 07:58, 20 October 2023
Development
Basic Development
Prepare to develop
 * Prepare 8G/above TF card, USB-Serial cable, Ubuntu System
 * Using your USB-Serial cable Connect to debug console on BPI-R4
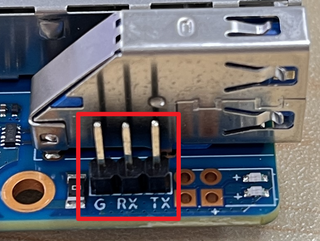

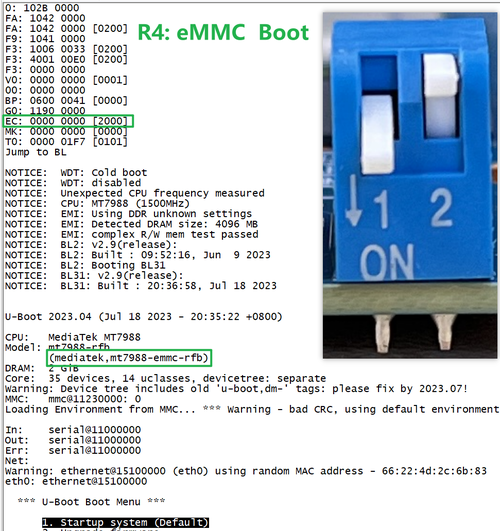
* BPI-R4 bootstrap and device select Jumper Setting
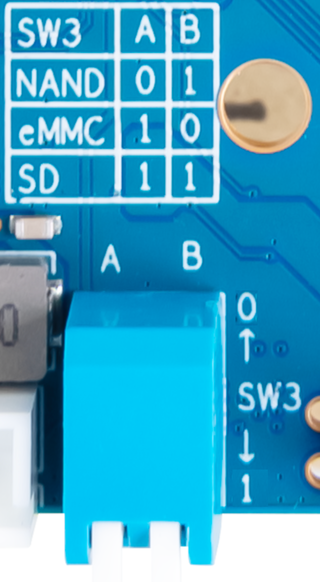

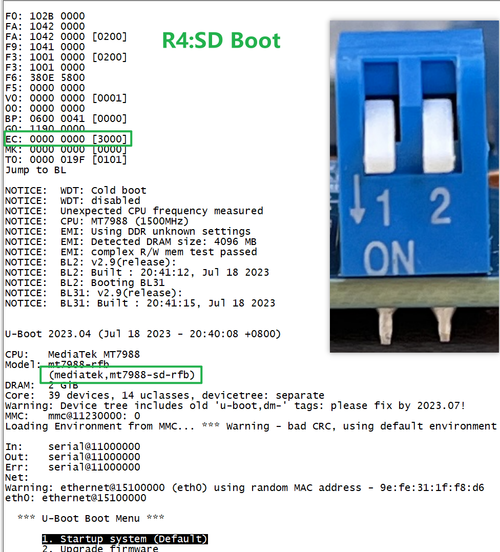
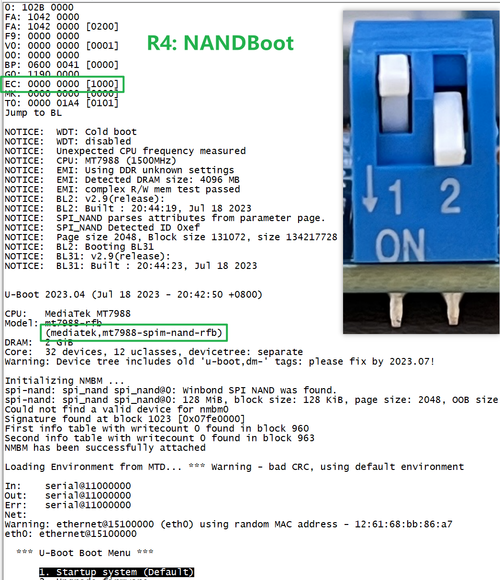
* Examples:
1. All Jumper is "1", BPI-R4 will boot from SD card

2. SW3-A is "0" and SW3-B is "1" , BPI-R4 will boot from SPI NAND

3. SW3-A is "1" and SW3-B is "0" , BPI-R4 will boot from eMMC

Accessories
1. 10G SFP Module
The SFP serdes of BPI-R4 requesting link mode inband/10gbase-kr, so only SFP that support this protocol can be used!
10G SFP+ Copper Module

.png)
Note:
The temperature of this module is very high when used for a long time, and can reach 90°C. Be careful to prevent burns.
Do not pull out this module once it is inserted, otherwise it will cause BPI-R4 to reboot.This phenomenon does not exist with other modules.
-Pull_out_reboot.png)
10G SFP+ Fibre Module

