|
|
| Line 44: |
Line 44: |
| | $ sudo apt-get install pv unzip | | $ sudo apt-get install pv unzip |
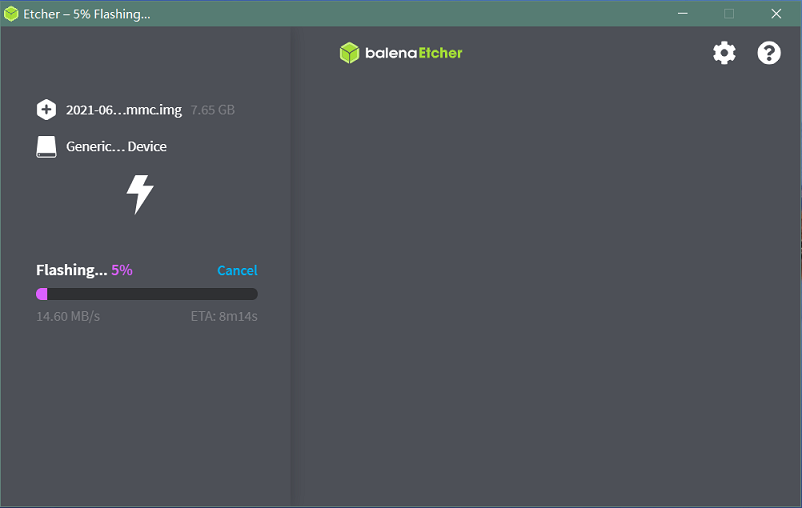
| | $ sudo bpi-copy xxx-bpi-m4-berry-xxx.img.zip /dev/sdX | | $ sudo bpi-copy xxx-bpi-m4-berry-xxx.img.zip /dev/sdX |
| − |
| |
| − | ===DTB overlay===
| |
| − | :1. DTB overlay 用于40引脚GPIO的多功能配置,并安装在vfat引导分区中,您可以使用mount命令检查挂载点。
| |
| − | root@bananapi:~# ls /boot/overlays/
| |
| − | custom_ir.dtbo pwm_b-backlight.dtbo spi0.dtbo
| |
| − | ds3231.dtbo pwm_c-beeper.dtbo uart1_cts_rts.dtbo
| |
| − | hifi_pcm5102a.dtbo pwm_cd-c.dtbo uart1.dtbo
| |
| − | hifi_pcm5122.dtbo pwm_cd.dtbo uart2.dtbo
| |
| − | i2c0.dtbo pwm_ef.dtbo waveshare_tft24_lcd.dtbo
| |
| − | i2c1.dtbo pwm_ef-f.dtbo waveshare_tft35c_lcd.dtbo
| |
| − | pwm_ab.dtbo sdio.dtbo waveshare_tft35c_rtp.dtbo
| |
| − |
| |
| − | :2. 更新vfat /boot/boot.ini中的overlay设置以启用所需的overlay。默认启用i2c0、spi0和uart1。
| |
| − |
| |
| − | # 要加载的overlay
| |
| − | # 示例组合:
| |
| − | # spi0 i2c0 i2c1 uart0
| |
| − | # hktft32
| |
| − | # hktft35
| |
| − | setenv overlays "i2c0 spi0 uart1"
| |
| − |
| |
| − | :3. 必须重新启动板以加载DTB overlay。
| |
| − |
| |
| − | ===WiringPi===
| |
| − | : 注意:此WiringPi仅支持将40引脚GPIO设置为输出、输入或软件PWM,对于io功能如i2c、spi、pwm等,您必须在boot.ini中启用[https://wiki.banana-pi.org/%E5%BF%AB%E9%80%9F%E4%B8%8A%E6%89%8B_BPI-M4_Berry#DTB_overlay DTB overlay]。
| |
| − |
| |
| − | :1. 构建并安装WiringPi,对于Debian系统,您必须在构建之前[https://wiki.banana-pi.org/%E5%BF%AB%E9%80%9F%E4%B8%8A%E6%89%8B_BPI-M4_Berry#.E4.B8.BADebian.E5.90.AF.E7.94.A8sudo 启用 sudo] 。
| |
| − | $ sudo apt-get update
| |
| − | $ sudo apt-get install build-essential git
| |
| − | $ git clone https://github.com/BPI-SINOVOIP/amlogic-wiringPi
| |
| − | $ cd amlogic-wiringPi
| |
| − | $ chmod a+x build
| |
| − | $ sudo ./build
| |
| − |
| |
| − | :2. Run '''gpio readall''' to show all 40pins status.
| |
| − | [[File:m5_wiringpi.png]]
| |
| − |
| |
| − | :3. BPI GPIO Extend board and examples in [https://github.com/BPI-SINOVOIP/amlogic-wiringPi/tree/master/examples amlogic-wiringPi/examples]
| |
| − |
| |
| − | :blinkall, blink all pin header gpios, no extend board.
| |
| − | :lcd-bpi, [http://wiki.banana-pi.org/BPI_LCD_1602_display_module BPI LCD 1602 display module] example.
| |
| − | :52pi-bpi, [http://wiki.banana-pi.org/BPI_OLED_Display_Module BPI OLED Display Module] example.
| |
| − | :matrixled-bpi, [http://wiki.banana-pi.org/BPI_RGB_LED_Matrix_Expansion_Module BPI RGB LED Matrix Expansion Module] example.
| |
| − | :berryclip-bpi, [http://wiki.banana-pi.org/BPI_BerryClip_Module BPI BerryClip Module]
| |
| − |
| |
| − | ===RPi.GPIO===
| |
| − |
| |
| − | : Build and install, 对于Debian系统,您必须在构建之前[https://wiki.banana-pi.org/%E5%BF%AB%E9%80%9F%E4%B8%8A%E6%89%8B_BPI-M4_Berry#.E4.B8.BADebian.E5.90.AF.E7.94.A8sudo 启用 sudo] 。
| |
| − | $ sudo apt-get update
| |
| − | $ sudo apt-get install build-essential python3 python3-pip python3-dev python3-setuptools git
| |
| − | $ git clone https://github.com/Dangku/RPi.GPIO-Amlogic.git
| |
| − | $ cd RPi.GPIO-Amlogic
| |
| − | $ sudo python3 setup.py clean --all
| |
| − | $ sudo python3 setup.py install
| |
| − |
| |
| − | : Create and install wheel package
| |
| − | $ sudo python3 setup.py bdist_wheel
| |
| − | $ sudo pip3 install dist/RPi.GPIO-XXX.whl
| |
| − |
| |
| − | : Install from git source directly without development
| |
| − | $ sudo pip3 install git+https://github.com/Dangku/RPi.GPIO-Amlogic.git
| |
| − |
| |
| − | : If the package is already installed, it should be uninstalled before installing the new one, or installing the new one with --force-reinstall option.
| |
| − |
| |
| − | ===WiringPi2-Python===
| |
| − |
| |
| − | : Build and install, 对于Debian系统,您必须在构建之前[https://wiki.banana-pi.org/%E5%BF%AB%E9%80%9F%E4%B8%8A%E6%89%8B_BPI-M4_Berry#.E4.B8.BADebian.E5.90.AF.E7.94.A8sudo 启用 sudo] 。
| |
| − | $ sudo apt-get update
| |
| − | $ sudo apt-get install build-essential python3 python3-dev python3-setuptools swig git
| |
| − | $ git clone --recursive https://github.com/Dangku/WiringPi2-Python-Amlogic.git
| |
| − | $ cd WiringPi2-Python-Amlogic
| |
| − | $ sudo python3 setup.py install
| |
| − |
| |
| − | ===Luma.Examples===
| |
| − | :[https://github.com/rm-hull/luma.examples luma.examples] use GPIO.BCM gpio mode default, so you should map 40pin header pins to bcm gpio number and connect the hardware correctly.
| |
| − |
| |
| − | :1. build and install RPi.GPIO
| |
| − |
| |
| − | $ sudo apt-get update
| |
| − | $ sudo apt-get install build-essential python3 python3-dev python3-setuptools git
| |
| − | $ git clone https://github.com/Dangku/RPi.GPIO-Amlogic.git
| |
| − | $ cd RPi.GPIO-Amlogic
| |
| − | $ sudo python3 setup.py clean --all
| |
| − | $ sudo python3 setup.py install
| |
| − |
| |
| − | :you can change the bcmledpin variable in test/led.py to your hardware backlight gpio and run it to check RPi.GPIO works well.
| |
| − |
| |
| − | $ sudo python3 test/led.py
| |
| − |
| |
| − | :hardware backlight will repeat on and off
| |
| − |
| |
| − | :2. luma.examples libs install
| |
| − |
| |
| − | $ sudo usermod -a -G i2c,spi,gpio pi
| |
| − |
| |
| − | :if group does not exist, the following command will create it:
| |
| − |
| |
| − | $ sudo groupadd --system xxx
| |
| − |
| |
| − | $ sudo apt-get install python3-dev python3-pip libfreetype6-dev libjpeg-dev build-essential
| |
| − | $ sudo apt-get install libsdl-dev libportmidi-dev libsdl-ttf2.0-dev libsdl-mixer1.2-dev libsdl-image1.2-dev
| |
| − | $ git clone https://github.com/rm-hull/luma.examples.git
| |
| − | $ cd luma.examples
| |
| − |
| |
| − | :install luma.core, luma.emulator, luma.lcd, luma.le-matrix, luma.oled pip libs, make sure this step without error or downloading interrupted, try again if get errors
| |
| − | $ sudo -H pip install -e .
| |
| − | :or
| |
| − | $ sudo -H pip3 install -e .
| |
| − |
| |
| − | :for debian buster(python 3.7) which does not include /usr/bin/pip in package python3-pip, and will get the following errors when install luma packages with pip3
| |
| − |
| |
| − | ...
| |
| − | WARNING, No "Setup" File Exists, Running "buildconfig/config.py"
| |
| − | Using UNIX configuration...
| |
| − |
| |
| − | /bin/sh: 1: sdl2-config: not found
| |
| − | /bin/sh: 1: sdl2-config: not found
| |
| − | /bin/sh: 1: sdl2-config: not found
| |
| − | ...
| |
| − |
| |
| − | :install sdl2 related packages to fix this issue, then install luma libs again with pip3
| |
| − | $ sudo apt-get install libsdl2-dev libsdl2-ttf-dev libsdl2-mixer-dev libsdl2-image-dev
| |
| − | $ sudo -H pip3 install -e .
| |
| − |
| |
| − | :check installed luma pip libs
| |
| − | $ pip3 list | grep luma
| |
| − |
| |
| − | luma.core 2.4.0
| |
| − | luma.emulator 1.4.0
| |
| − | luma.lcd 2.10.0
| |
| − | luma.led-matrix 1.7.0
| |
| − | luma.oled 3.11.0
| |
| − |
| |
| − | :3. examples test
| |
| − | :Enable i2c or spi [https://wiki.banana-pi.org/%E5%BF%AB%E9%80%9F%E4%B8%8A%E6%89%8B_BPI-M4_Berry#DTB_overlay DTB overlay] before running test examples
| |
| − | $ cd examples
| |
| − | $ sudo python3 bounce.py --config ../conf/ili9341.conf
| |
| − |
| |
| − | ==其他==
| |
| − |
| |
| − | ===为Debian启用sudo===
| |
| − | :默认情况下,Debian镜像不安装sudo,用户可以使用"su -"命令切换到root用户。如果您喜欢sudo,您可以安装它。
| |
| − |
| |
| − | $ su root
| |
| − | Password:(enter bananapi)
| |
| − |
| |
| − | # apt-get update
| |
| − | # apt-get install sudo
| |
| − | # adduser pi sudo
| |
| − |
| |
| − | : 然后,请注销并重新登录。
| |
