Getting Started with BPI-R4: Difference between revisions
Jump to navigation
Jump to search
No edit summary |
|||
| Line 31: | Line 31: | ||
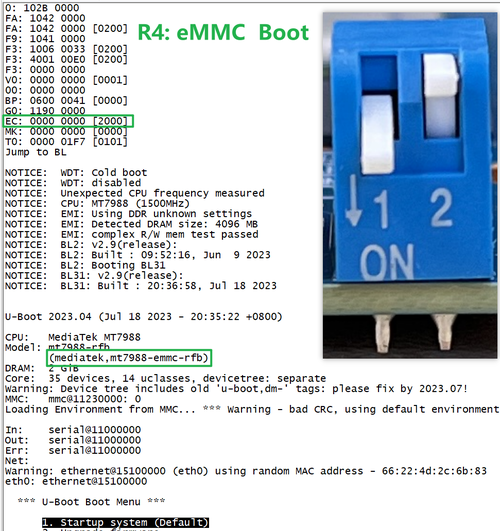
SW3-A is "1" and SW3-B is "0" , BPI-R4 will boot from eMMC | SW3-A is "1" and SW3-B is "0" , BPI-R4 will boot from eMMC | ||
[[File:R4 eMMCBOOT.png|500px]] | [[File:R4 eMMCBOOT.png|500px]] | ||
==Accessories== | |||
Revision as of 01:54, 8 October 2023
Introduction
MediaTek MT7986(Filogic 830)
Key Features
Development
Basic Development
Prepare to develop
 * Prepare 8G/above TF card, USB-Serial cable, Ubuntu System
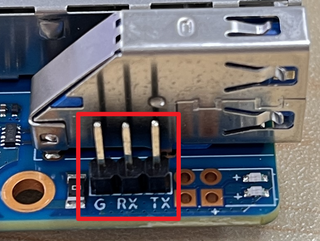
 * Using your USB-Serial cable Connect to debug console on BPI-R4

* BPI-R4 bootstrap and device select Jumper Setting
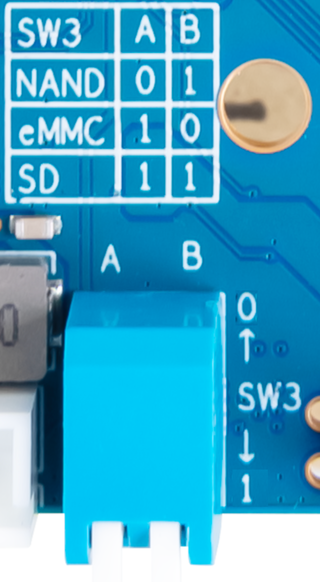

* Examples:
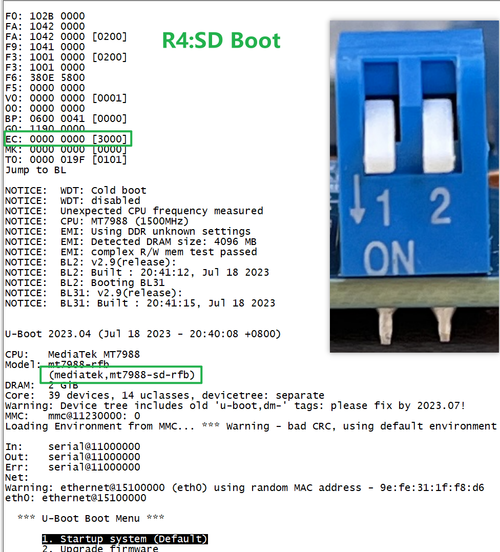
All Jumper is "1", BPI-R4 will boot from SD card

SW3-A is "0" and SW3-B is "1" , BPI-R4 will boot from SPI NAND
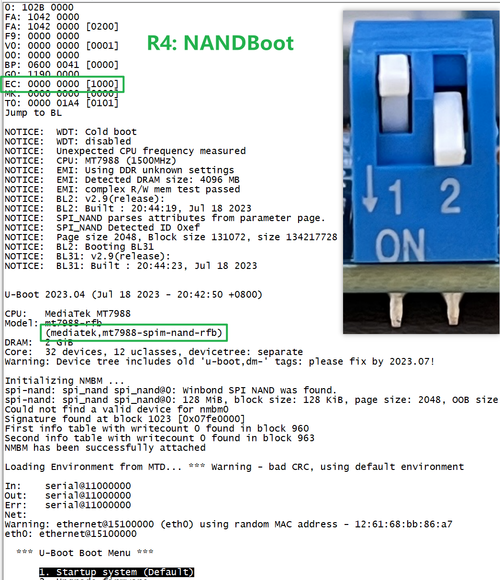

SW3-A is "1" and SW3-B is "0" , BPI-R4 will boot from eMMC