Difference between revisions of "Getting Started with BPI-M4 Berry"
(→Luma.Examples) |
|||
| Line 39: | Line 39: | ||
:3. Install Image with dd command on Linux, umount SDcard device /dev/sdX partition if mounted automatically. Actually bpi-copy is the same as this dd command. | :3. Install Image with dd command on Linux, umount SDcard device /dev/sdX partition if mounted automatically. Actually bpi-copy is the same as this dd command. | ||
$ sudo apt-get install pv unzip | $ sudo apt-get install pv unzip | ||
| − | $ sudo unzip -p xxx-bpi- | + | $ sudo unzip -p xxx-bpi-m4-berry-xxx.img.zip | pv | dd of=/dev/sdX bs=10M status=noxfer |
:4. Install image with bpi-tools on Linux, plug SDcard to Linux PC and run | :4. Install image with bpi-tools on Linux, plug SDcard to Linux PC and run | ||
| Line 70: | Line 70: | ||
: Note: This WiringPi only support set 40pin gpio to output, input or software pwm, for io functions as i2c, spi, pwm..., you must enable dtb overlay in boot.ini | : Note: This WiringPi only support set 40pin gpio to output, input or software pwm, for io functions as i2c, spi, pwm..., you must enable dtb overlay in boot.ini | ||
| − | :1. Build and install wiringPi, for debian, you must [https://wiki.banana-pi.org/ | + | :1. Build and install wiringPi, for debian, you must [https://wiki.banana-pi.org/Getting_Started_with_BPI-M4_Berry#Enable_sudo_for_Debian install sudo] before build |
$ sudo apt-get update | $ sudo apt-get update | ||
$ sudo apt-get install build-essential git | $ sudo apt-get install build-essential git | ||
| Line 91: | Line 91: | ||
===RPi.GPIO=== | ===RPi.GPIO=== | ||
| − | : Build and install, for debian, you must [https://wiki.banana-pi.org/ | + | : Build and install, for debian, you must [https://wiki.banana-pi.org/Getting_Started_with_BPI-M4_Berry#Enable_sudo_for_Debian install sudo] before build |
$ sudo apt-get update | $ sudo apt-get update | ||
$ sudo apt-get install build-essential python3 python3-pip python3-dev python3-setuptools git | $ sudo apt-get install build-essential python3 python3-pip python3-dev python3-setuptools git | ||
| Line 110: | Line 110: | ||
===WiringPi2-Python=== | ===WiringPi2-Python=== | ||
| − | : Build and install, for debian, you must [https://wiki.banana-pi.org/ | + | : Build and install, for debian, you must [https://wiki.banana-pi.org/Getting_Started_with_BPI-M4_Berry#Enable_sudo_for_Debian install sudo] before build |
$ sudo apt-get update | $ sudo apt-get update | ||
$ sudo apt-get install build-essential python3 python3-dev python3-setuptools swig git | $ sudo apt-get install build-essential python3 python3-dev python3-setuptools swig git | ||
| Line 181: | Line 181: | ||
$ cd examples | $ cd examples | ||
$ sudo python3 bounce.py --config ../conf/ili9341.conf | $ sudo python3 bounce.py --config ../conf/ili9341.conf | ||
| + | |||
| + | ==Other Development== | ||
| + | |||
| + | ===Enable sudo for Debian=== | ||
| + | :The release Debian image do not install sudo default, with "su -" command, user can change to root. If you like sudo, you can install it. | ||
| + | |||
| + | $ su root | ||
| + | Password:(enter bananapi) | ||
| + | |||
| + | # apt-get update | ||
| + | # apt-get install sudo | ||
| + | # adduser pi sudo | ||
| + | |||
| + | : Then please do logout and login again | ||
Revision as of 01:25, 27 September 2023
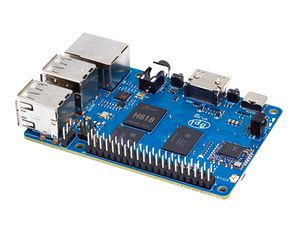
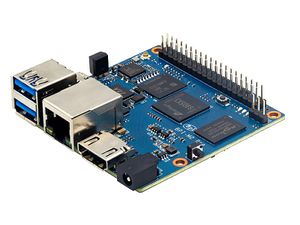
Banana Pi BPI-M4 Berry H618 design
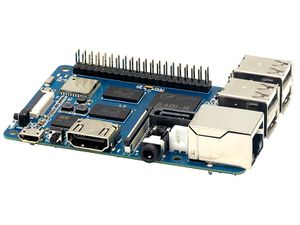
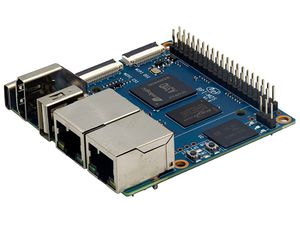
Banana Pi BPI-M2 Berry A40i-H design
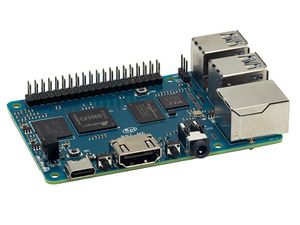
Banana Pi BPI-M2 Pro S905x3 design
Banana Pi BPI-M2S Amlogic A311D/S922 chip
Banana Pi BPI-M5 with S905x3 design
Contents
development
Linux
Prepare
- 1. Linux image support SDcard or EMMC bootup, but you should read the [Boot_Sequence boot sequence] at first.
- 2. It’s recommended to use A1 rated cards, 8GB at least.
- 3. Make sure bootable EMMC is formatted if you want bootup from SDcard.
- 4. Make sure SDcard is formatted without Linux image flashed if you want bootup from EMMC and use Sdcard as storage.
- 5. Download latest [Linux Linux Image], and confirm that the md5 checksum is correct.
- 6. Default login: pi/bananapi or root/bananapi
- 7. The wiki guide is only for [bananapi 4.9 bsp ubuntu/debian images].
Install Image to SDcard
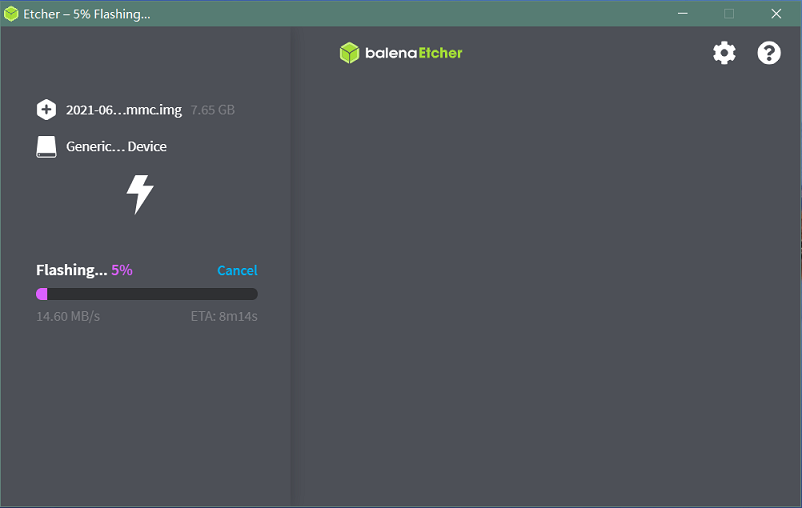
- 1. Install Image with Balena Etcher on Windows, Linux and MacOS.
- Balena Etcher is an opensource GUI flash tool by Balena, Flash OS images to SDcard or USB drive.
- 2. Install Image with Balena Cli on Windows, Linux and MacOS.
- Balena CLI is a Command Line Interface for balenaCloud or openBalena. It can be used to flash linux image. Download the installer or standalone package from balena-io and install it correctly to your PC, then you can use the "local flash" command option of balena to flash a linux image to sdcard or usb drive.
 $ sudo balena local flash path/to/xxx-bpi-m4-berry-xxx.img.zip
 $ sudo balena local flash path/to/xxx-bpi-m4-berry-xxx.img.zip --drive /dev/disk2
 $ sudo balena local flash path/to/xxx-bpi-m4-berry-xxx.img.zip --drive /dev/disk2 --yes
- 3. Install Image with dd command on Linux, umount SDcard device /dev/sdX partition if mounted automatically. Actually bpi-copy is the same as this dd command.
 $ sudo apt-get install pv unzip
 $ sudo unzip -p xxx-bpi-m4-berry-xxx.img.zip | pv | dd of=/dev/sdX bs=10M status=noxfer
- 4. Install image with bpi-tools on Linux, plug SDcard to Linux PC and run
 $ sudo apt-get install pv unzip
 $ sudo bpi-copy xxx-bpi-m4-berry-xxx.img.zip /dev/sdX
DTB overlay
- 1. DTB overlay is used for 40pin gpios multi-function configuration and install in vfat boot partition, you can check the mount point with mount command.
 root@bananapi:~# ls /boot/overlays/
 custom_ir.dtbo      pwm_b-backlight.dtbo  spi0.dtbo
 ds3231.dtbo         pwm_c-beeper.dtbo     uart1_cts_rts.dtbo
 hifi_pcm5102a.dtbo  pwm_cd-c.dtbo         uart1.dtbo
 hifi_pcm5122.dtbo   pwm_cd.dtbo           uart2.dtbo
 i2c0.dtbo           pwm_ef.dtbo           waveshare_tft24_lcd.dtbo
 i2c1.dtbo           pwm_ef-f.dtbo         waveshare_tft35c_lcd.dtbo
 pwm_ab.dtbo         sdio.dtbo             waveshare_tft35c_rtp.dtbo
- 2. Update the overlays env in vfat /boot/boot.ini to enable what you want. Default i2c0, spi0 and uart1 enabled.
 # Overlays to load
 # Example combinations:
 #   spi0 i2c0 i2c1 uart0
 #   hktft32
 #   hktft35
 setenv overlays "i2c0 spi0 uart1"
- 3. Must be restart the board for overlay dtb loaded.
WiringPi
- Note: This WiringPi only support set 40pin gpio to output, input or software pwm, for io functions as i2c, spi, pwm..., you must enable dtb overlay in boot.ini
- 1. Build and install wiringPi, for debian, you must install sudo before build
 $ sudo apt-get update
 $ sudo apt-get install build-essential git
 $ git clone https://github.com/BPI-SINOVOIP/amlogic-wiringPi
 $ cd amlogic-wiringPi
 $ chmod a+x build
 $ sudo ./build
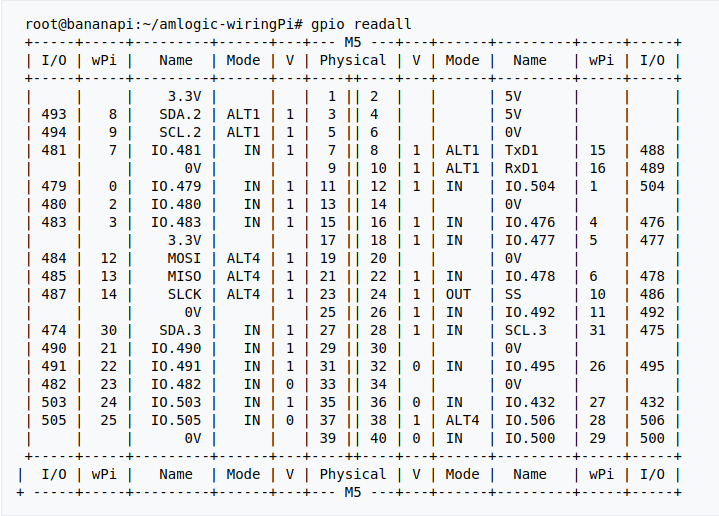
- 2. Run gpio readall to show all 40pins status.
- 3. BPI GPIO Extend board and examples in amlogic-wiringPi/examples
- blinkall, blink all pin header gpios, no extend board.
- lcd-bpi, BPI LCD 1602 display module example.
- 52pi-bpi, BPI OLED Display Module example.
- matrixled-bpi, BPI RGB LED Matrix Expansion Module example.
- berryclip-bpi, BPI BerryClip Module
RPi.GPIO
- Build and install, for debian, you must install sudo before build
 $ sudo apt-get update
 $ sudo apt-get install build-essential python3 python3-pip python3-dev python3-setuptools git
 $ git clone https://github.com/Dangku/RPi.GPIO-Amlogic.git
 $ cd RPi.GPIO-Amlogic
 $ sudo python3 setup.py clean --all
 $ sudo python3 setup.py install
- Create and install wheel package
 $ sudo python3 setup.py bdist_wheel
 $ sudo pip3 install dist/RPi.GPIO-XXX.whl
- Install from git source directly without development
$ sudo pip3 install git+https://github.com/Dangku/RPi.GPIO-Amlogic.git
- If the package is already installed, it should be uninstalled before installing the new one, or installing the new one with --force-reinstall option.
WiringPi2-Python
- Build and install, for debian, you must install sudo before build
 $ sudo apt-get update
 $ sudo apt-get install build-essential python3 python3-dev python3-setuptools swig git
 $ git clone --recursive  https://github.com/Dangku/WiringPi2-Python-Amlogic.git
 $ cd WiringPi2-Python-Amlogic
 $ sudo python3 setup.py install
Luma.Examples
- luma.examples use GPIO.BCM gpio mode default, so you should map 40pin header pins to bcm gpio number and connect the hardware correctly.
- 1. build and install RPi.GPIO
 $ sudo apt-get update
 $ sudo apt-get install build-essential python3 python3-dev python3-setuptools git
 $ git clone https://github.com/Dangku/RPi.GPIO-Amlogic.git
 $ cd RPi.GPIO-Amlogic
 $ sudo python3 setup.py clean --all
 $ sudo python3 setup.py install
- you can change the bcmledpin variable in test/led.py to your hardware backlight gpio and run it to check RPi.GPIO works well.
$ sudo python3 test/led.py
- hardware backlight will repeat on and off
- 2. luma.examples libs install
$ sudo usermod -a -G i2c,spi,gpio pi
- if group does not exist, the following command will create it:
$ sudo groupadd --system xxx
 $ sudo apt-get install python3-dev python3-pip libfreetype6-dev libjpeg-dev build-essential
 $ sudo apt-get install libsdl-dev libportmidi-dev libsdl-ttf2.0-dev libsdl-mixer1.2-dev libsdl-image1.2-dev
 $ git clone https://github.com/rm-hull/luma.examples.git
 $ cd luma.examples
- install luma.core, luma.emulator, luma.lcd, luma.le-matrix, luma.oled pip libs, make sure this step without error or downloading interrupted, try again if get errors
$ sudo -H pip install -e .
- or
$ sudo -H pip3 install -e .
- for debian buster(python 3.7) which does not include /usr/bin/pip in package python3-pip, and will get the following errors when install luma packages with pip3
 ...
 WARNING, No "Setup" File Exists, Running "buildconfig/config.py"
 Using UNIX configuration...

 /bin/sh: 1: sdl2-config: not found
 /bin/sh: 1: sdl2-config: not found
 /bin/sh: 1: sdl2-config: not found
 ...
- install sdl2 related packages to fix this issue, then install luma libs again with pip3
 $ sudo apt-get install libsdl2-dev libsdl2-ttf-dev libsdl2-mixer-dev libsdl2-image-dev
 $ sudo -H pip3 install -e .
- check installed luma pip libs
 $ pip3 list | grep luma

   luma.core          2.4.0
   luma.emulator      1.4.0
   luma.lcd           2.10.0
   luma.led-matrix    1.7.0
   luma.oled          3.11.0
- 3. examples test
- Enable i2c or spi overlays before running test examples
 $ cd examples
 $ sudo python3 bounce.py --config ../conf/ili9341.conf
Other Development
Enable sudo for Debian
- The release Debian image do not install sudo default, with "su -" command, user can change to root. If you like sudo, you can install it.
 $ su root
 Password:(enter bananapi)

 # apt-get update
 # apt-get install sudo
 # adduser pi sudo
- Then please do logout and login again
