Difference between revisions of "Code circuitpython with mu en"
(→Establish the connection) |
|||
| Line 25: | Line 25: | ||
= Establish the connection = | = Establish the connection = | ||
| − | + | 1. Start the Mu editor and change the mode to '''CircuitPython''', if you have connected the CircuitPython development board correctly, you will be prompted whether to switch to this mode directly. | |
[[File:Download_mu_3.png | 600px]] | [[File:Download_mu_3.png | 600px]] | ||
| Line 31: | Line 31: | ||
[[File:Download_mu_4.png | 400px]] | [[File:Download_mu_4.png | 400px]] | ||
| − | + | 2. Click the '''Serial''' button and press any key to enter the CircuitPython REPL. | |
[[File:Download_mu_5.png | 600px]] | [[File:Download_mu_5.png | 600px]] | ||
Latest revision as of 02:42, 29 September 2022
Contents
[hide]Hardware Preparation
1. Mu editor supports Windows x64, Mac OSX, Linux operating systems, prepare a computer running one of these operating systems.
2. A development board that supports CircuitPython, such as BPI-PicoW-S3.
3. A USB cable that can connect the development board to the computer.
Download and install Mu Editor
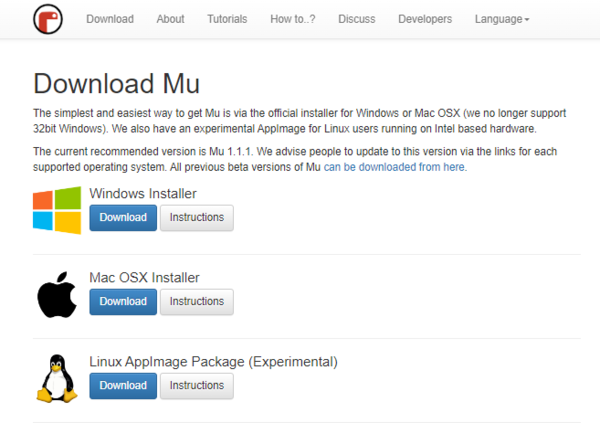
1. Open the Mu editor web page and click the Download button to enter the new page.
2. Select the operating system currently used by your computer, and click the Download button corresponding to the operating system to start downloading the installation package.
3. Click the Instuctions button of the corresponding operating system to view the detailed installation steps, and install according to the instructions.
Establish the connection
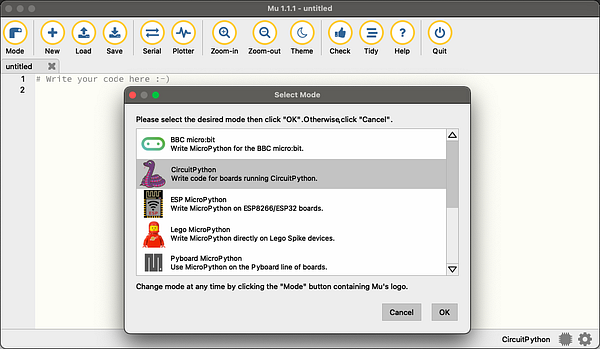
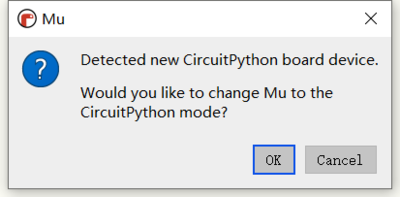
1. Start the Mu editor and change the mode to CircuitPython, if you have connected the CircuitPython development board correctly, you will be prompted whether to switch to this mode directly.
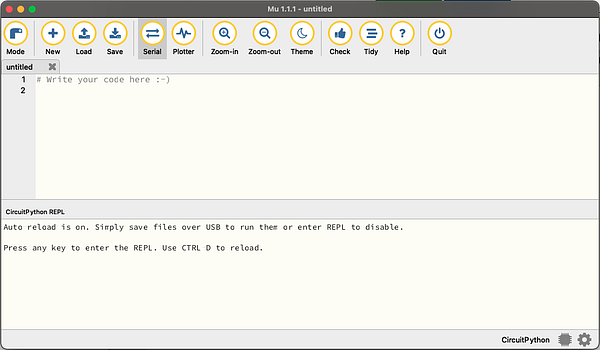
2. Click the Serial button and press any key to enter the CircuitPython REPL.
Edit code.py to make the LED blink
1. Click the Load button, select the code.py file on the CircuitPython development board, and click Open to start editing code.py .
2. Enter the following code in the editor:
import time
import board
import neopixel

pixels = neopixel.NeoPixel(board.NEOPIXEL, 1, brightness=0.1)

while 1:
    pixels[0] = (255,0,0)
    pixels.show()
    time.sleep(0.5)
    pixels[0] = (0,255,0)
    pixels.show()
    time.sleep(0.5)
    pixels[0] = (0,0,255)
    pixels.show()
    time.sleep(0.5)
    pixels[0] = (255,255,255)
    pixels.show()
    time.sleep(0.5)
3. Click the Save button, and the edited content will be saved to the CircuitPython development board.
If the code is correct, the full color LED on the development board will twinkle red, green, blue, and white cyclically.


