Difference between revisions of "EAI80 Burning Steps (Elementary)"
(Created page with "USB thumb flash format steps: Step 1: EAI80 connects a type C cable with a NB then connects a battery then connects a serial cable with EAI80 GPIO pin6, pin8, pin10. File:...") |
|||
| Line 9: | Line 9: | ||
Open the terminal then login root then command: ls /dev/ttyUSB* (for checking ttyUSB0 and ttyUSB1) | Open the terminal then login root then command: ls /dev/ttyUSB* (for checking ttyUSB0 and ttyUSB1) | ||
| + | [[File:EAI80_burn_2.jpg]] | ||
Step 3: | Step 3: | ||
Revision as of 22:51, 28 September 2020
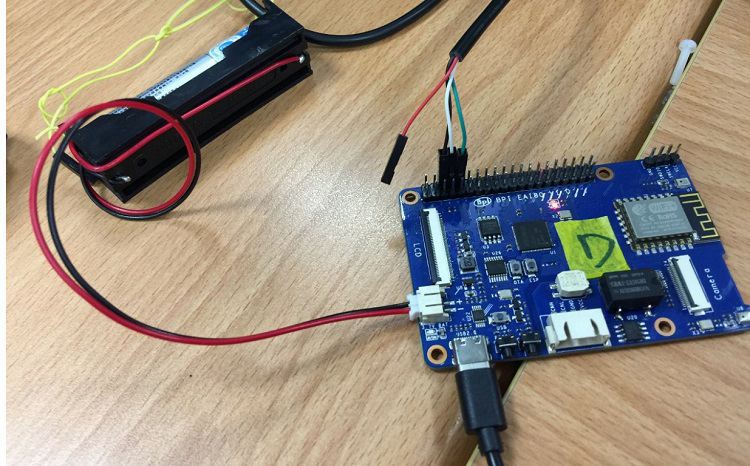
USB thumb flash format steps: Step 1: EAI80 connects a type C cable with a NB then connects a battery then connects a serial cable with EAI80 GPIO pin6, pin8, pin10.
Step 2:
Open the terminal then login root then command: ls /dev/ttyUSB* (for checking ttyUSB0 and ttyUSB1)
Step 3: Type minicom (press enter), press CTRL-A Z W then press space button and reset button both simultaneously then press enter.
Step 4: Type help (checking upgrade mode)
Step 5:
Command: usb format (press enter) go (press enter)
Saving image from EAI80 flash to USB thumb flash steps:
Step 1:
Command: minicom –D /dev/ttyUSB1 –b 115200 press CTRL-A Z W then press space button and reset button both simultaneously press enter.
Step 2:
Command: usb save 1:bpi.bin (press enter) -> go (press enter)
Remove type C cable -> insert the thumb flash (start saving)
Restore image from USB thumb flash to EAI80 flash steps:
Step 1: Command: usb restore 1:bpi.bin (press enter) go (press enter)

