Difference between revisions of "3 Try burning the board"
(→Erase the board firmware) |
|||
| Line 21: | Line 21: | ||
==Erase the board firmware== | ==Erase the board firmware== | ||
| − | + | it is recommended to erase the board once in the following situations. | |
*first use of the firmware | *first use of the firmware | ||
Revision as of 20:26, 17 February 2019
Try burning the board
Contents
Why burn the board?
burn is a term that used to be used to download programs to hardware. Now it's just an idiom.As long as we burn the tools, we can put the program we want to run in the hardware.
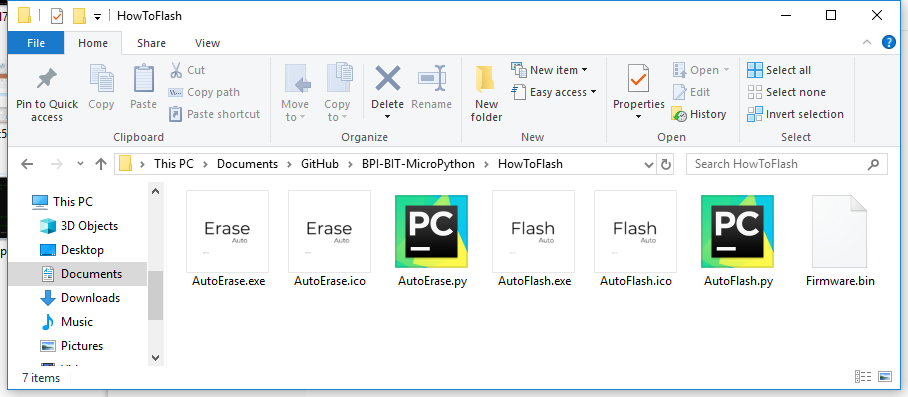
for example with windows 10,you need choose a image verison fromBPI:bitrelease,and download AutoErase.exe、AutoFlash.exe、firmware.bin and put it in the same directory
On other systems, you need to use the py script for the burn, which is autoerers.py and autoflash.py.
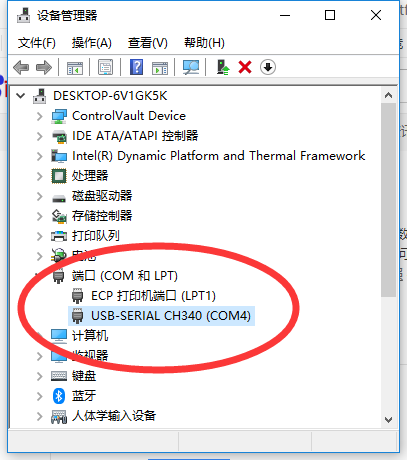
Finally, please ensure that the driver has been successfully installed and the board has been connected to the computer, you can continue to read the following content
One key to write firmware
Erase the board firmware
it is recommended to erase the board once in the following situations.
- first use of the firmware
- other firmware existed before
- the board operation is abnormal
- when at a loss
- 以 Windows 为例,双击运行 **AutoErase.exe**,它会识别电脑最新插入板子的串口,并自动擦除该板子,所以你只需要确保板子是最新插入的设备即可。
- 
- 以上即为成功擦除,如果失败请重试,仍然失败,请检查或设备的串口。
- 2. 更新板子固件
- 遇到以下情况时,建议更新一次板子。
 - 擦除板子后
 - 需升级固件
- 以 Windows 为例,双击运行 **AutoFlash.exe**,它会识别最新插入的板子的串口,并自动将同一目录下的 **firmware.bin** 固件文件烧写到板子当中。
- 
- 以上即为成功烧写,如果失败请重试,仍然失败,请检查或设备的串口。
- 至此已经完成了烧写,可以进入下一章节[Hello, World!](https://github.com/BPI-STEAM/BPI-BIT-MicroPython/wiki/helloworld)了,如有其他疑问或想知道更多的,可以继续往下看。
- 烧写工具详解*
- 使用 windows 系统*
- 运行 `AutoFlash.exe` 程序会自动查找最新插入的串口并将同一目录下的`fimware.bin`文件一键烧写至芯片当中。
-  。
- 使用 `AutoErase.exe` 程序可以将固件擦除,如果此前有其他固件存在,或遇到了不可解决的问题,均可通过该修复(擦除)工具重置板子后烧写固件,注意,它会将板子的所有文件全部删除。
-  。
- 上述程序经由相关 Python 脚本与`Pyinstller X86`模块打包而成。
- 以上两工具均支持命令行 ` AutoErase.exe --port COM4 --baud 115200 --port` 的用法,具体可以看下方配置参数介绍。
- 使用 linux 系统*
``` Shell sudo esptool.py --chip esp32 --port COM3 --baud 1152000 write_flash -z --flash_mode dio --flash_freq 40m 0x1000 firmware.bin ```
- 在此之前需用户安装 python 与安装其依赖项 esptool ,例如`pip install esptool`。
- esptool.py 是 ESP 芯片系列的烧写脚本工具。
- `--chip esp32` 指esp32芯片。
- `--port COM3` 指烧写端口,COM3是Windows环境下的串口命名,在Linux下则是/dev/ttyUSB0。
- `--baud 921600`,如果出现烧写错误,可以下调到460800,这会导致烧写的速度下降。
- `firmware.bin`,指烧写文件的位置,如果没有路径则默认是同一目录下。
- 其他保持不变,如果有疑问向我们可以提出。
- 在 Python 解释器环境当中执行烧写*
- [AutoFlash.py](https://github.com/junhuanchen/AutoTools/blob/master/AutoFlash.py) 跟Linux的Shell一致,可在Py代码中查阅得知。
- [AutoErase.py](https://github.com/junhuanchen/AutoTools/blob/master/AutoErase.py) 是指擦除当前硬件的固件,当遇到无法解决的问题时候,可以尝试擦除。
- 烧写之后?
- 烧写之后,如果烧写成功会如下图,否则会闪退或出现红色警告内容,等其他信息报告。
- 
- 出现问题?
- 当不知道怎么解决的时候,请直接提交问题给我们进行解决。
- 如果没人提供解决方案,您也可以自己使用修复(擦除)工具后重新烧写固件。
- 修复(擦除)工具执行成功之后结果的如下图。
- 
- 疑难解答
- 烧写固件失败,烧写程序闪退,或结果出现 红色警告 。
- 大多数原因是因为您的串口驱动存在问题,解决这个问题后可以再次尝试,如果出现了烧写错误,有可能是您的电脑正在使用多个串口导致识别错误的问题,请确保板子是最新插入的,否则不能自动识别并烧写,如果确定有这个问题也出现了烧写失败的情况,请更换至其他烧写的连接线,此时依旧烧写失败的话,请将板子寄给我们,我们将为您维修或更换。
- 烧写成功?但是没有工作?
- 先确认线材,如果面板灯没有亮,有两种可能,一种是连接线材的问题(线比较差,供电不足),更换好一点的线就可以了,另一种是存在先前固件的问题,分区数据受损,需要擦除一次才可以,一般发生在先前烧过其他固件的时候,如果排除了这两种情况,就只能是电脑的问题,可以先检查一下驱动是否正常,没有感叹号,或者是更换电脑再试。


