Getting Started with R1: Difference between revisions
Jump to navigation
Jump to search
JackZengWiki (talk | contribs) |
JackZengWiki (talk | contribs) |
||
| Line 34: | Line 34: | ||
* Execute "bpi-copy xxx.img /dev/sdx" to install image on your TF card | * Execute "bpi-copy xxx.img /dev/sdx" to install image on your TF card | ||
4.After step 3, then you can insert your TF card into R1, and press power button | 4.After step 3, then you can insert your TF card into R1, and press power button setup R1 | ||
Revision as of 12:10, 29 May 2018
Introduction
BPI-R1

  The Banana Pi R1 is a router based Banana Pi running on the same SoC as the M1 Classic Pi.
  The R1 is a open hardware router that can run on a variety of open source operating systems including OpenWrt, Android, and Bananian. The R1 has slim router form factor with a bay for 2.5" HDDs. It also has 4 Gigabit LAN ports, 1 Gigabit WAN, and 300Mbs wireless N capabilities.
- Read more about : Banana Pi BPI-R1
Key Features
- Dual-core 1.0GHz CPU
- 1 GB DDR3 memory
- Mali-400 MP2 with Open GL ES 2.0/1.1
- 4x Gigabit LAN 1x Gigabit WAN
Development
Basic Development
Prepare to develop
 * Prepare 16G/above TF card, USB-Serial interface, Ubuntu System
 * Using your USB-Serial Connect debug console on R1
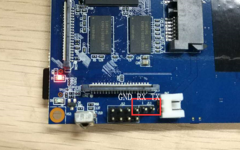

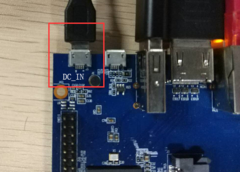

Load your first image on R1
 1.You could download latest image from our forum

 2.Install bpi-tools on your Ubuntu
 * apt-get install pv
 * curl -sL https://github.com/BPI-SINOVOIP/bpi-tools/raw/master/bpi-tools | sudo -E bash

 3.After you download the image, insert your TF card into your Ubuntu
 * Execute "bpi-copy xxx.img /dev/sdx" to install image on your TF card

 4.After step 3, then you can insert your TF card into R1, and press power button setup R1