Difference between revisions of "BPI-Bit"
(→BPI:bit for arduino) |
(→BPI:bit for arduino) |
||
| Line 216: | Line 216: | ||
*How to use with Arduino IDE : http://wiki.banana-pi.org/BPI-UNO32#Ardino_IDE | *How to use with Arduino IDE : http://wiki.banana-pi.org/BPI-UNO32#Ardino_IDE | ||
*uPyCraft(microPyhton) http://wiki.banana-pi.org/BPI-UNO32#uPyCraft.EF.BC.88microPyhton.29 | *uPyCraft(microPyhton) http://wiki.banana-pi.org/BPI-UNO32#uPyCraft.EF.BC.88microPyhton.29 | ||
| − | |||
===How to test 9 axis sensor-MPU9250=== | ===How to test 9 axis sensor-MPU9250=== | ||
Revision as of 17:58, 18 May 2018
Introduction
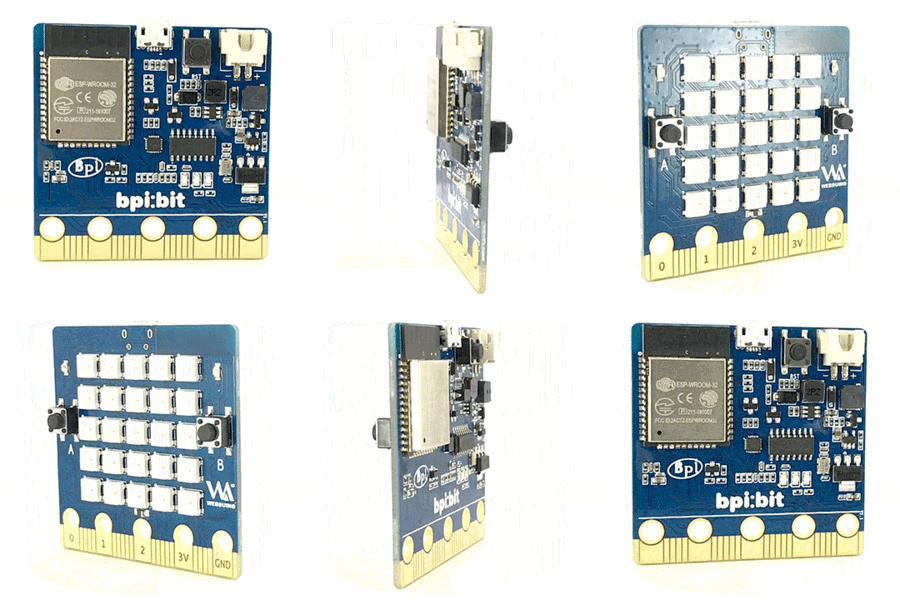
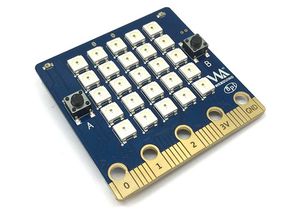
The BPI:bit (also referred to as BPI-bit, stylised as webduino:bit) is an ESP32 with Xtensa 32bit LX6 single/dual-core processor based embedded system. support Webduino and arduino function.
BPI:bit hardware
BPI:bit hardware description
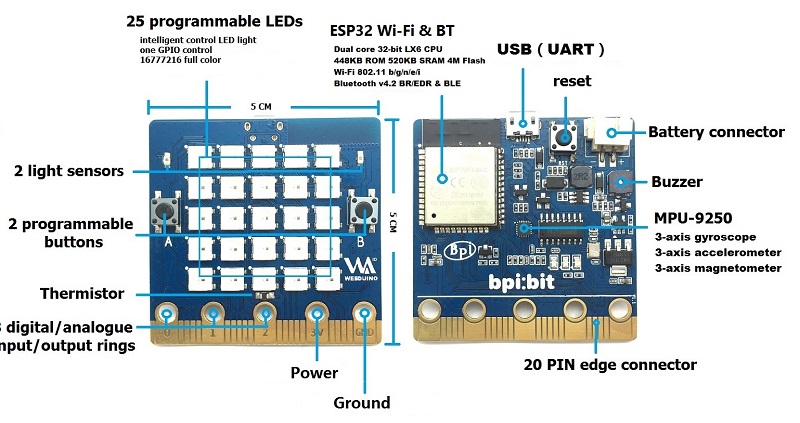
The board is 5 cm × 5 cm and has an ESP32 module with Xtensa 32bit LX6 single/dual-core processor, with a capacity of up to 600DMIPS, with a built-in 448KB ROM and 520 KB SRAM.accelerometer and magnetometer sensors,2.4G WiFI,Bluetooth and USB connectivity, a display consisting of 25 LEDs, two programmable buttons, and can be powered by either USB or an external battery pack.The device inputs and outputs are through five ring connectors that are part of the 23-pin edge connector.
BPI:bit provides a wide range of onboard resources, supports photosensitive sensor, digital triaxial sensor, digital compass, temperature sensor interface.Webduino:bit have 25 intelligent control LED light source that the control circuit and RGB chip are integrated in a package of 5050 components.Cascading port transmission signal by single line.Each pixel of the three primary color can achieve 256 brightness display, completed 16777216 color full color display, and scan frequency not less than 400Hz/s.
BPI:bit use MPU9250 onboard, MPU-9250 is a multi-chip module (MCM) consisting of two dies integrated into a single QFN package. One die houses the 3-Axis gyroscope and the 3-Axis accelerometer. The other die houses the AK8963 3-Axis magnetometer from Asahi Kasei Microdevices Corporation. Hence, the MPU-9250 is a 9-axis MotionTracking device that combines a 3-axis gyroscope, 3-axis accelerometer, 3-axis magnetometer and a Digital Motion Processor™ (DMP) all in a small 3x3x1mm package available as a pin-compatible upgrade from the MPU-6515. With its dedicated I2C sensor bus, the MPU-9250directly provides complete 9-axis MotionFusion™ output. The MPU-9250 MotionTracking device, with its 9-axis integration, on-chip MotionFusion™, and runtime calibration firmware, enables manufacturers to eliminate the costly and complex selection, qualification, and system level integration of discrete devices, guaranteeing optimal motion performance for consumers. MPU-9250 is also designed to interface with multiple non-inertial digital sensors, such as pressure sensors, on its auxiliary I²C port.
BPI:bit interface
BPI:bit edge interface
File:BPI bit edge pin define.png
BPI:bit PIN define
| HardWare PIN define of BPI:bit | |||||
| Pin Name | Analog Function1 | Analog Function2 | Function1 | Function2 | Power |
| P3 | ADC2_CH4 | GPIO13 | |||
| P0 | ADC2_CH8 | DAC_1 | GPIO25 | ||
| P4 | ADC2_CH3 | GPIO16 | |||
| P5 | ADC1_CH7 | GPIO35 | |||
| P6 | ADC2_CH5 | GPIO12 | |||
| P7 | ADC2_CH6 | GPIO14 | |||
| P1 | ADC1_CH4 | GPIO32 | |||
| P8 | GPIO16 | ||||
| P9 | GPIO17 | ||||
| P10 | ADC2_CH9 | DAC_2 | GPIO26 | ||
| P11 | ADC2_CH7 | GPIO27 | |||
| P12 | ADC2_CH2 | GPIO02 | |||
| P2 | ADC1_CH5 | GPIO33 | |||
| P13 | GPIO18 | SPI_SS | |||
| P14 | GPIO19 | SPI_SCK | |||
| P15 | GPIO23 | SPI_MISO | |||
| P16 | GPIO05 | SPI_MOSI | |||
| 3V3 | POWER:3V3 | ||||
| 3V3 | POWER:3V3 | ||||
| 3V3 | POWER:3V3 | ||||
| P19 | GPIO22 | I2C_SCL | |||
| P20 | GPIO21 | I2C_SDA | |||
| GND | GROUND | ||||
| GND | GROUND | ||||
| GND | GROUND | ||||
5*5 LED list
| 25 5*5 LED list of BPI:bit | ||||
| 20 | 15 | 10 | 5 | 0 |
| 21 | 16 | 11 | 6 | 1 |
| 22 | 17 | 12 | 7 | 2 |
| 23 | 18 | 13 | 8 | 3 |
| 24 | 19 | 14 | 9 | 4 |
MPU9250
A powerful 9 axis sensor, MPU9250, is placed on the BPI:bit board.
The 9 axis here is different from the 9 axis of space understanding, and is actually the combination of 3 separate 3 axis sensors (accelerometers - Accelerator, gyroscope - Gyroscope, magnetometer - Magnetometer). For the detailed introduction of this chip, you can visit GitHub to see the document: https://github.com/yelvlab/BPI-BIT/tree/master/doc
BPI-bit software
BPI:bit for webduino
BPI: bit Webduino Firmware Burning
BPI:bit can be perfectly adapted to Webduino. Of course, before using it, we need to burn the Webduino firmware first.
Firmware download address:Webduino for bpi:bit Firmware
Burning method:
There are two kinds of burning methods to choose from, we can use ESP Flash Download Tool to burn, we can also use the built-in Python script inside the PlatformIO to achieve burn.
One, ESP Flash Download Tool Tool download address:ESP Flash Download Tool
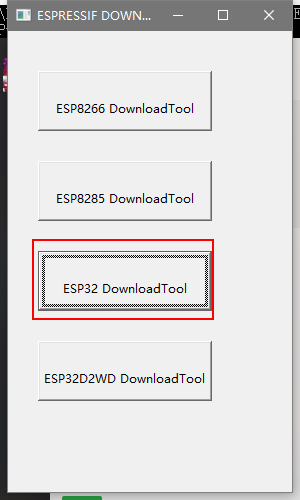
After downloading, unzip the archive and you will see an ESPFlashDownloadTool_v3.6.2.exe inside the folder. Open this shortcut and open an interface selection mode.
Select ESP32 DownloadTool:
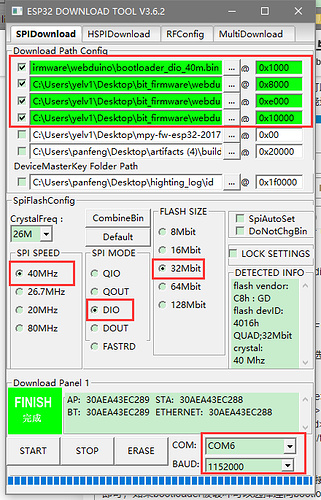
Under `Download Path Config`, we need to select the four bin files that need to be burned and fill in the corresponding burn locations.
- File and burn position corresponding to:
| File and burn position corresponding | |||
| set | file name | Position | |
| 1 | bootloader_dio_40m.bin | 0x1000 | |
| 2 | partitions.bin | 0x8000 | |
| 3 | boot_app0.bin | 0xe000 | |
| 4 | bit_default.bin | 0x10000 | |
- SpiFlashConfig:
| SpiFlashConfig | |||
| 1 | SPI SPEED | 40NHz | |
| 2 | SPI MODE | DIO | |
| 3 | FLASH SIZE | 32Mbit | |
| 4 | COM | COMx(Fill in the port number assigned by the computer) | |
| 5 | BAUD | 1152000 | |
Normally, you do not need to burn two boot boot files. You can directly burn the firmware (bit_default.bin) and partitions (partitions.bin). If the bootloader is damaged, you can choose to burn along with bootloader_dio_40m.bin and boot_app0.bin. But be sure to pay attention to the settings below
`SpiFlashConfig` Please configure according to the software screenshot, and then select the port in the COM. Porter 115200 does not need to be changed. Select “START” to start recording.
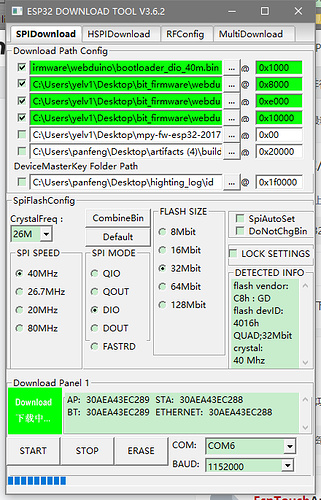
During the burning process:
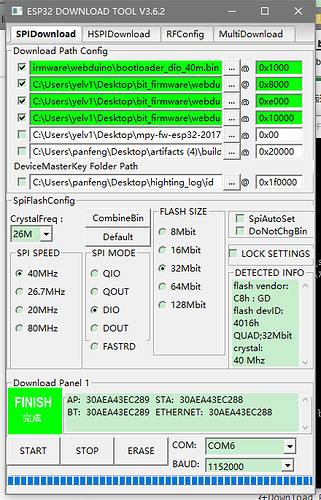
Finished:
After the burn is completed, you must reset or re-energize, and then you find the LED red light flashing, indicating that the burn is successful.
Burn time is about 20s
then you can use webduino all function on BPI:bit. Please see the webduino teaching documents
Second: PlatformIO comes with a script
This method needs to install PlatformIO in advance. Of course, if you are not using PlatformIO for development, you are advised to use the first method. This method is to disassemble the PlatformIO burning procedure.
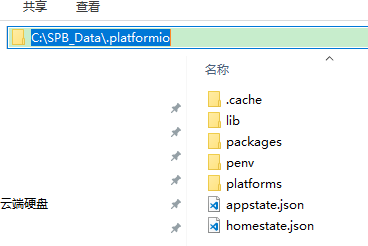
First of all, you need to find the installation location of PlatformIO on your computer. For example, my installation location is as follows
Of course, your installation location is not necessarily the same as mine, you need to find it yourself.
Then, we can find a script file .platformio\packages\tool-esptoolpy\esptool.py according to the following path. This file is the script we need to burn. Then, we open the terminal of PlatformIO, or open the computer. Command line tool, enter the following code
Python ~\.platformio\packages\tool-esptoolpy\esptool.py --port COM19 --baud 115200 write_flash -fm dio -fs 4MB 0x010000 ~\BIT\bit_default.bin
The ~ in the above code needs to be replaced with your actual path, and then fill in the corresponding burning position in order, select the corresponding file path, and then execute this code. This method may be very specific for certain situations. Help, usually used at the time, it is recommended to use the first method of burning.
Normally, you do not need to burn two boot boot files. You can directly burn the firmware (bit_default.bin) and partitions (partitions.bin). If the bootloader is damaged, you can choose to burn along with bootloader_dio_40m.bin and boot_app0.bin. But be sure to pay attention to the settings below
BPI:bit for arduino
Arduino
- How to use with Arduino IDE : http://wiki.banana-pi.org/BPI-UNO32#Ardino_IDE
- uPyCraft(microPyhton) http://wiki.banana-pi.org/BPI-UNO32#uPyCraft.EF.BC.88microPyhton.29
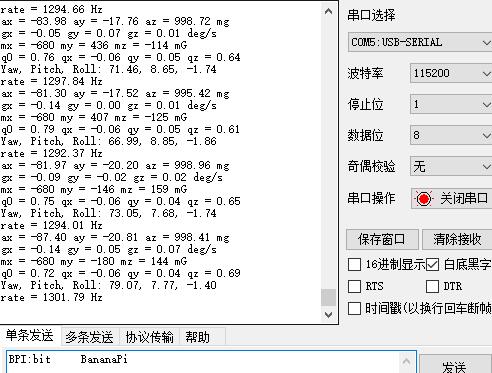
How to test 9 axis sensor-MPU9250
- code update to github : https://github.com/yelvlab/BPI-BIT/tree/master/Code/MPU9250
The following is the result of the return of the serial port
Resources
Source code
- BPI:bit for webduino source code on github: https://github.com/webduinoio
- BPI:bit for arduino Source code on Github: https://github.com/yelvlab/BPI-BIT
documents
- BPI:bit schematic diagram : https://github.com/yelvlab/BPI-BIT/blob/master/doc/BPI-WEBDUINO-BIT-V1_2-20180417.pdf
- BPI:bit user manual : https://github.com/yelvlab/BPI-BIT/blob/master/doc/BPI-bit_user_manual.pdf
- ESP32 datasheet: https://github.com/yelvlab/BPI-BIT/blob/master/doc/ESP32-datesheet_english.pdf
- MPU9250 datasheet:http://www.invensense.com/wp-content/uploads/2015/02/PS-MPU-9250A-01-v1.1.pdf
- More others : https://github.com/yelvlab/BPI-BIT/tree/master/doc
- Taiwan server : http://webuino.io
- Overworld server: http://webduino.io
- china mainland : http://www.webduino.com.cn
