Difference between revisions of "BPI:bit for Arduino"
| (69 intermediate revisions by 2 users not shown) | |||
| Line 1: | Line 1: | ||
| + | [[File:Webduino_gif.gif|thumb|Overview: [[BPI-Bit]]]] | ||
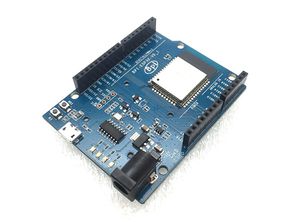
| + | [[File:ESP32_6.JPG|thumb|[[BPI-UNO32]] with ESP32 design]] | ||
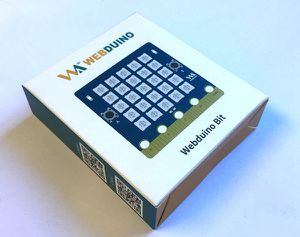
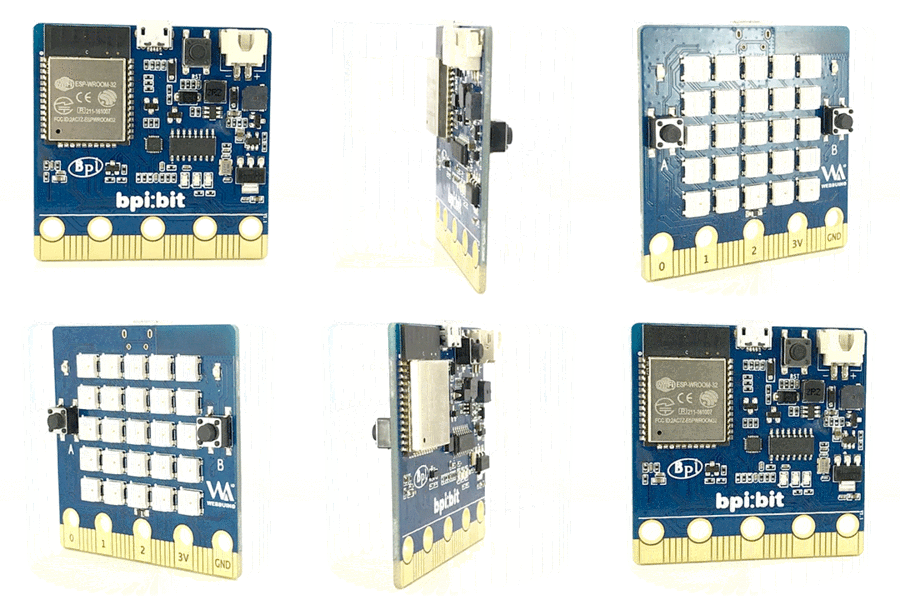
| + | [[File:BPi_bit_webduino_3.jpg|thumb|Overview: BPI:bit for Webduino]] | ||
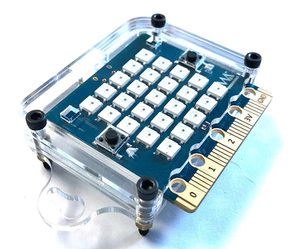
| + | [[File:BPI_bit_acrylic_shell_1_.JPG|thumb|[[BPI-bit acrylic shell compatible LEGO bricks]]]] | ||
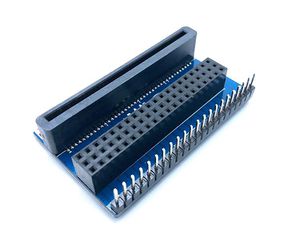
| + | [[File:Bpi_bit_gpio_expansion_board_2.JPG|thumb|[[BPI:bit gpio expansion board]]]] | ||
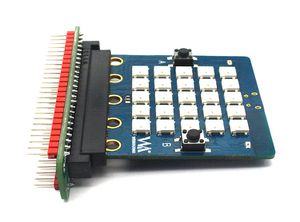
| + | [[File:BPIbit_breadboard_GPIO_expansion_board_3.jpg|thumb|[[BPI:bit gpio expansion board]]]] | ||
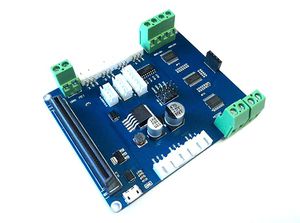
| + | [[File:BPI-bit_robort_board_3.JPG|thumb|[[BPI:bit robot expansion board]]]] | ||
| + | |||
=About BPI:bit= | =About BPI:bit= | ||
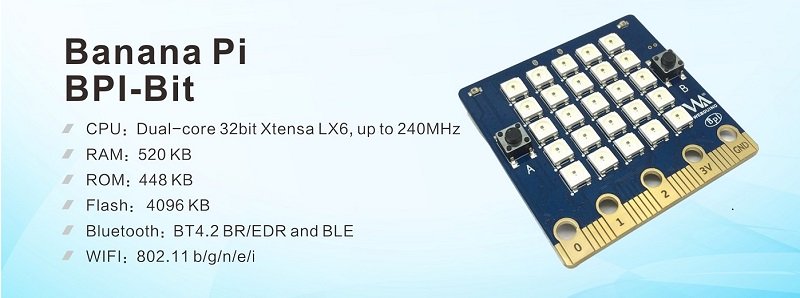
This product adopts esp-wroom-32 module as the core for design, and supports wi-fi, bluetooth, BLE and other wireless communication modes. | This product adopts esp-wroom-32 module as the core for design, and supports wi-fi, bluetooth, BLE and other wireless communication modes. | ||
| Line 5: | Line 13: | ||
[[File:A_BPI-Bit.jpg]] | [[File:A_BPI-Bit.jpg]] | ||
| + | |||
| + | More about Banana Pi BPI:bit,please see :[[BPI-Bit]] | ||
| + | |||
| + | =BPI:bit for Arduino-IDE= | ||
| + | |||
| + | ==Installation Instructions== | ||
| + | You can get more information about Arduino-esp32 from this page:https://github.com/espressif/arduino-esp32 | ||
| + | |||
| + | ==Wired connection board== | ||
| + | |||
| + | Connect the boards to your computer via the MicroUSB wire, it is same as BPI:bit with microPython. | ||
| + | |||
| + | please see this documents:[[2 Wired connection board]] | ||
| + | |||
| + | Installation instructions using Arduino IDE Boards Manager | ||
| + | |||
| + | == Using Arduino IDE Boards Manager (preferred) == | ||
| + | |||
| + | - Stable release link: https://raw.githubusercontent.com/espressif/arduino-esp32/gh-pages/package_esp32_index.json | ||
| + | |||
| + | - Development release link: https://raw.githubusercontent.com/espressif/arduino-esp32/gh-pages/package_esp32_dev_index.json | ||
| + | |||
| + | Starting with 1.6.4, Arduino allows installation of third-party platform packages using Boards Manager. We have packages available for Windows, Mac OS, and Linux (32, 64 bit and ARM). | ||
| + | |||
| + | Install the current upstream Arduino IDE at the 1.8 level or later. The current version is at the Arduino website. | ||
| + | Start Arduino and open Preferences window. | ||
| + | Enter one of the release links above into Additional Board Manager URLs field. You can add multiple URLs, separating them with commas. | ||
| + | Open Boards Manager from Tools > Board menu and install esp32 platform (and don't forget to select your ESP32 board from Tools > Board menu after installation). | ||
| + | |||
| + | =How to development with BPI:bit= | ||
| + | |||
| + | {| class = "wikitable" | ||
| + | |- | ||
| + | | style="background: PaleTurquoise; color: black" colspan="4"|'''Arduino IDE Programing Function Define''' | ||
| + | |- | ||
| + | !Function !! IO | ||
| + | |- | ||
| + | |RGB_LED || IO4 | ||
| + | |- | ||
| + | |RGB_LED_POWER || IO2 | ||
| + | |- | ||
| + | |BUZZER || IO25 | ||
| + | |- | ||
| + | |BOTTON_A || IO35 | ||
| + | |- | ||
| + | |BOTTON_B || IO27 | ||
| + | |- | ||
| + | |LIGHT_SENSOR1(upper left) || IO36 | ||
| + | |- | ||
| + | |LIGHT_SENSOR2(upper right) || IO39 | ||
| + | |- | ||
| + | |TEMPERTURE_SENSOR || IO34 | ||
| + | |- | ||
| + | |MPU9250_AD0 || IO0 | ||
| + | |- | ||
| + | | style="background: PaleTurquoise; color: black" colspan="4"|'''Communication Protocol''' | ||
| + | |- | ||
| + | !SPI | ||
| + | |- | ||
| + | |MISO || IO19 | ||
| + | |- | ||
| + | |MOSI || IO23 | ||
| + | |- | ||
| + | |SCK || IO23 | ||
| + | |- | ||
| + | |SS || IO5 | ||
| + | |- | ||
| + | !I2C | ||
| + | |- | ||
| + | |SCL || IO22 | ||
| + | |- | ||
| + | |SDA ||IO21 | ||
| + | |} | ||
| + | ==How to use with Arduino IDE== | ||
| + | |||
| + | |||
| + | |||
| + | ===Source code on github=== | ||
| + | |||
| + | *Source code on github: https://github.com/BPI-STEAM/BPI-BIT-Arduino-IDE | ||
| + | |||
| + | * 1. [[How to use with Arduino IDE]] | ||
| + | |||
| + | ==Lighting the RGB LED== | ||
| + | * 2. [[Lighting the RGB LED]] | ||
| + | |||
| + | =How to use with Platform IO= | ||
| + | |||
| + | ==Install Platform IO== | ||
| + | [[How to install Platform IO]] | ||
| + | |||
| + | ==Source code at github== | ||
| + | * Source code on github : https://github.com/BPI-STEAM/BPI-BIT-PlatformIO | ||
| + | |||
| + | ==Text Editor== | ||
| + | |||
| + | We need to prepare a text editor in advance (VSCode or Atom) | ||
| + | |||
| + | *[https://code.visualstudio.com/ Visual Studio Code(VSCode)] | ||
| + | |||
| + | *[https://atom.io/ Atom] | ||
| + | |||
| + | ==Add Espressif 32 Development Kit== | ||
| + | |||
| + | [https://github.com/BPI-STEAM/BPI-BIT-PlatformIO/blob/master/docs/ESP32-PIO-Development-Kit.md Espressif 32 for Atom/VSCode] | ||
| + | |||
| + | =Documents= | ||
| + | *BPI-Bit PlatformIO 4.0.0a3 documentation :https://docs.platformio.org/en/latest/boards/espressif32/bpi-bit.html# | ||
| + | *[[How to use with Platform IO]] | ||
| + | *BPI:bit arduino basic development tutorials(chinese version) : http://forum.banana-pi.org/t/bpi-bit-arduino-basic-development-tutorials-chinese-version/7299 | ||
| + | *Bpi:bit + Arduino IDE, shared by JavierPiay :http://forum.banana-pi.org/t/bpi-bit-arduino-ide/7244 | ||
Latest revision as of 19:55, 27 April 2020
Contents
About BPI:bit
This product adopts esp-wroom-32 module as the core for design, and supports wi-fi, bluetooth, BLE and other wireless communication modes.
The BPI bit (also referred to as BPI-bit, stylised as bpi:bit) is an ESP32 with 32-bit Xtensa LX6 dual-core processor based embedded system. It supports Webduino, Arduino, MicroPython as well as Scratch X programming environments.
More about Banana Pi BPI:bit,please see :BPI-Bit
BPI:bit for Arduino-IDE
Installation Instructions
You can get more information about Arduino-esp32 from this page:https://github.com/espressif/arduino-esp32
Wired connection board
Connect the boards to your computer via the MicroUSB wire, it is same as BPI:bit with microPython.
please see this documents:2 Wired connection board
Installation instructions using Arduino IDE Boards Manager
Using Arduino IDE Boards Manager (preferred)
- Stable release link: https://raw.githubusercontent.com/espressif/arduino-esp32/gh-pages/package_esp32_index.json
- Development release link: https://raw.githubusercontent.com/espressif/arduino-esp32/gh-pages/package_esp32_dev_index.json
Starting with 1.6.4, Arduino allows installation of third-party platform packages using Boards Manager. We have packages available for Windows, Mac OS, and Linux (32, 64 bit and ARM).
Install the current upstream Arduino IDE at the 1.8 level or later. The current version is at the Arduino website. Start Arduino and open Preferences window. Enter one of the release links above into Additional Board Manager URLs field. You can add multiple URLs, separating them with commas. Open Boards Manager from Tools > Board menu and install esp32 platform (and don't forget to select your ESP32 board from Tools > Board menu after installation).
How to development with BPI:bit
| Arduino IDE Programing Function Define | |||
| Function | IO | ||
|---|---|---|---|
| RGB_LED | IO4 | ||
| RGB_LED_POWER | IO2 | ||
| BUZZER | IO25 | ||
| BOTTON_A | IO35 | ||
| BOTTON_B | IO27 | ||
| LIGHT_SENSOR1(upper left) | IO36 | ||
| LIGHT_SENSOR2(upper right) | IO39 | ||
| TEMPERTURE_SENSOR | IO34 | ||
| MPU9250_AD0 | IO0 | ||
| Communication Protocol | |||
| SPI | |||
| MISO | IO19 | ||
| MOSI | IO23 | ||
| SCK | IO23 | ||
| SS | IO5 | ||
| I2C | |||
| SCL | IO22 | ||
| SDA | IO21 | ||
How to use with Arduino IDE
Source code on github
- Source code on github: https://github.com/BPI-STEAM/BPI-BIT-Arduino-IDE
Lighting the RGB LED
How to use with Platform IO
Install Platform IO
Source code at github
- Source code on github : https://github.com/BPI-STEAM/BPI-BIT-PlatformIO
Text Editor
We need to prepare a text editor in advance (VSCode or Atom)
Add Espressif 32 Development Kit
Documents
- BPI-Bit PlatformIO 4.0.0a3 documentation :https://docs.platformio.org/en/latest/boards/espressif32/bpi-bit.html#
- How to use with Platform IO
- BPI:bit arduino basic development tutorials(chinese version) : http://forum.banana-pi.org/t/bpi-bit-arduino-basic-development-tutorials-chinese-version/7299
- Bpi:bit + Arduino IDE, shared by JavierPiay :http://forum.banana-pi.org/t/bpi-bit-arduino-ide/7244
