Difference between revisions of "How to use with Arduino IDE"
(Created page with "===Ardino IDE=== * Arduino IDE:Open File -> Preferences, as shown in the following figure: File:Uno32_pic_1.png * Click the button in the red circle above and add th...") |
|||
| (8 intermediate revisions by 2 users not shown) | |||
| Line 1: | Line 1: | ||
===Ardino IDE=== | ===Ardino IDE=== | ||
| − | + | ===How to setup and start === | |
| − | |||
| − | * | + | Need to be prepared: |
| − | + | *BPI-UNO32 1 or BPI:bit 1 | |
| − | + | *Jumper Cap 4 | |
| + | *microUSB 1 | ||
| − | + | quickstart: | |
| − | + | 1,connect the four jumper caps to the top of the board, respectively, to connect the RGB LED to the buzzer. Then use the microUSB line to connect the development board to the computer. | |
| − | [[File: | + | *port: |
| + | [[File:Uno32_start_0.png]] | ||
| + | *Connect: | ||
| + | [[File:Uno32_start_1.png]] | ||
| − | + | open Arduino IDE and install ESP32 Expansion pack | |
| − | [[ | + | Arduino IDE Software:(*[[https://www.arduino.cc/en/Main/Software Arduino IDE]]) |
| − | * | + | ESP32 Expansion pack:(*[[https://github.com/espressif/arduino-esp32/blob/master/README.md Installation guide]]) ->Installation Instructions |
| − | [[File: | + | *Open Arduino IDE and setup baord: |
| + | [[File:ArduinoIDE-1.png]] | ||
| − | + | If you install ESP32 package you can ESP32 board in Tools->Boards see <ESP32 Arduino> | |
| − | * | + | *Arduino IDE Compile and Download: |
| + | [[File:ArduinoIDE-2.png]] | ||
| + | *Arduino IDE serial port setup: | ||
| + | [[File:ArduinoIDE-3.png]] | ||
| − | + | 2,You can click Serial Monitor in Arduino IDE. It will open a new window ,in this window ,you can setup serial : | |
| − | + | *Serial Config: | |
| − | + | [[File:ArduinoIDE-4.png]] | |
| − | |||
| − | |||
| − | |||
| − | |||
| − | |||
| − | |||
| − | |||
| − | |||
| − | |||
| − | |||
| − | [[File: | ||
| − | |||
| − | |||
| − | |||
| − | |||
Latest revision as of 22:00, 24 August 2018
Ardino IDE
How to setup and start
Need to be prepared:
- BPI-UNO32 1 or BPI:bit 1
- Jumper Cap 4
- microUSB 1
quickstart:
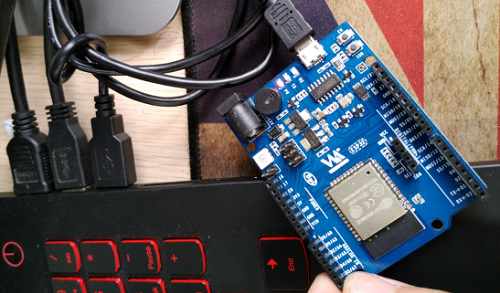
1,connect the four jumper caps to the top of the board, respectively, to connect the RGB LED to the buzzer. Then use the microUSB line to connect the development board to the computer.
- port:
- Connect:
open Arduino IDE and install ESP32 Expansion pack
Arduino IDE Software:(*[Arduino IDE])
ESP32 Expansion pack:(*[Installation guide]) ->Installation Instructions
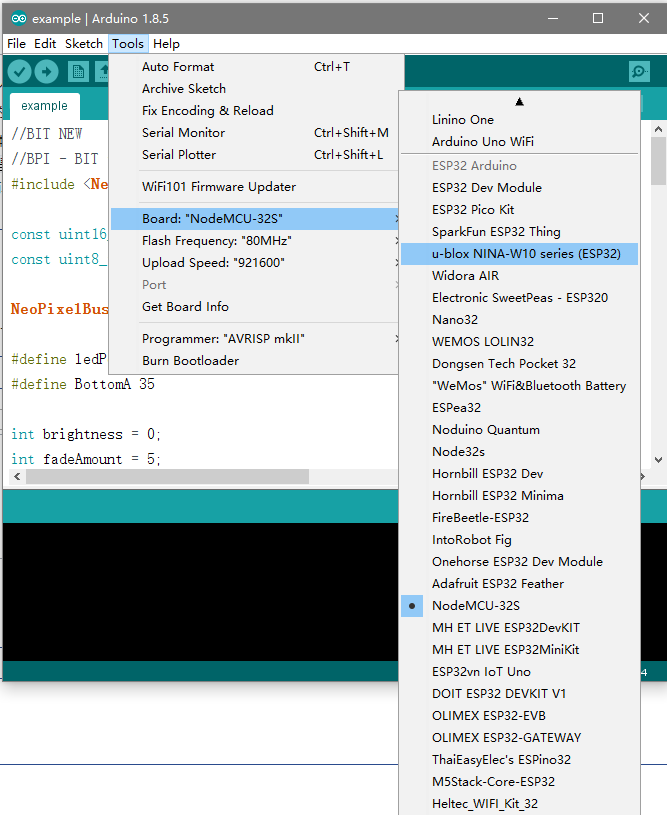
- Open Arduino IDE and setup baord:
If you install ESP32 package you can ESP32 board in Tools->Boards see <ESP32 Arduino>
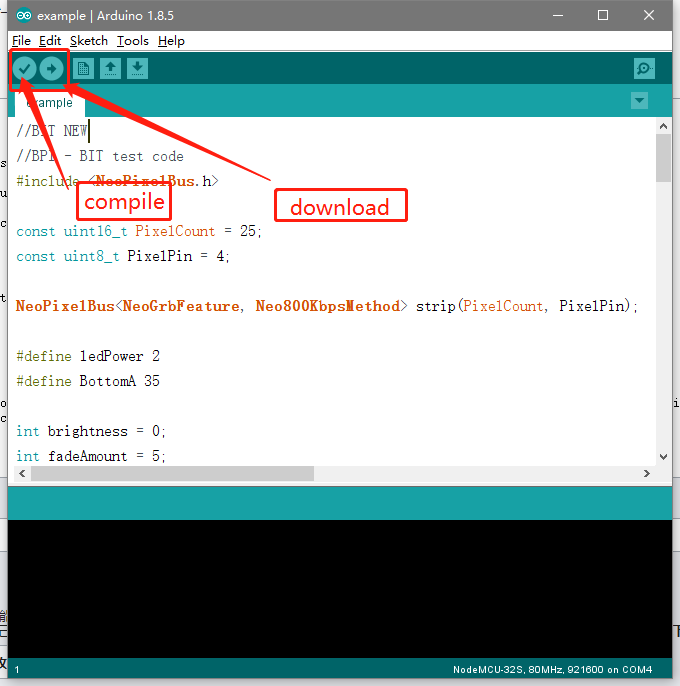
- Arduino IDE Compile and Download:
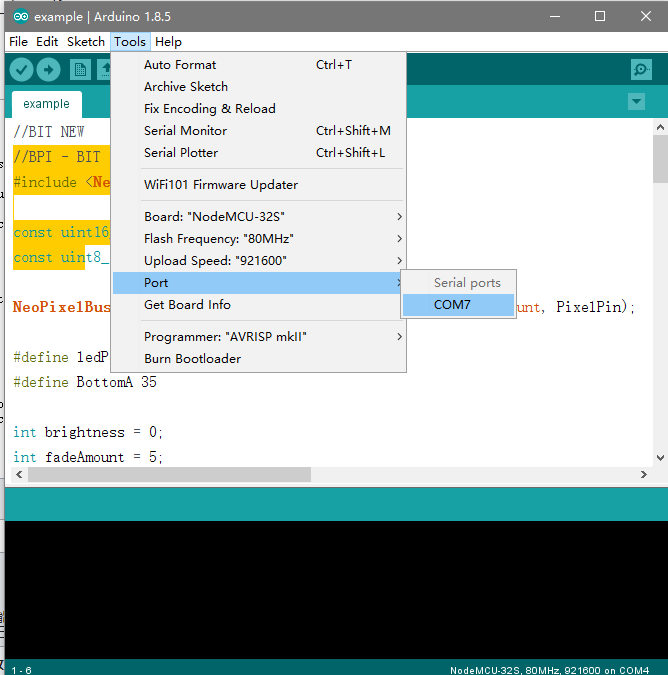
- Arduino IDE serial port setup:
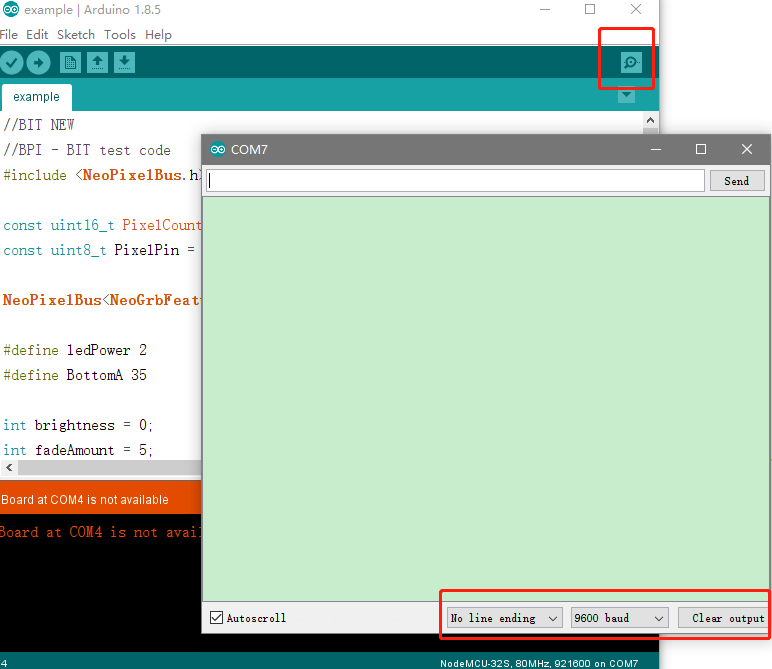
2,You can click Serial Monitor in Arduino IDE. It will open a new window ,in this window ,you can setup serial :
- Serial Config:

