Difference between revisions of "BPI Uart Module"
(→Product Specification) |
(→How to use module on BPI-M3) |
||
| (3 intermediate revisions by the same user not shown) | |||
| Line 39: | Line 39: | ||
Just insert the module to Banana Pi, like the below picture: | Just insert the module to Banana Pi, like the below picture: | ||
| − | + | [[File:Uart_install.jpg]] | |
More information | More information | ||
| Line 48: | Line 48: | ||
==Schematic diagram== | ==Schematic diagram== | ||
| − | + | [[File:Uart_sch.png]] | |
More information please check:http://www.maximintegrated.com/cn/products/interface/transceivers/MAX232.html | More information please check:http://www.maximintegrated.com/cn/products/interface/transceivers/MAX232.html | ||
| − | |||
==How to use module on BPI-M3== | ==How to use module on BPI-M3== | ||
| − | + | [[File:Uart_1.jpg]] | |
| − | + | [[File:Uart_2.jpg]] | |
*Video demo on youtube:https://www.youtube.com/watch?v=wh_PHCQOi_4 | *Video demo on youtube:https://www.youtube.com/watch?v=wh_PHCQOi_4 | ||
| Line 75: | Line 74: | ||
F - Hardware Flow Control : No | F - Hardware Flow Control : No | ||
| − | + | [[File:Uart_3.jpg]] | |
| + | |||
| + | [[File:Uart_4.jpg]] | ||
| − | |||
* Run the Minicom, then wait for the PC end to input text | * Run the Minicom, then wait for the PC end to input text | ||
| Line 97: | Line 97: | ||
Hardware Flow Control : No | Hardware Flow Control : No | ||
| − | + | [[File:Uart_5.jpg]] | |
* Input the text," Hello BPI-M3 ", after finishing the setting. | * Input the text," Hello BPI-M3 ", after finishing the setting. | ||
| Line 105: | Line 105: | ||
* Check if there's the text showing on the terminal window on BPI-M3 | * Check if there's the text showing on the terminal window on BPI-M3 | ||
| − | + | [[File:Uart_6.jpg]] | |
==Test bench== | ==Test bench== | ||
Latest revision as of 19:39, 16 May 2018
Contents
Produce Overview
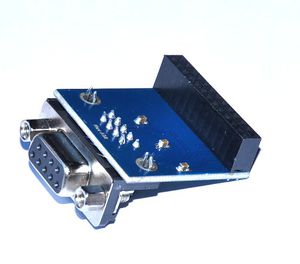
The Serial Port module is specifically designed for Banana Pi. The module use Maxim MAX232 chip and DB9 port. So the user don’t need to connect Dupont Line and that avoid wrong wiring. User can use this module to debug Banana Pi easily.
Produce Features
1. Maxim MAX232 on chip 2. DB9 port
Port
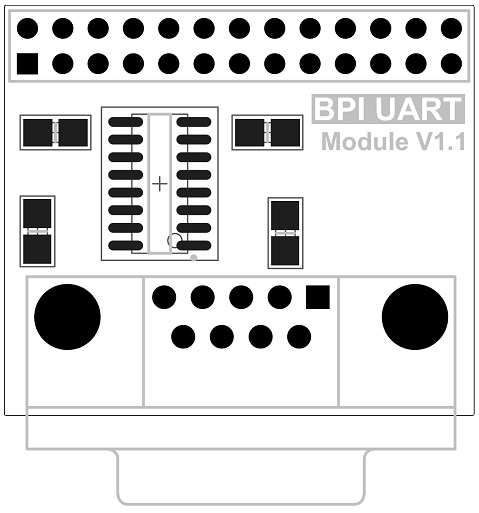
- 1. Banana Pi connection port
- 2. DB9 port
Product Parameters
- 1. Working voltage: 5V
- 2. Two Drivers and Two Receivers
- 3. Operates Up To 120 kbit/s
- 4. Low Supply Current . . . 8 mA Typical
Typical Application
- 1. Interface Translation
- 2. Multidrop RS-232 Networks
- 3. Low-Power Modems
Product Specification
How to use
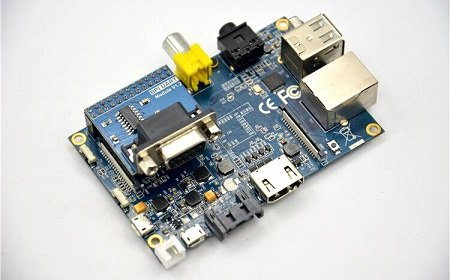
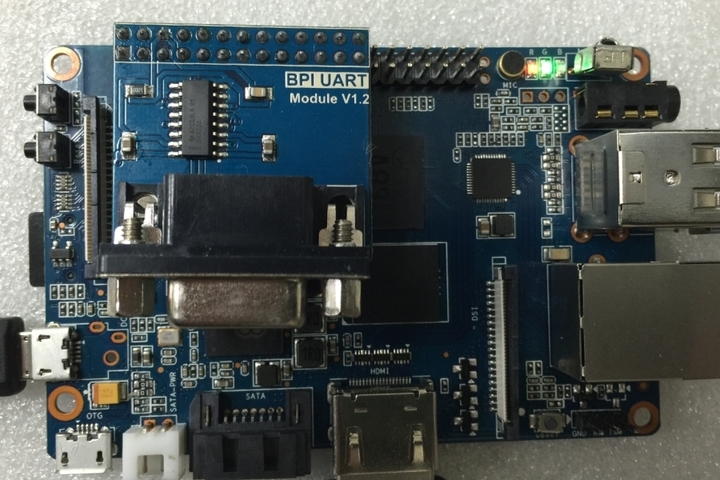
Just insert the module to Banana Pi, like the below picture:
More information
The MAX220–MAX249 family of line drivers/receivers is intended for all EIA/TIA-232E and V.28/V.24 communications interfaces, particularly applications where ±12V is not available.
These parts are especially useful in battery-powered systems, since their low-power shutdown mode reduces power dissipation to less than 5µW. The MAX225, MAX233, MAX235, and MAX245/MAX246/MAX247 use no external components and are recommended for applications where printed circuit board space is critical.
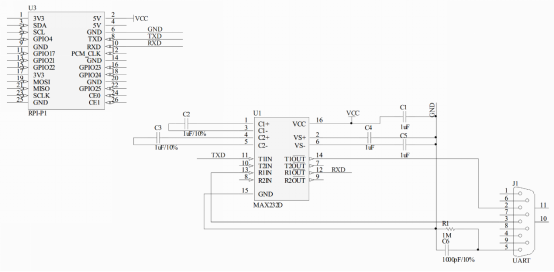
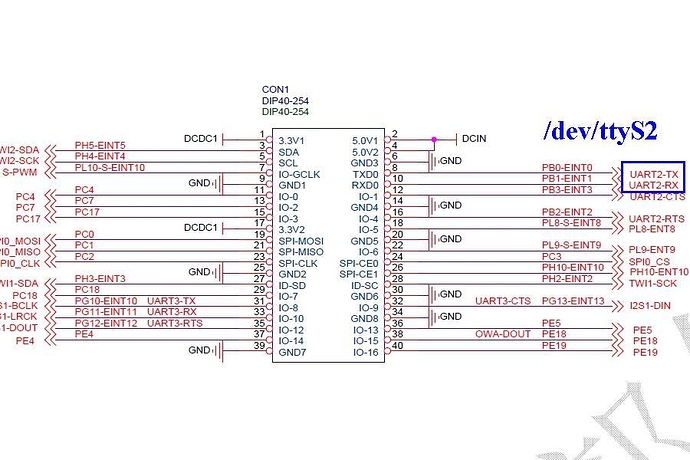
Schematic diagram
More information please check:http://www.maximintegrated.com/cn/products/interface/transceivers/MAX232.html
How to use module on BPI-M3
- Video demo on youtube:https://www.youtube.com/watch?v=wh_PHCQOi_4
- Install the Minicom on BPI-M3
sudo apt-get install minicom
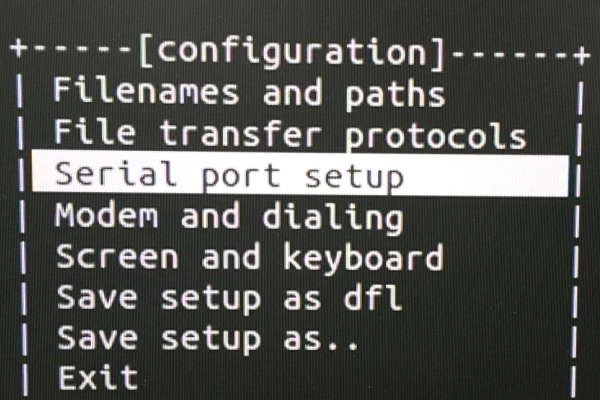
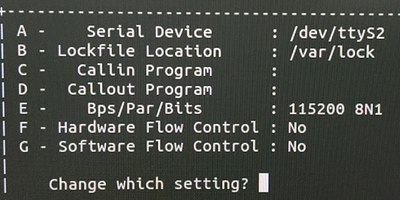
- Set the Minicom on BPI-M3
sudo minicom -s
A- Serial Device : /dev/ttyS2
E - Bps/Par/Bits : 115200 8N1
F - Hardware Flow Control : No
- Run the Minicom, then wait for the PC end to input text
sudo minicom
- Install the Minicom on your PC
sudo apt-get install minicom
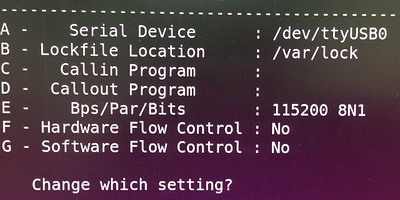
- Set the Minicom on your PC
sudo minicom -s
Serial Device : /dev/ttyUSB0
Bps/Par/Bits : 115200 8N1
Hardware Flow Control : No
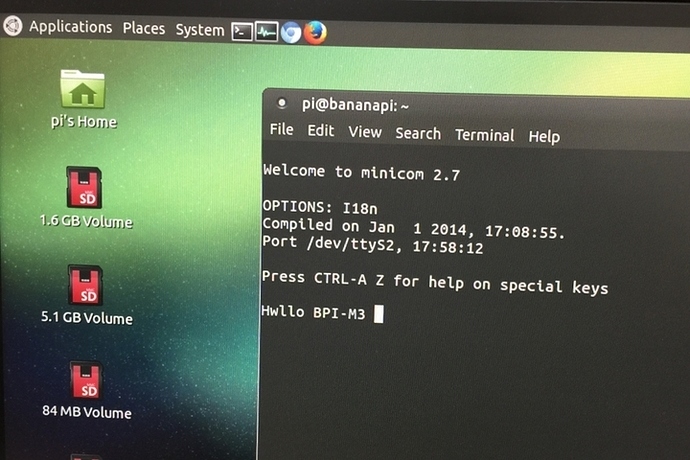
- Input the text," Hello BPI-M3 ", after finishing the setting.
sudo minicom
- Check if there's the text showing on the terminal window on BPI-M3
Test bench
- 1. Connect the module to the Banana Pi
- 2. Open the corresponding port through Putty
- 3. Power up the Banana Pi, if the terminal print the boot information the module is OK!

