Difference between revisions of "BPI-Centi-S3"
(→hardware) |
(→Hardware Specifications) |
||
| (23 intermediate revisions by 2 users not shown) | |||
| Line 28: | Line 28: | ||
* 1 * Rotary Encoder | * 1 * Rotary Encoder | ||
* 1 * Buzzer | * 1 * Buzzer | ||
| − | * 1 * | + | * 1 * Neopixel LED |
| − | * 1 * | + | * 1 * SH 1mm 4-Pin I2C connector |
| − | * 2 * | + | * 2 * SH 1mm 6-Pin |
* 1 * USB Type-C | * 1 * USB Type-C | ||
| − | * 1 * MX 1.25mm 2-Pin battery | + | * 1 * MX 1.25mm 2-Pin battery slot, support charging |
* 2 * M3 Screw Holes | * 2 * M3 Screw Holes | ||
| + | |||
| + | ==Getting Start== | ||
| + | |||
| + | *[https://bpi-steam.com/Centi_S3_doc/en/index.html Getting Started with BPI-Centi-S3] | ||
= hardware = | = hardware = | ||
| Line 43: | Line 47: | ||
BPI-Centi-S3 1.9-inch LCD display: | BPI-Centi-S3 1.9-inch LCD display: | ||
| − | [[File:BPI-Centi-S3_5.jpg]] | + | [[File:BPI-Centi-S3_5.jpg | 500 px]] |
== Hardware Specifications == | == Hardware Specifications == | ||
| Line 82: | Line 86: | ||
|- | |- | ||
| GPIO | | GPIO | ||
| − | | 9 available GPIOs have been exported to the | + | | 9 available GPIOs have been exported to the SH 1mm socket |
|- | |- | ||
| Support Peripherals | | Support Peripherals | ||
| Line 228: | Line 232: | ||
| GPIO36 | | GPIO36 | ||
|- | |- | ||
| − | | EC_KEY Rotary | + | | EC_KEY Rotary Encoder |
| GPIO35 | | GPIO35 | ||
|- | |- | ||
| Line 241: | Line 245: | ||
|} | |} | ||
| − | |||
| − | |||
| − | |||
| − | |||
| − | |||
=Resources= | =Resources= | ||
| + | '''BPI-Steam: Code with MicroPython''' | ||
| + | |||
| + | * [https://bpi-steam.com/Centi_S3_doc/en/getting-started.html '''Getting Started Guide'''] | ||
| + | * [https://bpi-steam.com/Centi_S3_doc/en/MicroPython/What_is_MicroPython.html What is MicroPython?] | ||
| + | * [https://bpi-steam.com/Centi_S3_doc/en/MicroPython/environment.html Configure the development environment] | ||
| + | * [https://bpi-steam.com/Centi_S3_doc/en/MicroPython/VScode_mpbridge.html How to use VScode + mpbridge tool] | ||
| + | * [https://bpi-steam.com/Centi_S3_doc/en/MicroPython/REPL_use_case.html REPL Use Case] | ||
| + | * [https://bpi-steam.com/Centi_S3_doc/en/MicroPython/Burn_firmware.html Burn firmware] | ||
| + | * [https://bpi-steam.com/Centi_S3_doc/en/MicroPython/Connect.html Connect to the development board] | ||
| + | * [https://bpi-steam.com/Centi_S3_doc/en/MicroPython/lcd_init.html LCD Screen init] | ||
| + | * [https://bpi-steam.com/Centi_S3_doc/en/MicroPython/Display_jpg_images.html LCD Display jpg images] | ||
| + | * [https://bpi-steam.com/Centi_S3_doc/en/MicroPython/Display_text.html LCD Display text characters] | ||
| + | * [https://bpi-steam.com/Centi_S3_doc/en/MicroPython/Make_semi-transparent_rectangular_text_box.html Make semi-transparent rectangular text box] | ||
| + | |||
| + | '''BPI-Steam: Code with Arduino''' | ||
| + | |||
| + | * [https://bpi-steam.com/Centi_S3_doc/en/Arduino/Environment.html Install and configure the environment] | ||
| + | * [https://bpi-steam.com/Centi_S3_doc/en/Arduino/Arduino_upload.html Connect, Upload] | ||
| + | * [https://bpi-steam.com/Centi_S3_doc/en/Arduino/Arduino_GFX_Install.html Install the Arduino GFX library] | ||
| + | * [https://bpi-steam.com/Centi_S3_doc/en/Arduino/Arduino_GFX_show_characters.html Arduino GFX, show characters] | ||
| + | |||
| + | ==Code on GitHub== | ||
| + | |||
| + | * [https://github.com/BPI-STEAM/BPI-Centi-S3-Doc/tree/main/micropython_example GitHub: BPI-Centi-S3 MicroPython example] | ||
| + | |||
| + | * [https://github.com/BPI-STEAM/BPI-Centi-S3-Doc/tree/main/micropython_st7789s3_firmware GitHub: BPI-Centi-S3 micropython+st7789s3 firmware] | ||
| + | |||
| + | == Schematic on GitHub == | ||
| + | |||
| + | * [https://github.com/BPI-STEAM/BPI-Centi-S3-Doc/blob/main/sch/BPI-Centi-S3-V0.2-SCH-20230317.pdf GitHub: BPI-Centi-S3 Schematic PDF] | ||
| + | |||
| + | ==Reference Video== | ||
| + | |||
| + | * [https://youtu.be/YANtoaNBQw4 YouTube video: BPI-Centi-S3, getting started with MicroPython, lighting up TFT-LCD] | ||
| + | |||
| + | * [https://youtu.be/jR3LpkfWWy8 YouTube video: BPI-Centi-S3 , Display JPG with MicroPython Code] | ||
| + | |||
| + | =Easy to buy sample= | ||
| + | |||
| + | *BPI Aliexpress shop: https://www.aliexpress.us/item/3256805325011805.html | ||
| + | *SinoVoip Aliexpress shop : https://www.aliexpress.us/item/3256805324649378.html | ||
| + | *Taobao shop : https://item.taobao.com/item.htm?spm=a213gs.success.result.1.5c287a86iZZWCW&id=714936265358 | ||
Latest revision as of 01:05, 30 August 2023
Introduction
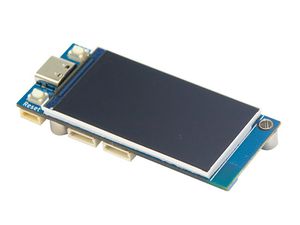
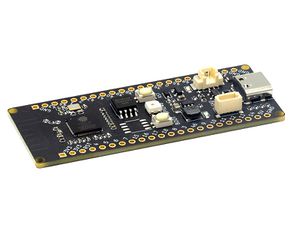
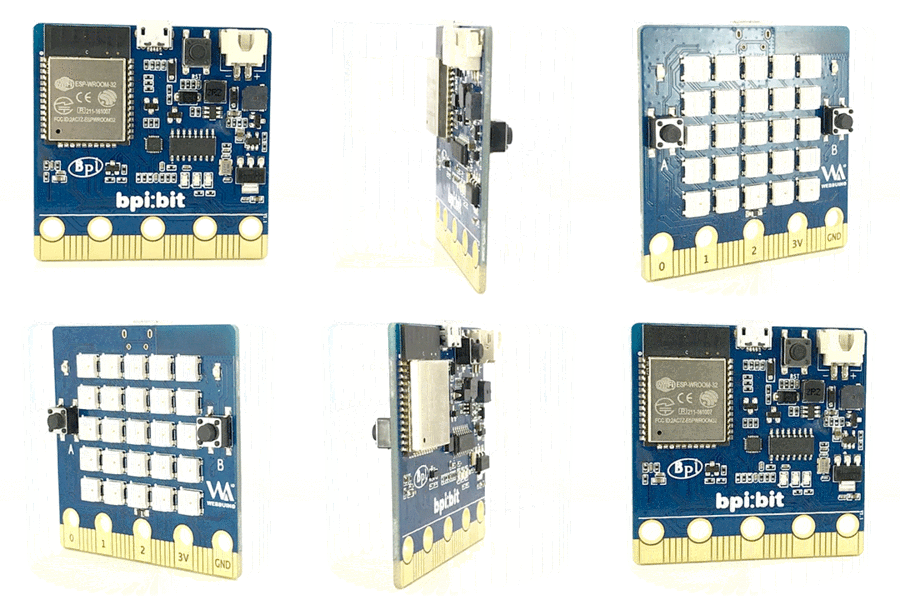
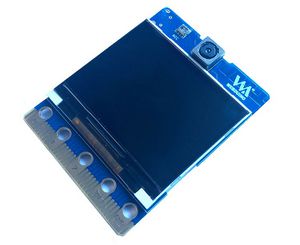
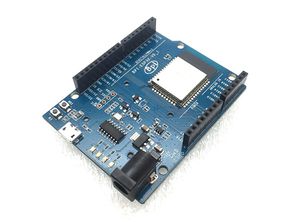
BPI-Centi-S3 is a small-sized ESP32-S3 development board with a 1.9-inch LCD onboard, suitable for the development of comprehensive Internet of Things application projects such as color display, interactive control, wireless communication, and sensor data acquisition.
Using the Espressif ESP32-S3 chip, it supports 2.4 GHz Wi-Fi and Bluetooth® Low Energy (Bluetooth® LE) dual-mode wireless communication.
In a compact space, it still provides an incremental rotary encoder, a buzzer, a WS2812 color LED, and all other available pins to meet diverse needs.
Support USB and external 3.7V lithium battery power supply, can realize automatic switching power supply function under dual power supply, and support USB charging mode, equipped with battery voltage detection circuit, convenient for power management.
Key Features
- ESP32-S3, Xtensa® 32 bit LX7
- 2M PSRAM, 8M FLASH
- 2.4G WIFI, Bluetooth 5, Bluetooth mesh
- GPIO, PWM, I2C, SPI, RMT, I2S, UART, USB, JTAG
- 1 * ST7789 TFT LCD, 1.9-inch, 170*320 resolution, 8bit 8080 parallel port
- 1 * Rotary Encoder
- 1 * Buzzer
- 1 * Neopixel LED
- 1 * SH 1mm 4-Pin I2C connector
- 2 * SH 1mm 6-Pin
- 1 * USB Type-C
- 1 * MX 1.25mm 2-Pin battery slot, support charging
- 2 * M3 Screw Holes
Getting Start
hardware
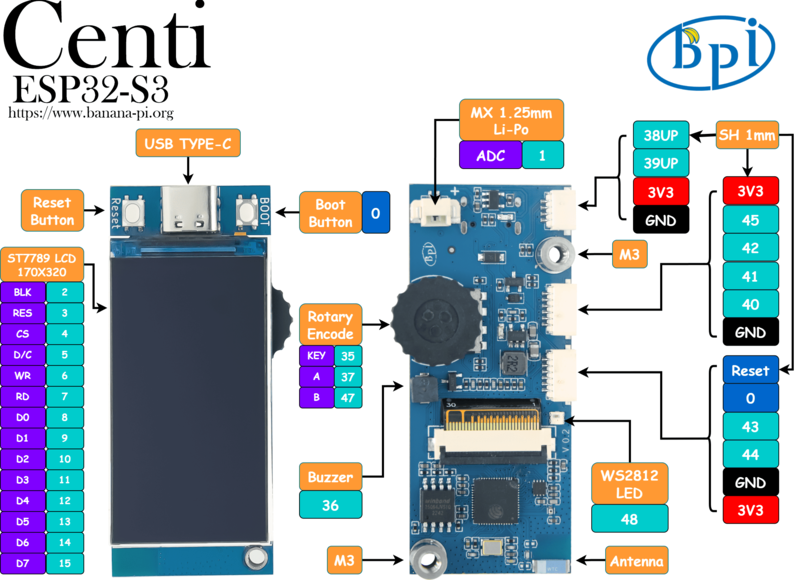
Schematic Diagram of Hardware Interface
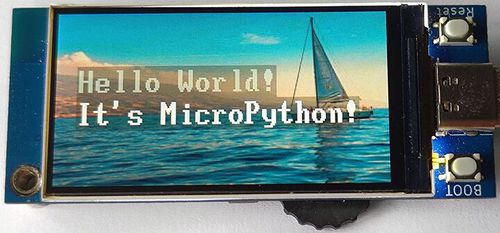
BPI-Centi-S3 1.9-inch LCD display:
Hardware Specifications
| BPI-Centi-S3 Spec | |
|---|---|
| SoC | ESP32-S3, Xtensa® 32-bit LX7 dual-core processor |
| Clock Frequency | 240MHz MAX |
| Internal ROM | 384 KB |
| Internal SRAM | 320 KB |
| Onboard FLASH ROM | 8MB |
| On-chip PSRAM | 2MB |
| WIFI | IEEE 802.11 b/g/n, 2.4Ghz frequency band, 150Mbps |
| bluetooth | Bluetooth 5, Bluetooth mesh |
| External crystal oscillator | 40Mhz |
| RTC and LowPower Management | Power Management Unit (PMU) + Ultra-Low-Power Coprocessor(ULP) |
| GPIO | 9 available GPIOs have been exported to the SH 1mm socket |
| Support Peripherals | I2C, SPI, PWM, UART, RMT, I2S, SD |
| JST SH 1mm socket | 1 * 4Pin, 2 * 6Pin |
| USB | 1 * Full Speed USB 2.0 OTG, Type-C Female |
| USB Serial/JTAG Controller | 1, USB full speed standard, CDC-ACM, JTAG |
| TFT LCD size | 1.9 inches |
| TFT LCD resolution | 170 * 320 RGB |
| TFT LCD control chip | ST7789V3 |
| TFT LCD interface | 8bit 8080 parallel port |
| Encoder | 1 * Incremental Rotary Encoder, support pressing function |
| Buzzer | 1 |
| Color LED | 1 * WS2812 2020 LED |
| Button | RST Button, BOOT Button |
| Screw Holes | 2 * M3 Screw Holes |
| Machine working temperature | -20℃ ~ +60℃ |
| Working voltage | 3.3V |
| USB input voltage | 3.3V~5.5V |
| Maximum discharge current | [email protected] DC/DC |
| Battery connector | MX 1.25mm 2-Pin |
| USB charging | Support |
| Maximum charging current | 500mA |
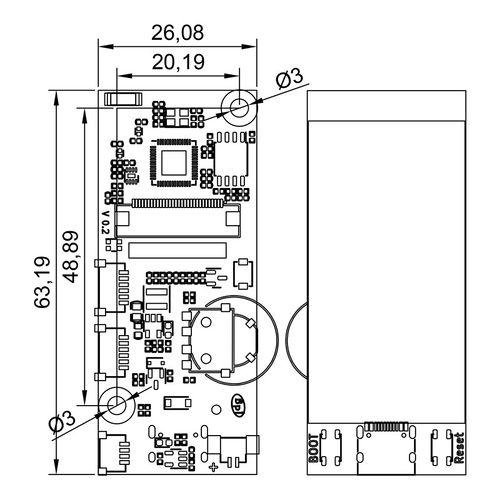
Hardware Dimensions
LCD Wiring Definition
| BPI-Centi-S3 LCD Wiring | |
|---|---|
| ESP_LCD_BLK | GPIO2 |
| ESP_LCD_RES | GPIO3 |
| ESP_LCD_CS | GPIO4 |
| ESP_LCD_D/C | GPIO5 |
| ESP_LCD_WR | GPIO6 |
| ESP_LCD_RD | GPIO7 |
| ESP_LCD_D0 | GPIO8 |
| ESP_LCD_D1 | GPIO9 |
| ESP_LCD_D2 | GPIO10 |
| ESP_LCD_D3 | GPIO11 |
| ESP_LCD_D4 | GPIO12 |
| ESP_LCD_D5 | GPIO13 |
| ESP_LCD_D6 | GPIO14 |
| ESP_LCD_D7 | GPIO15 |
| ESP_TP_RESET | GPIO16 |
| II2C_SCL | GPIO17 |
| II2C_SDA | GPIO18 |
| ESP_TP_INT | GPIO21 |
Peripheral Wiring Definition
| BPI-Centi-S3 peripheral wiring | |
|---|---|
| RST button | RST(CHIP_PU) |
| BOOT button | GPIO0 |
| BAT_ADC battery voltage detection | GPIO1 |
| Buzzer | GPIO36 |
| EC_KEY Rotary Encoder | GPIO35 |
| EC_A Rotary Encoder | GPIO37 |
| EC_B Rotary Encoder | GPIO47 |
| WS2812B-2020 | GPIO48 |
Resources
BPI-Steam: Code with MicroPython
- Getting Started Guide
- What is MicroPython?
- Configure the development environment
- How to use VScode + mpbridge tool
- REPL Use Case
- Burn firmware
- Connect to the development board
- LCD Screen init
- LCD Display jpg images
- LCD Display text characters
- Make semi-transparent rectangular text box
BPI-Steam: Code with Arduino
- Install and configure the environment
- Connect, Upload
- Install the Arduino GFX library
- Arduino GFX, show characters
Code on GitHub
Schematic on GitHub
Reference Video
Easy to buy sample
- BPI Aliexpress shop: https://www.aliexpress.us/item/3256805325011805.html
- SinoVoip Aliexpress shop : https://www.aliexpress.us/item/3256805324649378.html
- Taobao shop : https://item.taobao.com/item.htm?spm=a213gs.success.result.1.5c287a86iZZWCW&id=714936265358
