Difference between revisions of "How to install Platform IO"
(→flash reprogramming) |
|||
| (7 intermediate revisions by the same user not shown) | |||
| Line 30: | Line 30: | ||
[[File:Vscode_5.jpeg]] | [[File:Vscode_5.jpeg]] | ||
| + | |||
| + | =Create new project= | ||
| + | |||
| + | 1.Click the small house in the lower left corner to enter the main page of platformIO and click New Project | ||
| + | |||
| + | [[File:Vscode_6.jpeg]] | ||
| + | |||
| + | 2.Fill in the project name, board and frame. Project name on the basis of personal interests, because I am using bpi:bit board, so here I chose the bpibit board. Selecting the bpibit board will automatically select the frame. Below is the choice to save the address, generally the default, as long as the hook removed, you can choose to customize the address | ||
| + | |||
| + | [[File:Vscode_7.png]] | ||
| + | |||
| + | 3.Click finish to successfully set up a project | ||
| + | |||
| + | [[File:Vscode_8.jpeg]] | ||
| + | |||
| + | 4.The explorer on the left displays the project folder | ||
| + | *Platformio.ini (for configuration file) | ||
| + | *Lib (directory of automatically generated libraries) | ||
| + | *SRC (directory where the program source files are stored) | ||
| + | |||
| + | [[File:Vscode_9.jpeg]] | ||
| + | |||
| + | =flash reprogramming= | ||
| + | |||
| + | Enter the SRC directory and click main.cpp to program. After connecting the board to the computer with the data cable, click the arrow below, and platformIO will automatically identify the serial port and burn the program. | ||
| + | |||
| + | [[File:Vscode_10.jpeg]] | ||
| + | |||
| + | free developmnet BPI:bit with Platforum IO. | ||
| + | |||
| + | [[File:Vscode_11.jpeg]] | ||
Latest revision as of 02:18, 10 July 2019
How to install platformIO and create a new project on platformIO.
Contents
Install Vscode
Visual Studio Code is a lightweight but powerful source code editor which runs on your desktop and is available for Windows, macOS and Linux. It comes with built-in support for JavaScript, TypeScript and Node.js and has a rich ecosystem of extensions for other languages (such as C++, C#, Java, Python, PHP, Go) and runtimes (such as .NET and Unity).
download vscode: https://code.visualstudio.com/
it is easy to install ,So we won't go into detail here
Install the platformIO plug-in on vscode
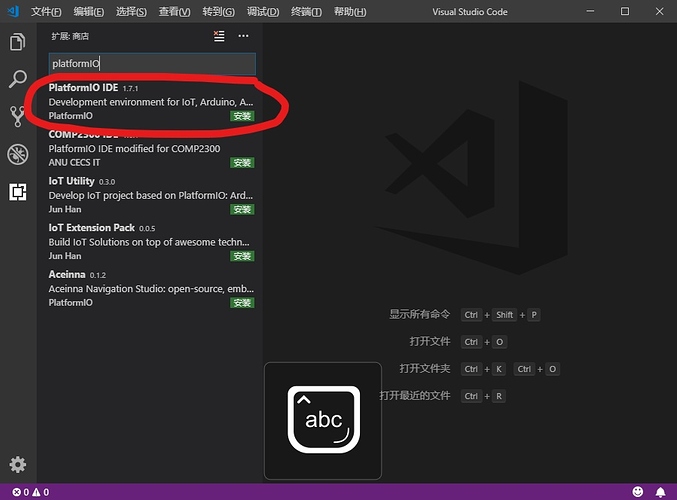
1.First open the vscode extension list and click on the fifth icon in the left list
2.After searching for platformIO in the search bar, click the first platformIO IDE in the list below
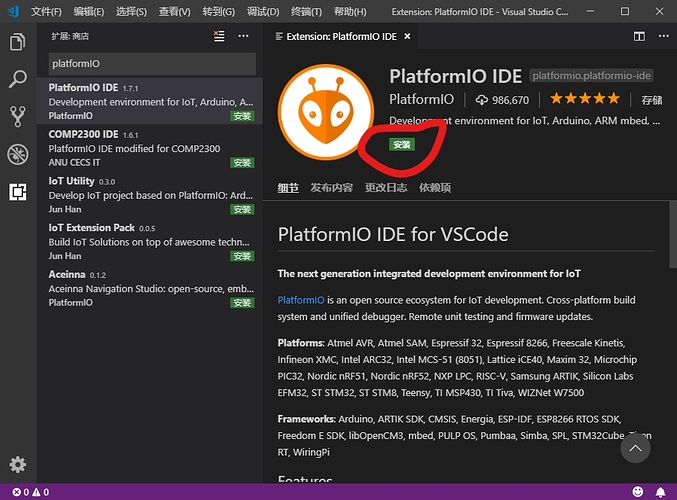
3.Click install on the plug-in interface
4.The installation process will be very long, about 40 minutes, wait patiently. When a notification is given that Python2.7 cannot be found, we will ignore it because it will be automatically installed during PlatformIO installation.
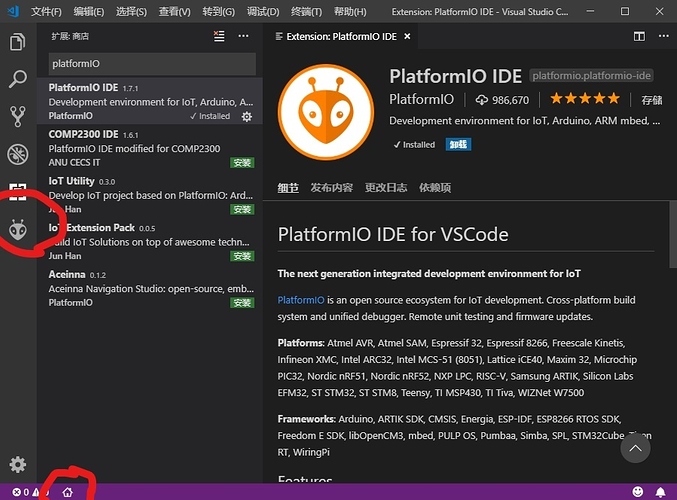
5.After successful installation, an icon will appear in the left list, and a small log will appear in the lower left corner
Create new project
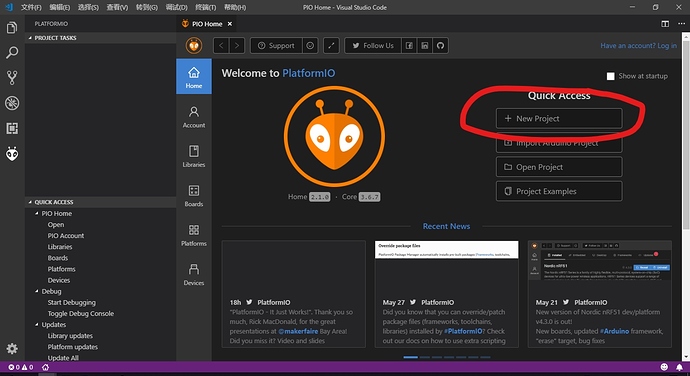
1.Click the small house in the lower left corner to enter the main page of platformIO and click New Project
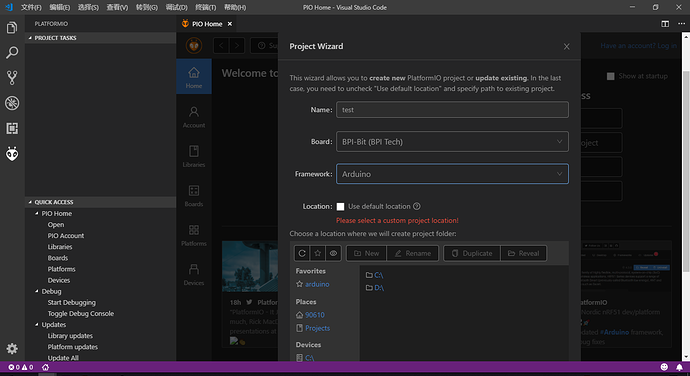
2.Fill in the project name, board and frame. Project name on the basis of personal interests, because I am using bpi:bit board, so here I chose the bpibit board. Selecting the bpibit board will automatically select the frame. Below is the choice to save the address, generally the default, as long as the hook removed, you can choose to customize the address
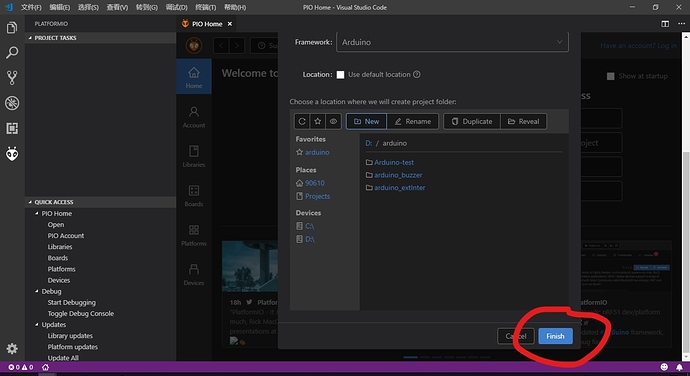
3.Click finish to successfully set up a project
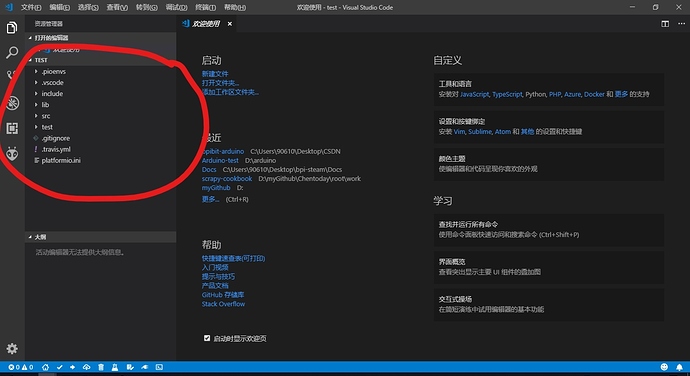
4.The explorer on the left displays the project folder
- Platformio.ini (for configuration file)
- Lib (directory of automatically generated libraries)
- SRC (directory where the program source files are stored)
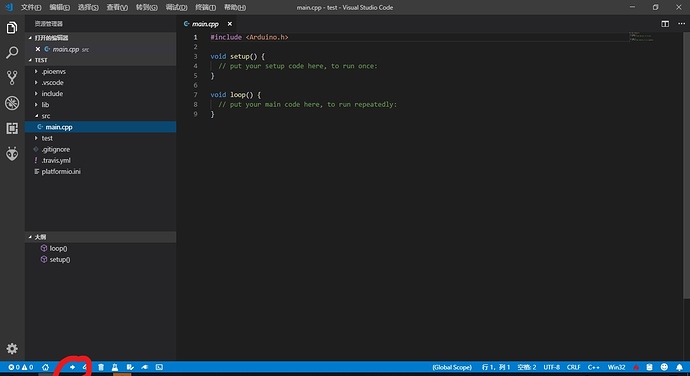
flash reprogramming
Enter the SRC directory and click main.cpp to program. After connecting the board to the computer with the data cable, click the arrow below, and platformIO will automatically identify the serial port and burn the program.
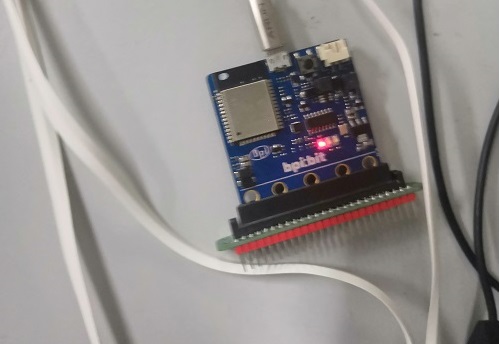
free developmnet BPI:bit with Platforum IO.

