Difference between revisions of "Getting Started with R2"
JackZengWiki (talk | contribs) (→OpenWrt) |
JackZengWiki (talk | contribs) (→OpenWrt) |
||
| Line 55: | Line 55: | ||
Execute "git clone https://github.com/garywangcn/bpi-r2_lede.git" | Execute "git clone https://github.com/garywangcn/bpi-r2_lede.git" | ||
| − | 2. You need to have installed gcc, binutils, bzip2, flex, python, perl, make, find, grep, diff, unzip, gawk, getopt, subversion, libz-dev and libc | + | 2. You need to have installed gcc, binutils, bzip2, flex, python, perl, make, find, grep, diff, unzip, gawk, getopt, subversion, |
| − | + | libz-dev and libc headers. | |
3. Run "./scripts/feeds update -a" to get all the latest package definitions defined in feeds.conf / feeds.conf.default respectively | 3. Run "./scripts/feeds update -a" to get all the latest package definitions defined in feeds.conf / feeds.conf.default respectively | ||
| Line 70: | Line 70: | ||
mtk-bpi-r2-EMMC.img | mtk-bpi-r2-EMMC.img | ||
mtk-bpi-r2-SD.img | mtk-bpi-r2-SD.img | ||
| + | |||
| + | 7. | ||
==Advanced Development== | ==Advanced Development== | ||
Revision as of 19:08, 6 May 2018
Contents
Introduction
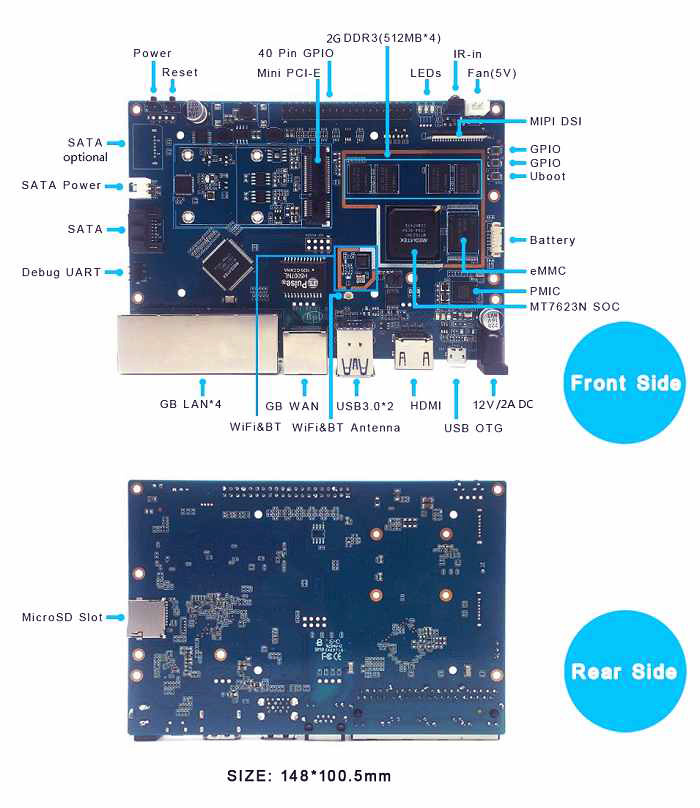
The Banana Pi R2 is a router based development board, which can run on a variety of open source operating systems including OpenWrt, Android, and Bananian. It has 4 Gigabit LAN ports, 1 Gigabit WAN, and 300Mbs wireless N capabilities.
Key Features
- MediaTek MT7623N, Quad-core ARM Cortex-A7
- Mali 450 MP4 GPU
- 2G DDR3 SDRAM
- Mini PCIE interface
- SATA interface
- 4x Gigabit LAN 1x Gigabit WAN
Hardware
Development
Let's get start to develop on BPI-R2, see amazing things happen.
Basic Development
Prepare to develop
1.Prepare 16G/above TF card, USB-Serial interface, Ubuntu System
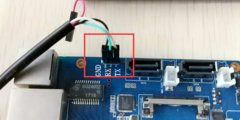
2.Using your USB-Serial Connect debug console on R2
Load your first image on R2
 1.You could download latest image from our forum
 * Here is the example image link: http://forum.banana-pi.org/t/bpi-r2-new-image-release-ubuntu-16-04-v1-3-2018-3-30/5293
 2.Install bpi-tools on your Ubuntu
 * apt-get install pv
 * curl -sL https://github.com/BPI-SINOVOIP/bpi-tools/raw/master/bpi-tools | sudo -E bash
 3.After you download the image, insert your TF card into your Ubuntu
 * Execute "bpi-copy xxx.img /dev/sdx" to install image on your TF card.
4.After step 3, then you can insert your TF card into R2, and press power button for around 10s to setup R2.
Build your own image on R2
Ubuntu
 1. Clone Bsp project from Github
 Execute "git clone [email protected]:BPI-SINOVOIP/BPI-R2-bsp.git"
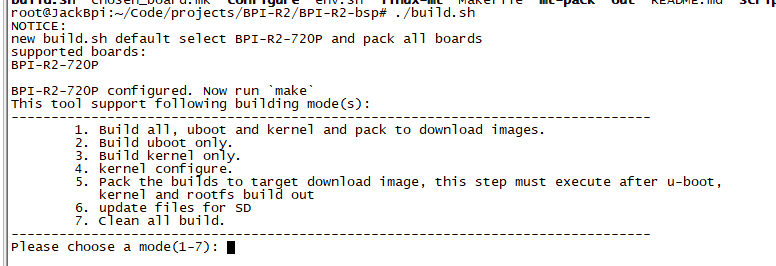
2. Execute "./build.sh", to build your own uboot and kernel.
3. After finish built, Execute "cd SD", plug your Ubuntu TFcard in PC.
4. Execute "bpi-update -c bpi-r2.conf -d /dev/sdX", to update the compiled kernel to your TFcard.
OpenWrt
 1. Clone OpenWrt project from Github.
 Execute "git clone https://github.com/garywangcn/bpi-r2_lede.git"
 2. You need to have installed gcc, binutils, bzip2, flex, python, perl, make, find, grep, diff, unzip, gawk, getopt, subversion,
 libz-dev and libc headers.
 3. Run "./scripts/feeds update -a" to get all the latest package definitions defined in feeds.conf / feeds.conf.default respectively
 and "./scripts/feeds install -a" to install symlinks of all of them into package/feeds/.
 4. Use "make menuconfig" to configure your image.
 Choose "Target System" to config as "MediaTek Ralink ARM"
 Choose "Boot Loaders" to config as "u-boot-bpi_r2"
5. Execute "make -j1 V=s" to build your own OpenWrt image.
 6. After built, enter to "build_dir/target-arm_cortex-a7+neon-vfpv4_musl_eabi/linux-mediatek_32/", you will find two images
 mtk-bpi-r2-EMMC.img
 mtk-bpi-r2-SD.img
7.

