Difference between revisions of "BPI-UNO32"
(→Visuino) |
(→How to use BPI-UNO32 with Visuino) |
||
| Line 97: | Line 97: | ||
[[Getting Started BPI-UNO32 with Visuino]] | [[Getting Started BPI-UNO32 with Visuino]] | ||
| + | |||
| + | *discuss on forum : http://forum.banana-pi.org/t/banana-pi-bpi-uno32-with-visuino/5959 | ||
==Arduino== | ==Arduino== | ||
Revision as of 03:46, 8 June 2018
Introduction
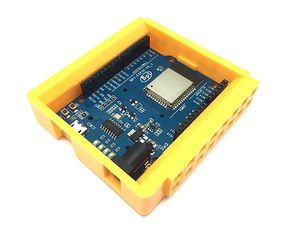
The BPI:UNO32 (also referred to as BPI-UNO32, stylised as BPI UNO32) is an ESP32 with Xtensa 32bit LX6 single/dual-core processor based embedded system. support Webduino and arduino function.
BPI-UNO32 uses the ESP-WROOM-32 of espressif company as MCU. ESP32 is a single-chip solution integrating 2.4GHz Wi-Fi and Bluetooth dual mode. The 40 nanometer technology of TSMC has the best power consumption, RF performance, stability, versatility and reliability. It can deal with various application scenarios.
Two separate controlled CPU cores, the main frequency can be up to 240MHz, 448KB ROM, 520KB SRAM.
BPI-UNO32 The appearance size is fully matched with Arduino UNO R3
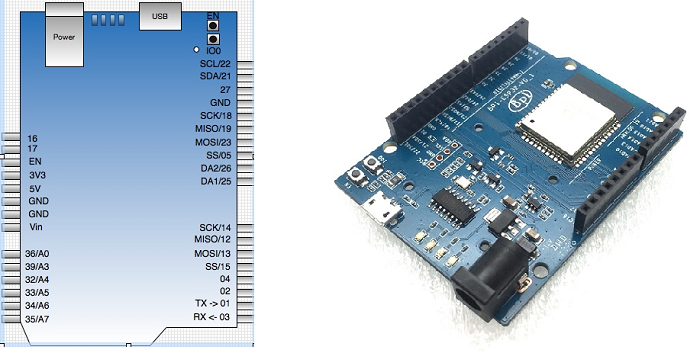
BPI:UNO32 hardware
BPI:UNO32 interface
BPI:UNO32 Spec
| Hardware spec | |||
| CPU | Xtensa® 32-bitLX6single / dual core processor | ||
| ROM | 448KB | ||
| SRAM | 520KB | ||
| Flash | 4MB(Onboard),A maximum of 4 Flash/SRAM, each Flash maximum 16MB | ||
| Power | 5V@1AmicroUSBpoweror 5.5mm 12VDCport | ||
| GPIO | 12-bits SAR ADC 18 channel, 2\*8-bit D/A converter, 4*SPI, 2*I2S, 2*I2C, 3*UART, Host SD/eMMC/SDIO, Slave SDIO/SPI | ||
| Wi-Fi | 802.11 b/g/n/e/i 802.11 n\(2.4GHz 150Mbps\) 802.11 e\(Quality of Service\) | ||
| Bluetooth | BT4.2 & BLE | ||
| Buzzer | Passive buzzer | ||
| LEDs | RGB LED/POWER LED/Receive LED/Transmit LED | ||
| Sizes | 68mm\*53mm | ||
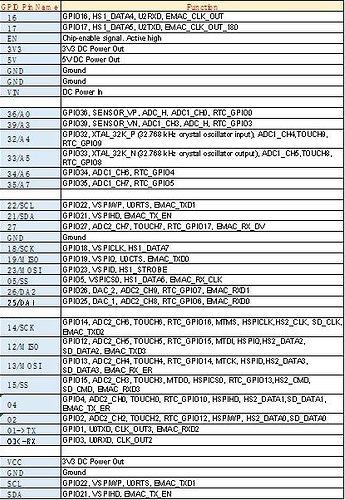
BPI:UNO32 PIN define
BPI-UNO32 software
Visuino
About Visuino
Visuino is a visual, graphical development environment for Arduino and similar boards, including almost all standard Arduino boards, Teensy, Femto IO, LinkIt ONE, FreeSoC2, RoMeo BLE, Bluno Beetle, Goldilocks Analogue, ESP8266, ESP32, PIC32, nRF52832, Maple Mini, and many Arduino based Industrial PLC Controllers such as Controllino, Bedac, and Digital Loggers PLDuino, and Industrial Shields.
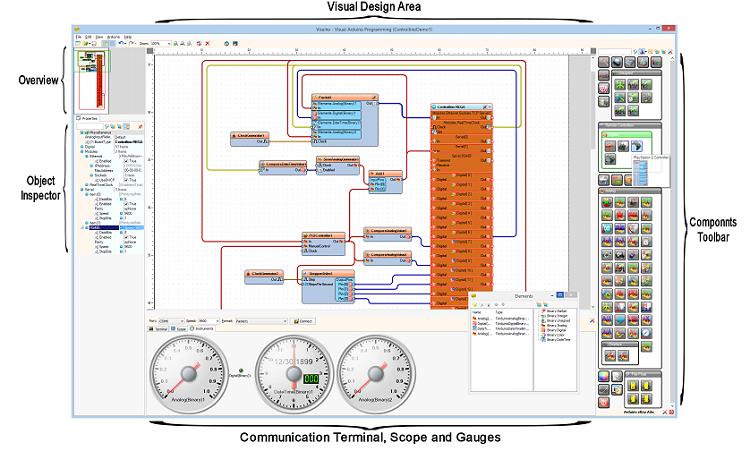
Programming with Visuino is as easy as picking components from the Components Toolbar, placing them in the Visual Design Area, connecting them, and setting their properties with the Object Inspector. The Overview, allows easy navigation over big designs, and Visuino includes built-in Communication Terminal, Scope, and Gauges, and other Visual Instruments to monitor and display the data sent from Arduino. It allows creating complex industrial automation, and IoT solutions by simply dropping and connecting a few graphical blocks. Visuino will automatically generate the necessary Arduino code.
Visuino contains a large set of components for:
- Math functions
- Comparators – Analog, Integer, Date/Time, and Color
- Logic functions – OR, AND, XOR, NOT
- Flip Flops – T, R-S, D, J-K
- Switches – Analog, Integer, Date/Time, and Color
- Generators – Clock, Pulse, Sine Wave, Triangular Wave, Rectangle, Random
- Timers – periodic or single pulse
- Counters – Up Down, and Directional
- Motors – Stepper, DC or Servo
- Displays – LCD, 7 Segment, touchscreen, matrix, Smart Pixels, and TV Out
- Sensors – Temperature, Pressure, Weight, Distance, Compass, Accelerometer, Rotary Encoders
- Remote controllers – Infrared, Servo, Wii or PS2 compatible
- Date/Time components
- Color components
- PID controllers
- Communication – Serial, RS 485, Wired and Wireless Wi-Fi Ethernet or GSM
- and many more added daily...
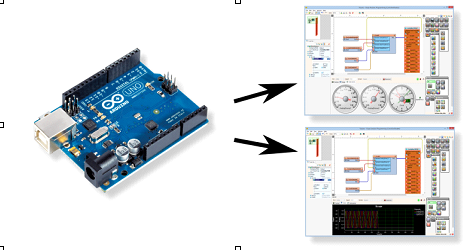
Once the Arduino is programmed, Visuino offers easy way to connect to it over Serial and monitor multiple channels of data in a Terminal, Scope or Visual Instruments:
With the addition of the BPI:UNO32 support, Visuino brings all this this easy to use functionality to the BPI:UNO32 users. Furthermore the Visuino libraries add ESP32 functionality not otherwise available out of he box, including support for PWM Analog Output, Servo control, Play Tone and more.
How to use BPI-UNO32 with Visuino
Getting Started BPI-UNO32 with Visuino
- discuss on forum : http://forum.banana-pi.org/t/banana-pi-bpi-uno32-with-visuino/5959
Arduino
How to setup and start
Need to be prepared:
- BPI-UNO32 1
- Jumper Cap 4
- microUSB 1
quickstart:
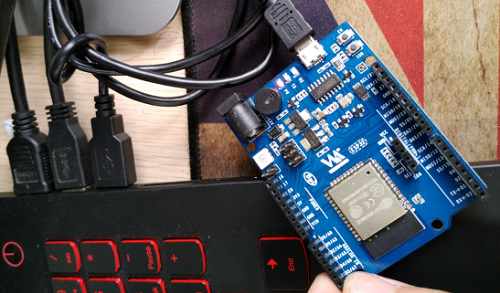
1,connect the four jumper caps to the top of the board, respectively, to connect the RGB LED to the buzzer. Then use the microUSB line to connect the development board to the computer.
- port:
- Connect:
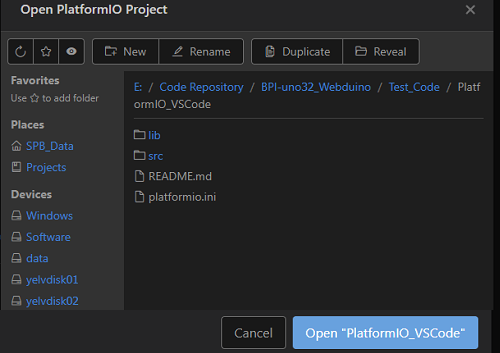
open VS Code \(you can also choose other compilers\) and open BPI-UNO32 on the PlatformIO Home page Code project, for example, to open a test code engineering folderPlatformIO\_VSCode。
- Project:
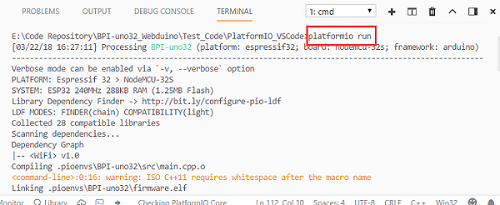
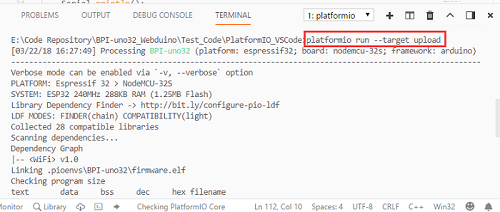
open the VS Code terminal console, input , compile the program, input , compile and burn the program. (if it hasn't been compiled before, it may be slow to compile the first time and need to be connected because he needs to get the corresponding platform information).
- platformio run:
- platformio run --target upload:
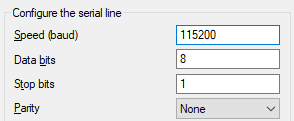
2,then open the serial port assistant tool, select BPI-UNO32 on the computer corresponding to the serial serial number, the serial port settings are selected as: Baud rate: 115200 Data bit: 8 Parity check: no Stop bit:
- Serial Config:
3,Test content:
- RGB LED fading.
- AD acquisition and testing of 6 ADC\_channel1.
- WiFi scan testing.
- Control test of buzzer gradient.
Ardino IDE
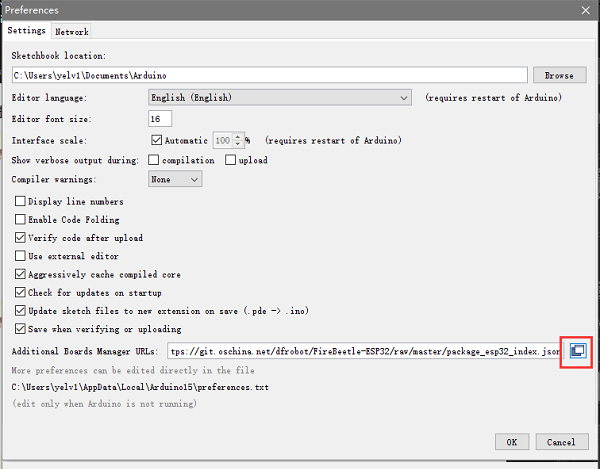
- Arduino IDE:Open File -> Preferences, as shown in the following figure:
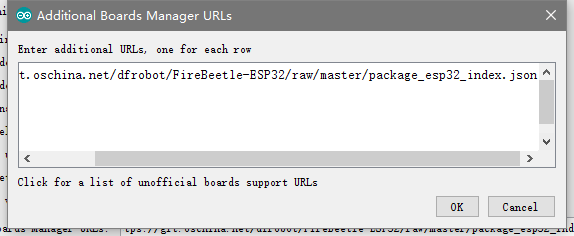
- Click the button in the red circle above and add the following URL in the newly popped
- window:https://git.oschina.net/dfrobot/FireBeetle-ESP32/raw/master/package\_esp32\_index.json
- As shown below:
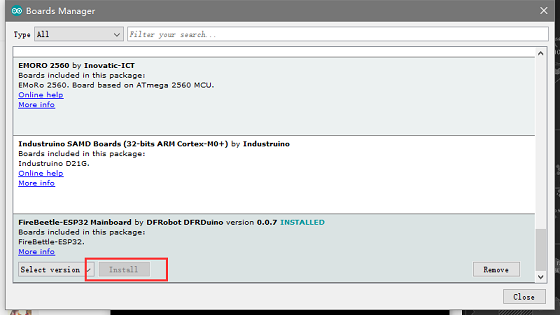
- Open Tools->Board->Board Manager. Pull down to see FireBeetle-ESP32 and click Install.Please select the relevant model after installation.
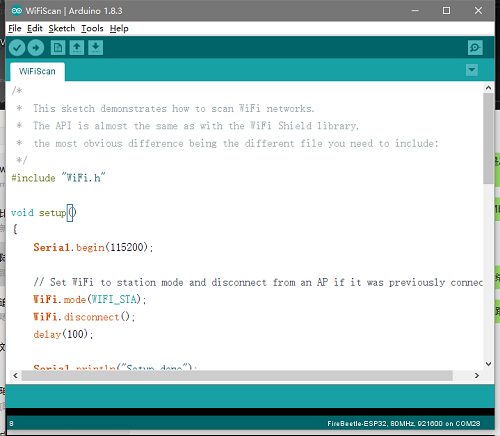
- Open a project in the upper left corner of the file, or open an example.
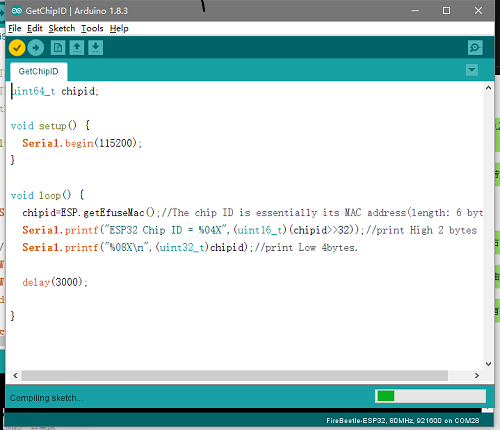
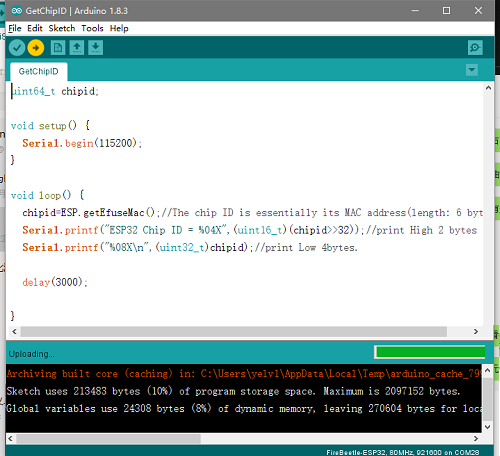
- Select a correct port in Tools -> Ports, then click ”compile"will be compiled code,clickwill "run" be burn program。
- PlatformIO for Atom/VS Code
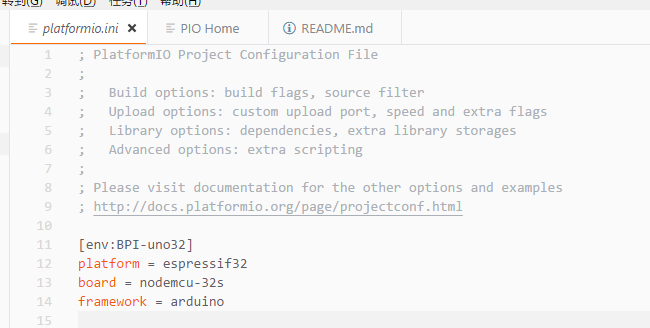
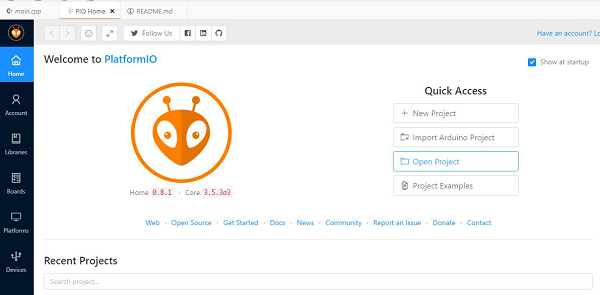
1,First open the PlatformIO Home page, then click Open Project to open the project. \(You can choose the test code.\) If you write your own code to burn, then the platformio.ini file should write the following code
[env:BPI-uno32]
platform = espressif32
board = nodemcu-32s
framework = arduino
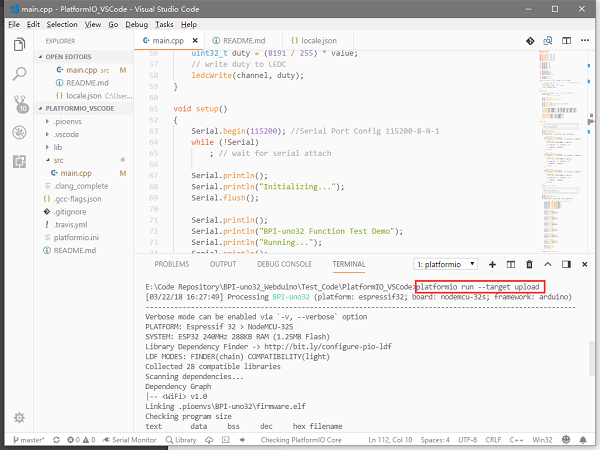
2,The code path under PlatformIO project is generally src/main.cpp. Open the code and use Ctrl+\` to open the terminal debugger. Enter platformio run --target upload.
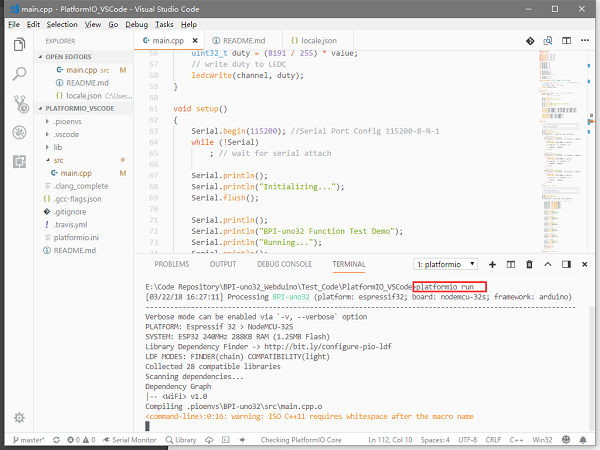
3,Make sure the board is connected. The program will be compiled first and then burned into the BPI-uno32 board. There are some points to note. If the above code does not specify the port, please try to avoid other serial devices connected on the computer. For serial port numbers, run platformio --help.
uPyCraft(microPyhton)
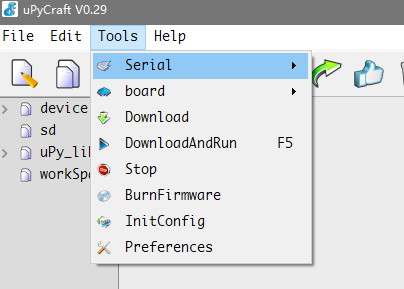
1,first open the uPyCraft software, click the Tools->Serial port to select the port in the upper toolbar. After selecting port, the software will automatically decide whether to burn the firmware, if necessary, the interface will be popped up.
uPyCraft(microPyhton):
- first open the uPyCraft software, click the Tools->Serial port to select the port in the upper toolbar. After selecting port, the software will automatically decide whether to burn the firmware, if necessary, the interface will be popped up.
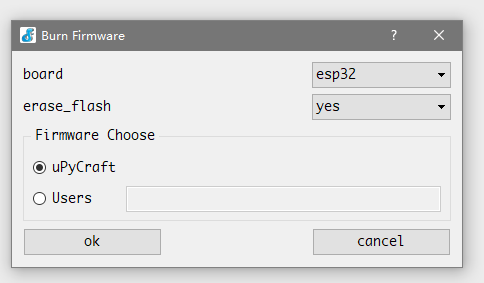
2,when the software interface is opened, we choose ESP32 in board. If erase\_flash chooses yes, it will wipe out the original flash first, and generally choose to erase it, so that the original flash will have an impact on it now.
3, after the selection, click Yes to start the burning, there will be the following dialog, only to wait for it.
when the Burn column is full, the dialog box automatically closes and displays the software master interface.
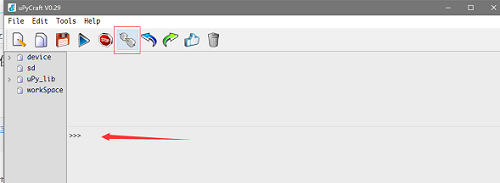
4,In the main interface we can clickto “connect" connected. It is located in the lower row of the toolbar. The following interface will appear after the connection
This means we can appear > > > for interactive programming like to Python in the following dialogue.
Basic function test:
You can visit GitHub to download the test code, compile, burn, and observe the test results through the serial port.
Project link \(PlatformIO\):https://github.com/yelvlab/BPI-UNO32/tree/master/Test_Code/PlatformIO_VSCode
Resources
Source code
- BPI:UNO32 for arduino Source code on Github: https://github.com/yelvlab/BPI-uno32
Documents
- BPI:UNO schematic diagram :https://github.com/yelvlab/BPI-UNO32/blob/master/doc/BPI-UNO32-V1_1.pdf
- ESP32 datasheet: https://github.com/yelvlab/BPI-BIT/blob/master/doc/ESP32-datesheet_english.pdf
- More others : https://github.com/yelvlab/BPI-UNO32/tree/master/doc

