Getting Start with BP-W2
Contents
Introduction
Read more: Banana Pi BPI-W2
Key Features
Hardware
Development
Let's get start to develop on BPI-W2, see amazing things happen.
Basic Development
Prepare to develop
Load your first image on R2
Build your own image on R2
Ubuntu
 1. Clone Bsp project from Github
 * Execute "git clone [email protected]:BPI-SINOVOIP/BPI-R2-bsp.git"
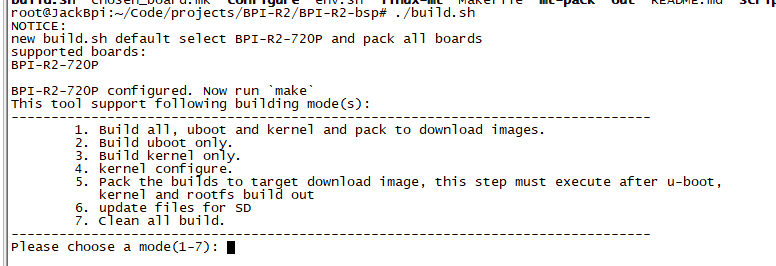
2. Execute "./build.sh", to build your own uboot and kernel.

3. After finish built, Execute "cd SD", plug your Ubuntu TFcard in PC.
4. Execute "bpi-update -c bpi-r2.conf -d /dev/sdX", to update the compiled kernel to your TFcard.
 5. If you want to install Ubuntu on EMMC, follow these steps:
 * Program ubuntu image to SD card
 * Install this SD to R2 board and boot from SD
 * Enter the Uboot prompt, and run command emmc pconf 48 to change Partition config of EMMC
 * And then run command reset, let it boot to OS
 * Enter the system with username pi or root
 * Run command
   echo 0 > /sys/block/mmcblk1boot0/force_ro  to enable /dev/mmcblk1boot0 write mode`
 * To write preloader to EMMC by running command:
   "bpi-bootsel BPI-R2-EMMC-boot0-DDR1600-0k-0905.img.gz /dev/mmcblk1boot0" where BPI-R2-EMMC-boot0-DDR1600-0k-0905.img.gz is the preloader for emmc, please download it from link:https://github.com/BPI-SINOVOIP/BPI-files/blob/master/SD/100MB/BPI-R2-EMMC-boot0-DDR1600-0k-0905.img.gz
 * To copy ubuntu image to EMMC:
   unzip -p <XXX.img.zip> | pv | dd of=<device> bs=10M status=noxfer
   or
   bpi-copy  <XXX.img.zip> <device> where the XXX.img.zip is ubuntu image we can get it from http://www.banana-pi.org/r2-download.html 40, and where should be /dev/mmcblk1.
 * power off
 * remove SD & power on
OpenWrt
 1. Clone OpenWrt project from Github.
 * Execute "git clone https://github.com/garywangcn/bpi-r2_lede.git"
2. You need to have installed gcc, binutils, bzip2, flex, python, perl, make, find, grep, diff, unzip, gawk, getopt, subversion, libz-dev and libc headers.
3. Run "./scripts/feeds update -a" to get all the latest package definitions defined in feeds.conf / feeds.conf.default respectively and "./scripts/feeds install -a" to install symlinks of all of them into package/feeds/.
 4. Use "make menuconfig" to configure your image.
 * Choose "Target System" to config as "MediaTek Ralink ARM"
 * Choose "Boot Loaders" to config as "u-boot-bpi_r2"
5. Execute "make -j1 V=s" to build your own OpenWrt image.
 6. After built, we have two ways to install image.
 (1) Plug your TFcard in Ubuntu PC, and enter to "build_dir/target-arm_cortex-a7+neon-vfpv4_musl_eabi/linux-mediatek_32/",
     you will find two images:
     * mtk-bpi-r2-EMMC.img
     * mtk-bpi-r2-SD.img
 (2) Write image to TF card, execute "bpi-copy if=mtk-bpi-r2-SD.img of=/dev/sdX"
 (3) If you want to install image to EMMC, We need another system which is running on SD card to program EMMC image to EMMC, please follow below steps to do:
     * Copy EMMC image to a running system which is from SD card
     * Program EMMC image to User Data Area of EMMC: dd if=mtk-bpi-r2-EMMC.img of=/dev/mmcblk0 (assume /dev/mmcblk0 is for EMMC)
     * Unlock EMMC boot0 block: echo 0 > /sys/block/mmcblk0boot0/force_ro
     * Program preloader to EMMC boot0 block: dd if=mtk-bpi-r2-EMMC.img of=/dev/mmcblk0boot0 bs=1M count=1
     * Change the Partition configurion of EMMC is 48h: reboot the system which is running SD, and enter the U-boot command line, run command emmc pconf 48 (for this steps, we can change partition configuration in userspace by using mmc-utils,see more information in BPI-R2 OpenWrt(LEDE) Souce code : 2018-04-11)
     * Power off, remove SD card, and then power on R2 board
 7. This step is for upgrade, if you don't want to install image after you built, you could use runtime upgrade.
 * Copy "bin/targets/mediatek/32/lede-mediatek-32-bananapi,bpi-r2-sysupgrade.tar" to R2 board which is running OpenWrt system(no matter where(SD or EMMC) it boots from), and then run command "sysupgrade lede-mediatek-32-bananapi,bpi-r2-sysupgrade.tar" to update both kernel and rootfs.